[Ralph Doncaster] has a geothermal heat pump which is responsible for providing heat for his home. He’s been looking into some hacks that would make it more efficient and decided that the freon (R-22) needed to be tweaked. Some would say the stuff is bad for the environment, so he decided to go a different route. He replaced the Freon with propane, using this rig to make the fuel-grade propane more like cooling-grade propane called r-290.
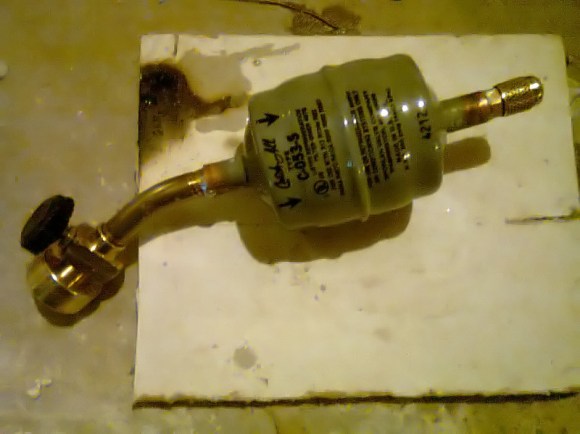
He purchased the gauge set which is used whenever a technician services an A/C system (but you can also see it in this other A/C propane hack). That’s important because it’s responsible for making sure the old coolant is recaptured (his hose failure nixed this part of the plan) and the new coolant goes where it should at the correct pressure. But before dumping in propane from the local hardware store he needs to dry it out. Fuel-grade propane can have moisture in it, which can be bad for the cooling system. He bought a drier device, the grey bulb seen above, and soldered it on one end to a propane torch fitting and to a valve connection on the other. Now he could remove moisture as he pressurized the system.
Everything is working again, and the cooling side of the system gets much colder. He plans to do more testing as time goes by.