Upgrading and repairing vintage laptops is often a challenge — even if their basic hardware is compatible with ordinary PCs, they often use nonstandard components and connectors due to space constraints. The Sharp PC-4600 series from the late 1980s is a case in point: although it comes with standard serial and parallel ports, the only other external interface is a mysterious connector labelled EXPBUS on the back of the case. [Steven George] has been diving into the details of this port and managed to design a module to turn it into a pair of standard ISA ports.
Apparently, no peripherals were ever released for the EXPBUS port, so reverse-engineering an existing module was out of the question. [Steven] did stumble upon a service manual for the PC-4600 however, and as it turned out, the connector carried all the signals present in an 8-bit ISA bus. Turning it into something useful was simply a matter of designing an adapter board with the EXPBUS connector on one side and regular ISA slots on the other.
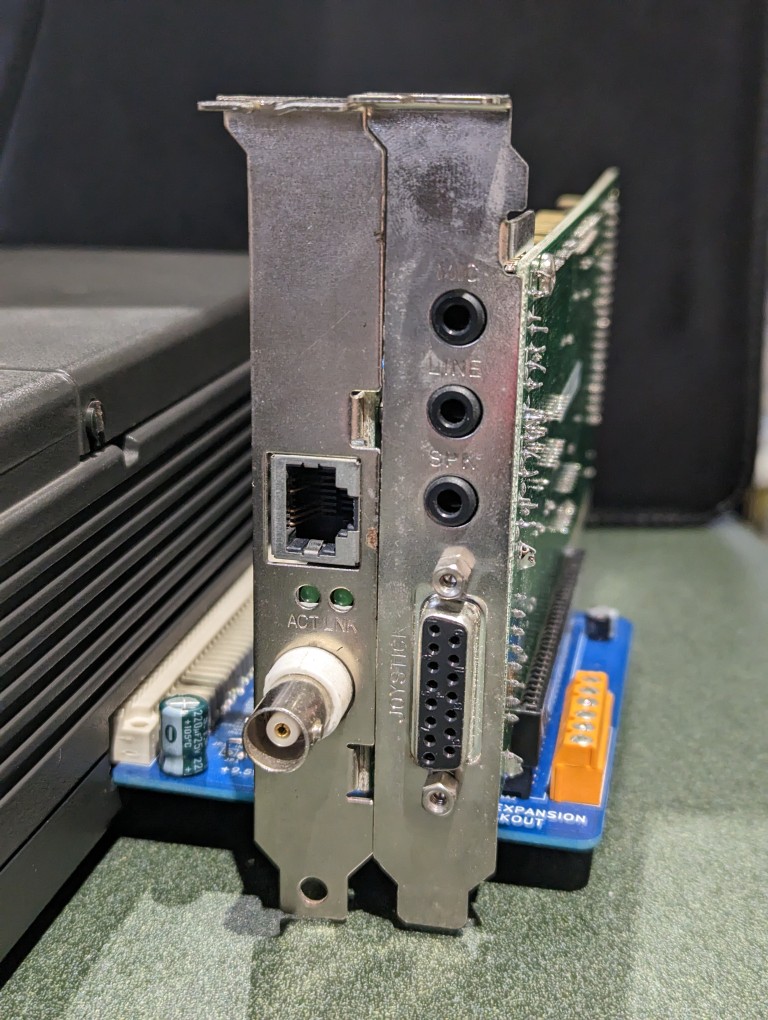 The board also has an external power connector, to avoid overloading the laptop’s internal power supply, as well as a couple of buffer capacitors to smooth out the power rails. [Steven] tested the expansion board with a network adapter and a sound card, and it appears to be functioning well. It should be noted that only the +5 V power rail is available by default, so if any cards need +12 V or any negative rail, those should be provided externally.
Gerber files for this project are available on [Steven]’s website, so if you’ve got one of these machines lying around, now might be the time to upgrade it. This isn’t the first expansion for the PC-4600 series that [Steven] developed, either: he also designed an external floppy drive adapter that should ease data transfer with other PCs.
It’s great to see how the hacker community keeps classic portables like this one alive: one day it might also need a broken screen replaced or a dodgy power supply repaired.