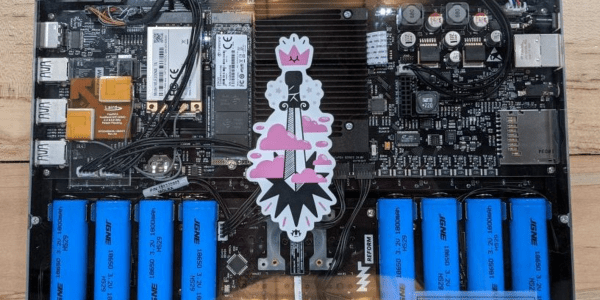
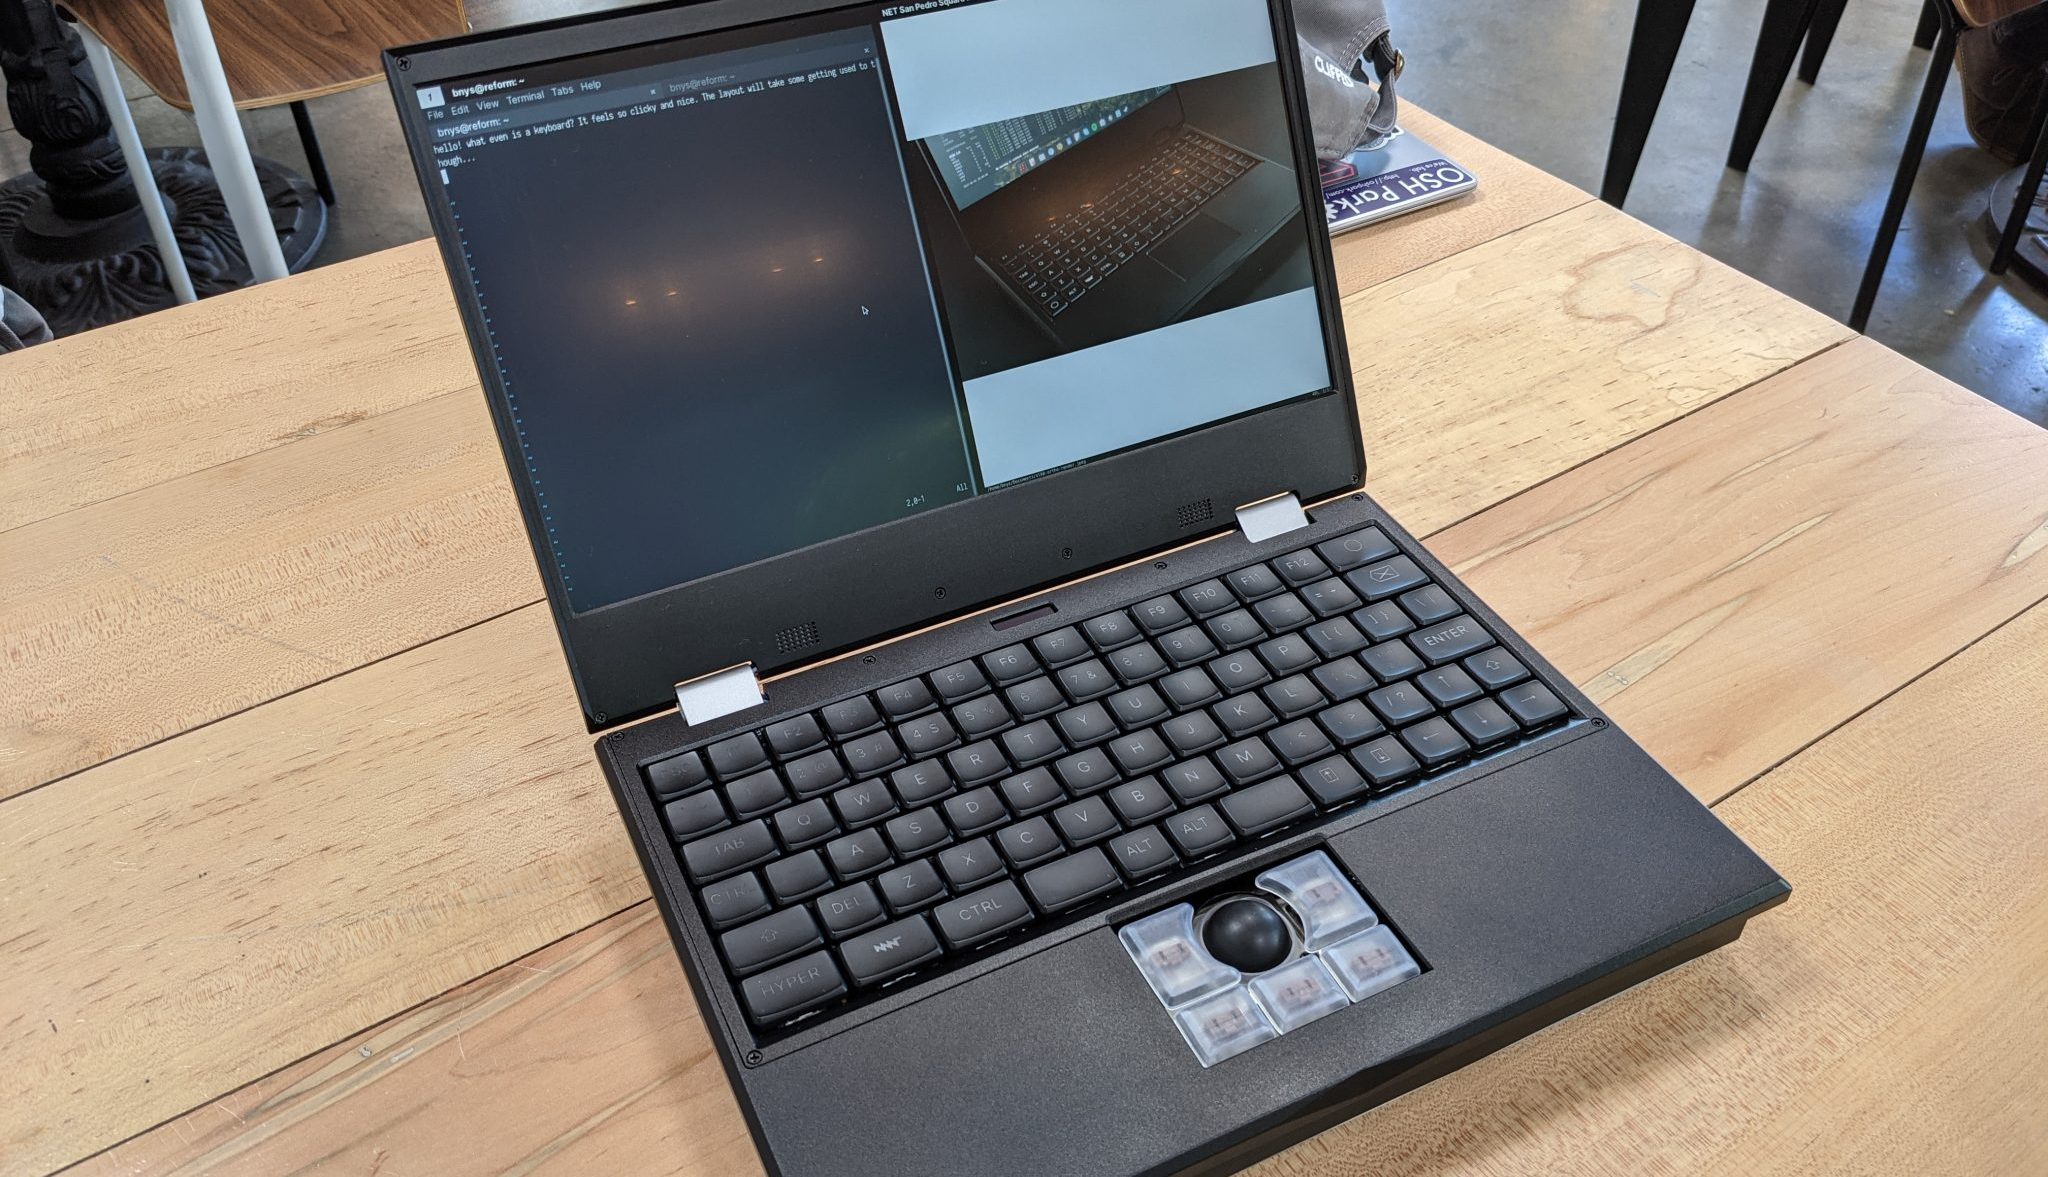
Extracting The WiFi Firmware And Putting Back A Keylogger

In the interest of simplification or abstraction, we like to think of the laptop on the kitchen table as a single discrete unit of processing. In fact, there is a surprisingly large number of small processors alongside the many cores that make up the processor. [8051enthusiast] dove into the Realtek rtl8821ae WiFi chip on his laptop and extracted the firmware. The Realtek rtl8821ae chip is a fairly standard Realtek chip as seen in this unboxing (which is where the main image comes from).

True to his name, [8051enthusiast] was pleased to find that the rtl8821ae was clearly based on the Intel 8051. The firmware was loaded on startup from a known file path and loaded onto the chip sitting in an M.2 slot. Careful consideration, [8051enthusiast] reasoned that the firmware was using RTX51 Tiny, which is a small real-time kernel.

The firmware is loaded at 0x4000 but it calls to code below that address, which means there is a ROM on the chip that contains some code. The easiest way to extract it would be to write some custom code that just copies the masked ROM back to the main CPU via the shared memory-mapped config space, but the firmware is checksummed by the masked ROM code. However, the checksum is just a 16-bit XOR. With a tweak in the kernel to allow accessing the shared config space from userspace, [8051enthusiast] was on his way to a complete firmware image.

Next, [8051enthusiast] looked at what could be done with his newfound hackability. The keyboard matrix is read by the Embedded Controller (EC), which happens to be another 8051 based microcontroller. There also happens to be an RX and a TX trace from the EC to the m.2 slot (where the rtl8821ae is). This has to do with 0x80 postcodes from the processor being routed out somewhere accessible via the EC. With a bit of custom code on both the EC and the WiFi chip, [8051enthusiast] had a keylogger that didn’t run on the main processor broadcasting the PS/2 keystrokes as UDP packets.

Of course, there are plenty of other 8051 based devices out there just waiting to be discovered. Like this 8051 based e-ink display controller.

[Main image source: Realtek RTL8821AE unboxing on YouTube by Евгений Горохов]

Is It A Cyberdeck Or A Vintage Toshiba?

Cyberdecks, the portable computers notable for a freely expressed form factor, owe much to post-apocalyptic sci-fi. But they are not always the most practical devices. There’s a reason that all laptops share a very similar form factor: it’s a convenient and functional way to make a computer to take anywhere. So for the ideal compromise, why not make a cyberdeck from a vintage laptop? That’s exactly what [Valrum] has done with a non-functioning Toshiba 3100/20, upgrading the display and slipping in a Raspberry Pi 4, along with a handy removable USB e-ink supplementary screen (The red/black rectangle to the right of the main screen).

These older machines were so bulky that once their original hardware is removed there is plenty of space for upgrades. Even the screen enclosure is big enough to hide the LCD driver board behind a modern panel.  It follows a well-worn path for Raspberry Pi builds of using a Teensy as a USB keyboard controller, but unexpectedly the stock keyboard has been entirely replaced with a hand-wired one, which is nicely executed to appear superficially as though it was original. In an amusing twist this machine has no battery, not because it wouldn’t be possible but because the original Toshiba didn’t have one either. The USB ports are brought out to the space where the floppy would once have been.

With a plentiful supply of unexceptional or non functional older laptops to be had it’s clear that there’s a rich vein to be mined in this type of build. It’s something we’ve seen done before, in a more famous Toshiba laptop.

Upgrading The PowerBook 100 With A Fresh New Battery

The PowerBook 100 was one of the earliest Apple laptops released, coming not long after the breakout Macintosh Portable. Unlike modern hardware, it relied on sealed lead acid batteries. [360alaska] has such a laptop whose original battery is long dead, so they set about building a replacement battery with lithium cells instead.

The battery and its associated support circuitry is a mite unconventional in its design, but it gets the job done. The build uses two lithium polymer pouch cells in place of the original four cell sealed-lead acid battery, to replicate the roughly 7.2V nominal voltage. Because of this, unfortunately the stock PowerBook charger can’t provide enough voltage to fully charge the LiPo cells up to their full 8.4 volts.

The workaround selected is that when the batteries fall below 80% state of charge, relays disconnect the cells from their series configuration powering the laptop, and instead connect each cell to its own single-cell charger board. Once charging is complete, the relays switch back out of charging mode so the batteries power the laptop once more. The only major drawback is that withdrawing the power adapter while the batteries are on charge will cut all power to the laptop.

It may not be perfect, but [360alaska] has succeeded in building a drop-in battery solution for the PowerBook 100 that can be used with the stock charger. Laptop batteries can be a fraught thing to deal with; often there are safeguards or DRM-type issues to navigate to get them to work around. Sometimes open-source designs are the best solution out there.

Recycling A Laptop Screen Into A Portable Folding Monitor

There’s plenty of times we’ve seen a laptop fail, break, or just become too slow for purpose despite the fact that it’s still packing some useful components. With all the single-board computers and other experiments lurking about the average hacker workshop, it’s often useful to have a spare screen on hand, and an old laptop is a great way to get one. This recycled display build from [Gregory Sanders] is a great example of how to reuse old hardware.

The build doesn’t simply package a laptop monitor in the same way as a regular desktop unit. Instead, [Gregory] designed a custom 3D printed frame with an arch design. The laptop screen is installed onto the frame using its original hinges, and [Gregory] designed in standoffs for an laptop LCD driver board to run the display as well as a generic frame where single-board computers can be installed.

The result is a portable monitor that can be folded up for easy transport, which is also self-supporting with its nice large base. It can also be used with other hardware, as it has a full complement of DVI, HDMI and VGA inputs on board. Of course, while you’re tinkering with laptop displays, you might also consider building yourself a dual-screen laptop as well.

E-Ink Laptop, First Steps

[Alexander Soto] prefers the reduced eye-strain of an e-ink display, but he doesn’t have a portable solution to use at different work stations. The solution? Make your own e-ink laptop. Once you see his plan, it’s not as crazy as it sounds.

[Alexander] got his inspiration from an earlier Dasung Paperlike Pro teardown that we covered back in 2018. His plan is to shoehorn the e-ink panel into a “headless” Thinkpad T480 laptop. This particular model ES133TT3 display is 13.3 inches (about 40 cm) with a much-better-than-normal laptop resolution of 2200 x 1650 pixels. It is driven over HDMI and is perfect fit for the Thinkpad enclosure.

Unfortunately, these displays haven’t gone down in price since 2018. They’re still in the $1000+ price range, more expensive than many laptops. But if you really want the reduced eye-strain of e-ink in a laptop format, you’re going to have to shell out for it.

It’s a pretty ambitious project. We’re looking forward to following his progress and see how the finished laptop goes together. Do check out the extensive list of e-ink references on his project page, too. If you want to experiment with a less expensive e-ink project, have a look at the PaperTTY project for your Raspberry Pi.


DIY USB-C Touch Monitor Is All Polished Brass

We’ve known for a while that you can buy interface boards to turn old laptop screens into standalone monitors, but complete sets with 4K panels and control boards are also now becoming widely available on sites like eBay and AliExpress, and prices are dropping. These sets are also available with low-profile connectors like micro HDMI and USB-C, which allow for some very compact builds.

[Matt] from [DIY Perks] used one of these sets to build a slimline USB-C monitor with a brass enclosure. Video after the break. The enclosure consists of brass sheets and U-channel pieces soldered and screwed together. There is quite a bit of residue and discoloration after soldering, but this was removed with a bit of sanding and polishing. A pair of adjustable legs were added to allow it to stand on its own, and an additional chamber on the back holds the control board, an old smartphone battery, and a battery protection circuit. [Matt] also added a pair of removable speakers, which are sealed speaker units covered in brass mesh and plate.

We’ve covered several DIY monitor builds over the years, and they are perfect as an additional monitor for a laptop, or for pairing with the Raspberry Pi 400 with its integrated keyboard. We really [Matt]’s builds, which include a smartphone-based 4K projector, and a very effective cooling system for an expensive DSLR camera. Continue reading “DIY USB-C Touch Monitor Is All Polished Brass”

A USB-PD Laptop Conversion In Extreme Detail.

With USB-PD slowly making wall wart power supplies obsolete and becoming the do-it-all standard for DC power, it’s a popular conversion to slap an off-the-shelf USB-PD module in place of the barrel jack in a laptop. Not when it comes to [jakobnator] though, who fitted his Dell with an upgrade lovingly and expertly crafted for both electrical and mechanical perfection.

The video that you can find below the break is a long and detailed one, but in that detail lies touches that set the conversion apart from the norm. We’re treated to a full-run-down of USB-PD module design and chip programming, and then the mechanics of the 1-wire chip through which the Dell ties itself in with only Dell power supplies. Programming this chip in particular is something of a challenge.

It’s the mechanical design that sets this one apart. He started with an odd-shaped space that had contained the barrel jack socket and a ferrite choke, and designed a PCB to fit it exactly. 3D-printing a model to check for fit is attention to detail at the stratospheric level. The result is a fit that looks almost as though it was part of the original manufacture, and which should keep the laptop useful for years to come.

This may be the most elegant USB-C laptop conversion we’ve seen, but it’s not the only one.

Continue reading “A USB-PD Laptop Conversion In Extreme Detail.”