Holograms: The Art Of Recording Wavefronts

The difference between holography and photography can be summarized perhaps most succinctly as the difference between recording the effect photons have on a surface, versus recording the wavefront which is responsible for allowing photographs to be created in the first place. Since the whole idea of ‘visible light’ pertains to a small fragment of the electromagnetic (EM) spectrum, and thus what we are perceiving with our eyes is simply the result of this EM radiation interacting with objects in the scene and interfering with each other, it logically follows that if we can freeze this EM pattern (i.e. the wavefront) in time, we can then repeat this particular pattern ad infinitum.

Close-up of the wavefront pattern recorded on the holographic film (Credit: 3Blue1Brown, YouTube)

In a recent video by [3Blue1Brown], this process of recording the wavefront with holography is examined in detail, accompanied by the usual delightful visualizations that accompany the videos on [3Blue1Brown]’s channel. The type of hologram that is created in the video is the simplest type, called a transmission hologram, as it requires a laser light to illuminate the holographic film from behind to recreate the scene. This contrasts with a white light reflection hologram, which can be observed with regular daylight illumination from the front, and which is the type that people are probably most familiar with.

The main challenge is, perhaps unsurprisingly, how to record the wavefront. This is where the laser used with recording comes into play, as it forms the reference wave with which the waves originating from the scene interact, which allows for the holographic film to record the latter. The full recording setup also has to compensate for polarization issues, and the exposure time is measured in minutes, so it is very sensitive to any changes. This is very much like early photography, where monochromatic film took minutes to expose. The physics here are significant more complex, of course, which the video tries to gently guide the viewer through.

Also demonstrated in the video is how each part of the exposed holographic film contains enough of the wavefront that cutting out a section of it still shows the entire scene, which when you think of how wavefronts work is quite intuitive. Although we’re still not quite in the ‘portable color holocamera’ phase of holography today, it’s quite possible that holography and hologram-based displays will become the standard in the future.

Continue reading “Holograms: The Art Of Recording Wavefronts”

Getting Started In Laser Cutting

If you were to walk into most of the world’s hackerspaces, it’s likely that the most frequent big-ticket tool you’ll find after a 3D printer is a laser cutter. A few years ago that would inevitably been one of the ubiquitous blue Chinese-made K40 machines, but here in 2024 it’s become common to see something far more sophisticated. For all that, many of us are still laser cutter noobs, and for us [Dominic Morrow] gave a talk at last summer’s EMF Camp in the UK entitled “Getting Started In Laser Cutting“. [Dominic] is a long-term laser cutting specialist who now works for Lightburn, so he’s ideally placed to deliver this subject.

It’s fair to say that this is an overview in the time available for a hacker camp talk rather than an in-depth piece, so he takes the approach of addressing people’s misconceptions and concerns about cutters. Perhaps the most important one he addresses is the exhaust, something we’ve seen a few in our community neglect in favor of excessive attention to laser cooling or other factors. An interesting one for us though was his talking about the cheaper diode lasers, having some insight into this end of the market is valuable when you have no idea which way to go.

We’re sorry to have missed this one in the real world, perhaps because of the allure of junk.

Continue reading “Getting Started In Laser Cutting”

A Laser With Mirrors Makes A CRT-like Display

[bitluni]’s laser-based display pretending to be a an old-school vector CRT.
Phosphor-based displays like CRTs rely on the phosphor to emit light for a set amount of time after being activated, allowing them to display a seemingly persistent image with one drawing beam per color. Translated to UV-sensitive PLA filament, this means that you can totally use a printed sheet of this material in combination with a 405 nm laser diode to create a display that doesn’t look dissimilar to an early CRT. This is exactly what [bitluni] did in a recent video, meshing together said laser diode, UV-sensitive PLA, stepper motors and two mirrors with an Arduino-based controller to create a rather interesting vector display.

In the video, [bitluni] goes over the development steps, including a range of improvements like being able to turn off the laser when moving between the end of a line and the beginning of a new one. While the Arduino Nano board does the driving of the stepper motor controllers, an ESP32 provides the drawing instructions. The STL and other project files including Nano & ESP32 firmware can be found on the GitHub project page.

While far from being a practical display with a single-digit Hz refresh rate, it does provide an interesting demonstration of these types of persistence of vision based displays, and without the use of exotic MEMS mirror modules or the like.

Continue reading “A Laser With Mirrors Makes A CRT-like Display”

Custom built RGB laser firing beam

Lasers, Galvos, Action: A Quest For Laser Mastery

If you’re into hacking hardware and bending light to your will, [Shoaib Mustafa]’s latest project is bound to spike your curiosity. Combining lasers to project multi-colored beams onto a screen is ambitious enough, but doing it with a galvanomirror, STM32 microcontroller, and mostly scratch-built components? That’s next-level tinkering. This project isn’t just a feast for the eyes—it’s a adventure of control algorithms, hardware hacks, and the occasional ‘oops, that didn’t work.’ You can follow [Shoaib]’s build log and join the journey here.

The nitty-gritty is where it gets fascinating. Shoaib digs into STM32 Timers, explaining how modes like Timer, Counter, and PWM are leveraged for precise control. From adjusting laser intensity to syncing galvos for projection, every component is tuned for maximum flexibility. Need lasers aligned? Enter spectrometry and optical diffusers for precision wavelength management. Want real-time tweaks? A Python-controlled GUI handles the instruments while keeping the setup minimalist. This isn’t just a DIY build—it’s a work of art in problem-solving, with successes like a working simulation and implemented algorithms along the way.

If laser projection or STM32 wizardry excites you, this build will inspire. We featured a similar project by [Ben] back in September, and if you dig deep into our archives, you can eat your heart out on decades of laser projector projects. Explore Shoaib’s complete log on Hackaday.io. It is—literally—hacking at its most brilliant.

The Laser Shadow Knows

Normally, you think of things casting a shadow as being opaque. However, new research shows that under certain conditions, a laser beam can cast a shadow. This may sound like nothing more than a novelty, but it may have applications in using one laser beam to control another. If you want more details, you can read the actual paper online.

Typically, light passes through light without having an effect. But using a ruby crystal and specific laser wavelengths. In particular, a green laser has a non-linear response in the crystal that causes a shadow in  a blue laser passing through the same crystal.

Continue reading “The Laser Shadow Knows”

Laser Sound Visualizations Are Not Hard To Make

You might think that visualizing music with lasers would be a complicated and difficult affair. In fact, it’s remarkably simple if you want it to be, and [byte_thrasher] shows us just how easy it can be.

At heart, what you’re trying to do is make a laser trace out waveforms of the music you’re listening to, right? So you just need a way to move the laser’s beam along with the sound waves from whatever you’re listening to. You might be thinking about putting a laser on the head of a servo-operated platform fed movement instructions from a digital music file, but you’d be way over-complicating things. You already have something that moves with the music you play — a speaker!

[byte_thrasher’s] concept is simple. Get a Bluetooth speaker, and stick it in a bowl. Cover the bowl with a flexible membrane, like plastic wrap. Stick a small piece of mirror on the plastic. When you play music with the speaker, the mirror will vibrate and move in turn. All you then have to do is aim a safe laser in a safe direction such that it bounces off the mirror and projects on to a surface. Then, the laser will dance with your tunes, and it’ll probably look pretty cool!

We’ve seen some beautiful laser visual effects before, too. Just be careful and keep your power levels safe and your beams pointing where they should be.

Continue reading “Laser Sound Visualizations Are Not Hard To Make”

Laser Painting Explained

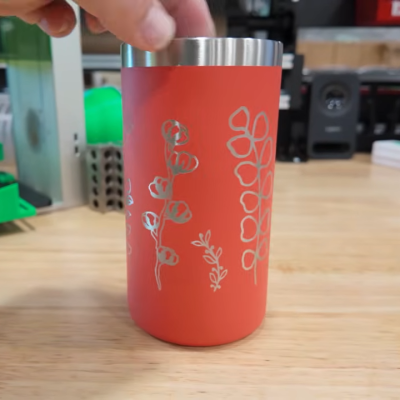
If you get an inexpensive diode laser cutter, you might have been disappointed to find it won’t work well with transparent acrylic. The material just passes most of the light at that wavelength, so there’s not much you can do with it. So how did [Rich] make a good-looking sign using a cheap laser? He used a simple paint and mask technique that will work with nearly any clear material, and it produces great-looking results, as you can see in the video below.

[Rich] starts with a piece of Acrylic covered with paper and removes the paper to form a mask. Of course, even a relatively anemic laser can slice through the paper covering with no trouble at all. He also cuts an outline, which requires a laser to cut the acrylic. However, you could easily apply this to a rectangular hand-cut blank. Also, most diode lasers can cut thin acrylic, but it doesn’t always come out as cleanly as you’d like.

Continue reading “Laser Painting Explained”