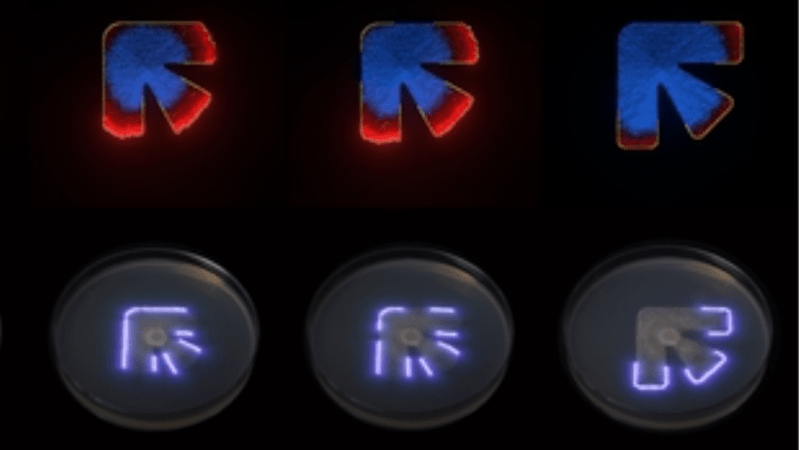
A series of simulations of a shape are shown, with that shape traced out in a petri dish with a laser below. The shape is roughly like a 90-degree corner bisected by a third arm.

Printing Fungal Art With Laser Control

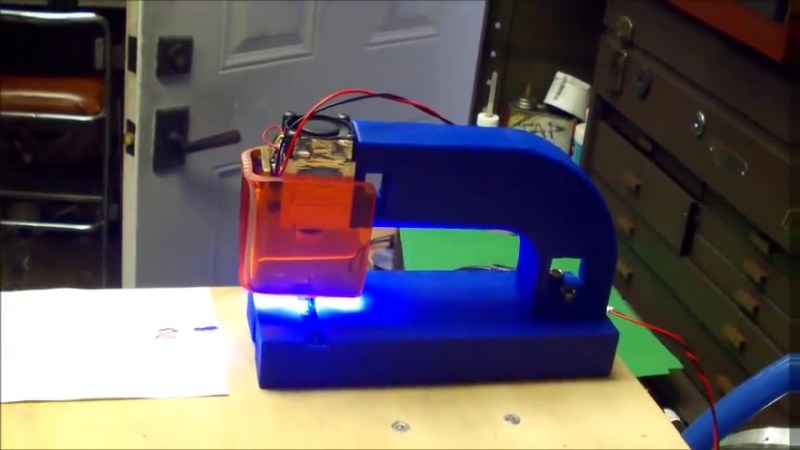
Preservationists usually take great care to prevent fungi from appearing the world of art, but in the case of [Kexin Wang]’s Funguy project, the fungus itself is the art. It uses a laser diode to repeatedly trace an outline onto a dish of agar gel in which fungus is growing, and the photophobic fungus grows only up to the edge of the laser-traced figure, potentially creating complex designs.

This project evolved out of a research project in which they developed a computer model for fungal growth, then used its predictions and a laser to control a fungus’s growth pattern. The model has two parts: a temporal convolutional neural network which learns fungi growth patterns from a series of images, and a cellular automaton to simulate these growth patterns under different starting conditions. The cellular automaton’s rules aren’t fixed; each cell runs a small neural network which learns the rules under supervision from the convolutional network. By training these networks on images of the growth stages of three different fungi, it was able to realistically predict the different growth patterns of the different species.

To actually control the growth pattern, the researchers tried a series of different wavelengths and laser powers; shorter wavelengths tended to work better, with a 405 nm laser working best. The growth model complemented the laser setup by predicting in which areas the growth medium had run out of nutrients. Since fungus would no longer spread in these regions, the laser no longer needed to trace these sections. The Funguy kit’s laser system itself is similar to a laser engraver, with an XY-kinematic system seemingly built from a DVD drive frame. It uses fungi from the Mucor genus, though it can print with other photophobic microorganisms, such as slime molds.

This project seems aimed at artistic and educational uses, but considering the various electronic parts that have been made of fungi, more functional applications should be possible.

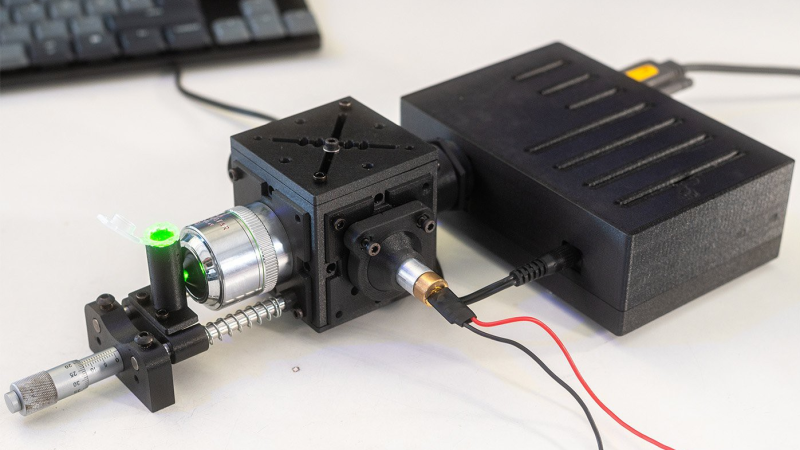
A black plastic cube is shown in front of another, larger rectangular black plastic box. The plastic cube has a silver microscope objective protruding from one side, with green light being emitted from it into a small plastic tube held on a positioning stage.

2026 Frikkin Lasers Challenge: A 3D-Printed Raman Spectrometer

When light reflects off a surface, not all of it reflects off at the same wavelength; some photons impart a portion of their energy to raising the vibrational energy of the surface’s molecules, and are thus scattered away at a lower energy and longer wavelength. This is called Raman scattering, and the precise wavelength shifts are characteristic of the particular molecule being illuminated. It can therefore be used in Raman spectroscopy to identify molecules; these spectrometers are normally elaborate, expensive instruments, but [Allegedly Science] was able to build a simple system with surprising sensitivity.

Continue reading “2026 Frikkin Lasers Challenge: A 3D-Printed Raman Spectrometer”

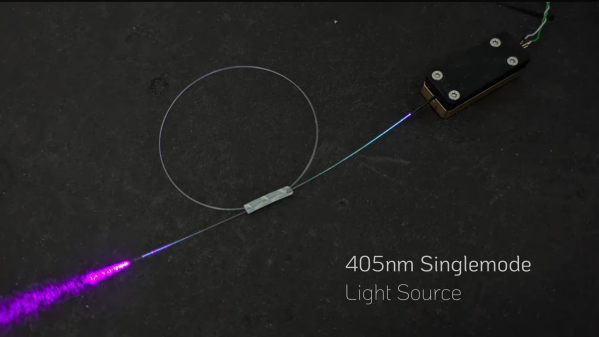
A rectangular black box is shown, connected to a coil of fiber-optic wire. Out of the end of the fiber, purple light is emitted. A label in the lower right corner says "405nm Singlemode Light Source".

Building A Fiber-Coupled Laser Source For Precision Optics

Laser diodes are convenient light sources, but for precise optical work their often-elliptical beam profile leaves something to be desired. One way to get around this is to couple the beam into a single-mode optical fiber, which then emits a circular Gaussian beam from the other end. For more advanced experiments, therefore, [Diffraction Limited] built this fiber-coupled laser source.

The simplest approach is to place the fiber directly against a light source, but this results in most of the light missing the three-micron fiber core. Optical fibers have an acceptance cone, and only light approaching from within this cone is coupled into the fiber. The design therefore uses an aspheric lens to focus light from the laser diode down to a tiny point matching the diameter of the fiber core, creating a cone of incoming light narrower than the acceptance cone.

The body of the laser source was CNC machined out of brass, with the laser-diode press-fit in one end. The lens stands in front of the diode, and was glued in place so that its focal point was just above the end of a mounting pin for the glass fiber. Positioning and fixing the fiber in place was the biggest challenge; [Diffraction Limited] could use the micro-manipulator from a previous video to position the fiber, but the UV-set glue used to fix it in place shrinks during curing, pulling it out of position. To deal with this, two set screws under the mounting pin allowed its position to be adjusted slightly after gluing. As expected, adhesive shrinkage meant that the completed source initially produced no light, but after the set screws were adjusted, the beam appeared.

For more on fiber-coupled lasers, check out [Les Wright]’s work. If you don’t have access to an aspheric lens, an anti-bumping bead could be a reasonable alternative.

2026 Frikkin Lasers Challenge: Super-Simple Laser Precision For Your Stargazing

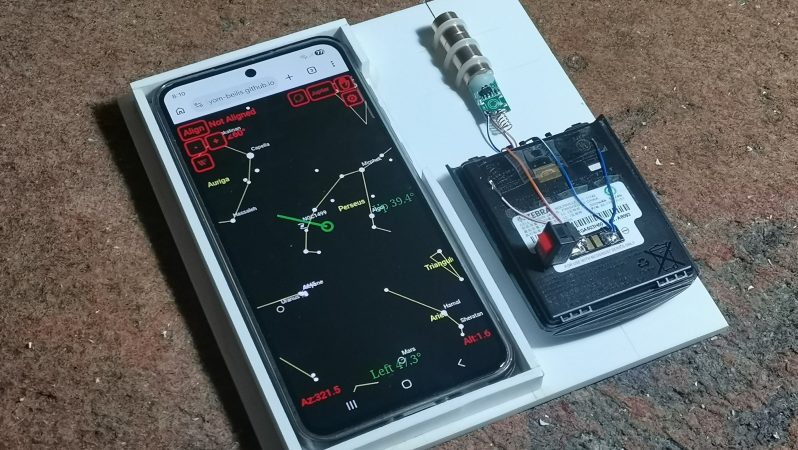
Perhaps the hardest thing for amateur astronomers just starting out is finding the things you want to look at. Prolific maker [mircemk] has submitted a quick-and-easy star-hopper device that will help guide your binoculars with laser-like precision using things you likely already have on hand: a smartphone, a mounting plate, and a green laser pointer.

The smartphone is running AstroHopper, an astronomy app that uses GPS and inertial navigation to know exactly where your phone is pointing, and offer an image of the sky on the screen. There are many others of this ilk, and there’s no reason [mircemk]’s trick won’t work with your favorite. The trick is decidedly simple: the smartphone is mounted to a flat plate, in line with a green laser pointer. Careful placement aligns the axis of the phone and the laser, and the mounting plate is set up to fit a tripod.

Using it is simple: with a labelled view of the sky displayed on the screen, one lines up the phone/laser combo with the desired object, and activates the laser pointer. [micremk] has wired in an on-off switch for this purpose and a large external battery, rather than relying on the stock pushbutton. Since the axis of the laser pointer and the phone are aligned, a green line launches out into the heavens for you to follow with your binoculars. Once you locate that green dot, you can turn off the laser. Yes, the computer has helped you find the object, but your muscles are doing the slewing and that will make it much more likely you start to learn the sky yourself rather than relying on electronic magic.

This is probably the simplest hack we’ve yet seen in the Frikkin’ Lasers Challenge, and yet also one of the most practical. If you enjoy playing with radiation that’s spontaneously emitted, there’s still time to get your entry together — the contest runs until July 23, 2026.

Continue reading “2026 Frikkin Lasers Challenge: Super-Simple Laser Precision For Your Stargazing”

All The Different Lasers, And How Well They Mark 3D Prints

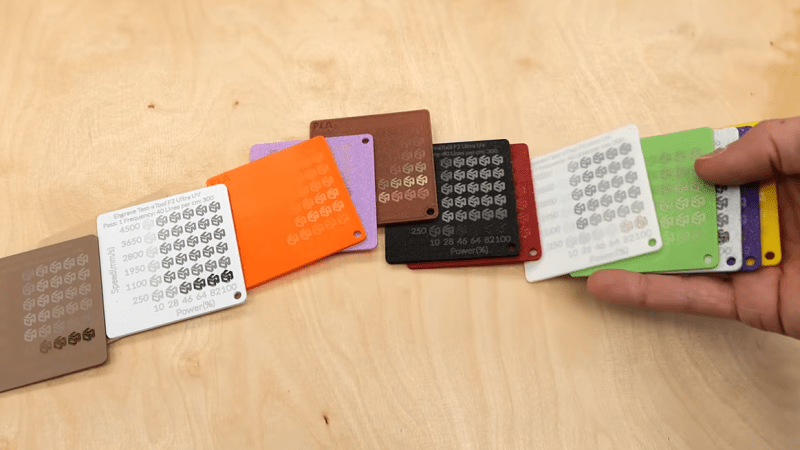
[Stefan] of CNC Kitchen has an informative video describing his experiences with trying to cleanly laser-mark 3D printed plastics using different methods, and it also happens to be a fantastic tour of all the different laser options available to hobbyists and workshops these days.

Laser marking is a fast and effective way to put things like product names, serial numbers, and other information on plastics. [Stefan] wondered whether laser options would be capable of creating clean and professional marks on 3D-printed items, and approached things with his usual attention to detail.

Continue reading “All The Different Lasers, And How Well They Mark 3D Prints”

2026 Frikkin Lasers Contest: Steampunk, 360 O-Scope Does It With Tubes

Audiophiles all know everything sounds better fed through vacuum tubes, but did you know visualizers look better with them, too? That’s what we’re forced to conclude looking at the Tachyscope Laser, a 360-degree oscilloscope display that is [Daniel Ross]’s entry into the ongoing Frikkin Lasers contest.

The diagram makes it look easier than building it probably was.

The laser is a good old-fashioned helium–neon tube — something we see less and less of in this era of solid state lasers — and the wavelength gives the waveform display a retro charm. The actual display is unique in our experience, with the beam shining up through a hollow shaft to bounce off a galvanometer mirror on a spinning platform. Galvo sweeps the laser across a translucent target, which creates the waveform by persistence of vision as it spins at 100 RPM or so.

Does the fact that the audio signal feeds through a tube amp to drive the single galvanometer actually improve the visuals? Only in the sense that those tubes make the steampunk-style enclosure look really, really cool, as does the exposed laser tube. That all of the steampunk elements obviously have a point to them rather than just being a another “glue some gears on it” project is icing on the laser-flavored cake.

The contest runs until July 23rd, so there’s lots of time to get laserin’ — and remember that there are categories for DIY lasers and anything that isn’t a display, just in case you think this project puts the bar too high for a light show. We’ve actually featured one of [Daniel]’s tachyscope waveform visualizers before, but that one, madly enough, spun an actual CRT.

Continue reading “2026 Frikkin Lasers Contest: Steampunk, 360 O-Scope Does It With Tubes”

Image of an elf projected by the laser scanner

2026 Frikkin Lasers Contest: Glow Engine Is Like An Open Air Slow Scan CRT

Slow-scan CRTs were never exactly common compared to their faster cousins, but given the popularity of Slow Scan TV (SSTV) amongst hams and NASA broadcasts, many of you are probably familiar with them. The slow scan rate of SSTV meant it required much less bandwidth, but in the early days you needed a CRT with a long-persistence phosphor to hold onto the image. [AJRussell]’s Glow Engine works much the same, with one key difference — instead of cathode rays, he’s using a frikkin laser beam.

In this case, the phosphor is Strontium Aluminate, the same stuff that gives most glow-in-the-dark toys and filament its kick. Energized by a 405 nm laser of questionable wattage, the phosphor will glow for several seconds, allowing the creation of an image. So while this is a laser projector, it works more like a CRT than most galvo projectors, which rely on Persistence of Vision to create an image. Here it’s persistence of fluorescence.

Continue reading “2026 Frikkin Lasers Contest: Glow Engine Is Like An Open Air Slow Scan CRT”