A Lesson In K40 Laser Repair

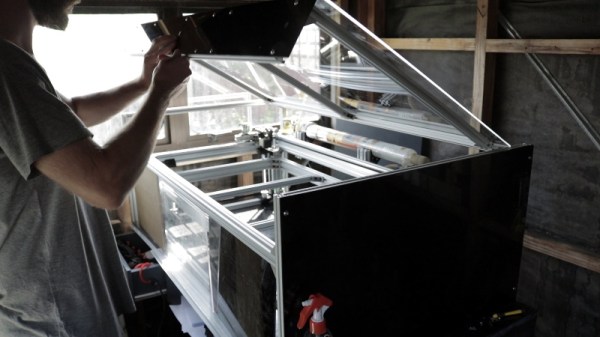
The K40 laser cutter has become ubiquitous in hackerspaces and well-equipped home workshops over the past few years, as a relatively inexpensive introduction to laser cutting and a machine that is readily hackable. Tokyo Hackerspace have one, but sadly their laser tube failed after relatively little use. Replacing a laser tube might be a routine component change for some readers, but it’s still worth looking at in some detail.

Their tube had failed at its output lens cooling cap, a component that is glued onto the end of the tube rather than bonded, and which had snapped off. There had been no mechanical stress upon it, but it was found  that the arrangement of their cooling system caused it to drain between uses and thus air bubbles could accumulate. The resulting cooling inefficiency caused enough thermal stress for the bond between the tube and the end piece to fail.

The in-depth analysis of what caused the failure and step-by-step description of the procedure should be of interest to any K40 owner. Little things such as ensuring that the tube is rotated to the right angle for all air bubbles to make their way out of it, or making sure that when the pump is switched off the water isn’t all pulled out of it by gravity seem obvious, but these are traps that will have caught more than one K40 owner.

We’ve covered many K40 stories over the years, but a good place to start for the novice might be this commissioning story, or even this tale of a hackerspace’s modifications to their model.

Hacking A Cheap Laser Rangefinder

When a new piece of technology comes out, the price is generally so high that it keeps away everyone but the die hard early adopters. But with time the prices inch down enough that more people are willing to buy, which then drives the prices down even more, until eventually the economies of scale really kick in and the thing is so cheap that it’s almost an impulse buy. Linux SBCs, Blu-ray lasers, 3D printers; you name it and the hacker community has probably benefited from the fact that it’s not just the hacker community that’s interested anymore.

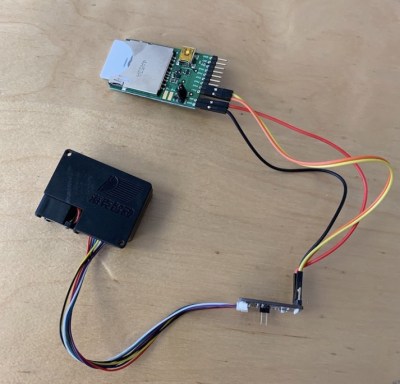
Which is exactly what’s started to happen with laser rangefinders. Once almost exclusively a military technology, you can now pick a basic “laser tape measure” for less than $40 USD from the normal overseas suppliers. Unfortunately, as [iliasam] found, they aren’t particularly well suited other tasks. For one there’s no official way of getting the data out of the thing, but the other problem is that the sample rate is less than one per second. Believing the hardware itself was promising enough, he set out to reverse engineer and replace the firmware running on one of these cheap laser rangefinders (Google Translate from Russian).

His blog post is an absolute wealth of information on how these devices operate, and a must read for anyone interested in reverse engineering. But the short version is that he figured out a way to reprogram the STM32F100C8T6 microcontroller used in the device, and develop his own firmware that addresses the usability concerns of this otherwise very promising gadget.

With some minor hoop jumping, the laser tape measure PCB can be hooked up to an ST-Link programmer, and the firmware provided by [iliasam] can be used to enable an easy to use serial interface. Perfect for pairing with an Arduino or Raspberry Pi to get fast and accurate range data without breaking the bank.

It probably won’t surprise you to see this isn’t the first time [iliasam] has gotten down and dirty with a laser rangefinder. This extremely impressive build from last year allowed for incredibly accurate 3D scans of his room, and before that he created his own rangefinder from scratch.

Continue reading “Hacking A Cheap Laser Rangefinder”

Gorgeous NickelBot Serves Up Lasered Wooden Nickels

[bdring] just recently completed his absolutely fantastic NickelBot, which is a beautifully made unit that engraves small wooden discs with a laser like some kind of on demand vending machine, and it’s wonderful. NickelBot is small, but a lot is going on inside. For example, there’s a custom-designed combination engraving platform and hopper that takes care of loading a wooden nickel from a stack, holding it firm while it gets engraved by a laser, then ejects it out a slot once it’s done.

NickelBot is portable and can crank out an engraved nickel within a couple of minutes, nicely fulfilling its role of being able to dish out the small items on demand at events while looking great at the same time. NickelBot’s guts are built around a PSoC5 development board, and LaserGRBL is used on the software side to generate G-code for the engraving itself. Watch it work in the video embedded below.

Continue reading “Gorgeous NickelBot Serves Up Lasered Wooden Nickels”

Laser Projector Ditches Galvanometer For Spinning Drum

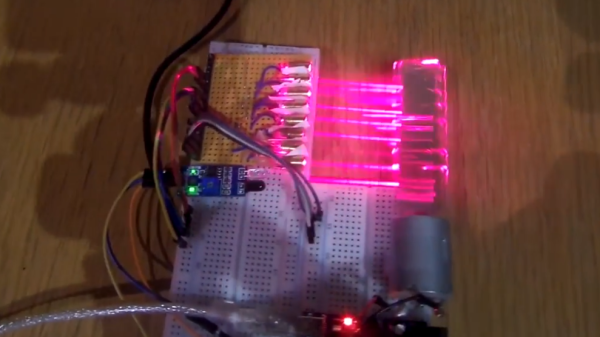
Laser projectors like those popular in clubs or laser shows often use mirror galvanometers to reflect the laser and draw in 2D. Without galvos, and on a tight budget, [Vitaliy Mosesov] decided that instead of downgrading the quality, he would seek an entirely different solution: a spinning mirror drum.

He fires a laser at a rotating drum with twelve mirror faces, each at a different adjustable vertical angle. The laser will hit a higher or lower point on the projection surface depending on which mirror it’s reflecting off – this creates resolution in the Y direction.

Timing the pulsing of the laser so that it reflects off the mirror at a certain horizontal angle provides the X resolution.

As you can already tell, speed and timing is critical for this to work. So much so that [Vitaliy] decided he wanted to overclock his Arduino – from 16 MHz to 24.576 MHz. Since this changes the baud rate, an AVR ISP II was used for programming after the modification, and the ‘duino’s hardware serial initialization had to be hacked too.

For the laser itself, [Vitaliy] designed some nifty driver circuitry, which can respond quickly to the required >50 kHz modulation, supply high current, and filter out voltage transients on the power supply (semiconductor lasers have no protection from current spikes).

On the motor side of things, closed loop control is essential. A photo-interrupter was added to the drum for exact speed detection, as well as a differentiator to clean up the signal. Oh, and did we mention the motor is from a floppy disk drive?

We’ve actually seen builds like this before, including a dot-matrix version with multiple lasers and one made apparently out of Meccano and hot-glue that can project a Jolly Wrencher. But this build, with its multiple, adjustable mirrors, is a beauty.  Check it out in action below.

Continue reading “Laser Projector Ditches Galvanometer For Spinning Drum”

Arduino Revives Junkyard Laser Cutter

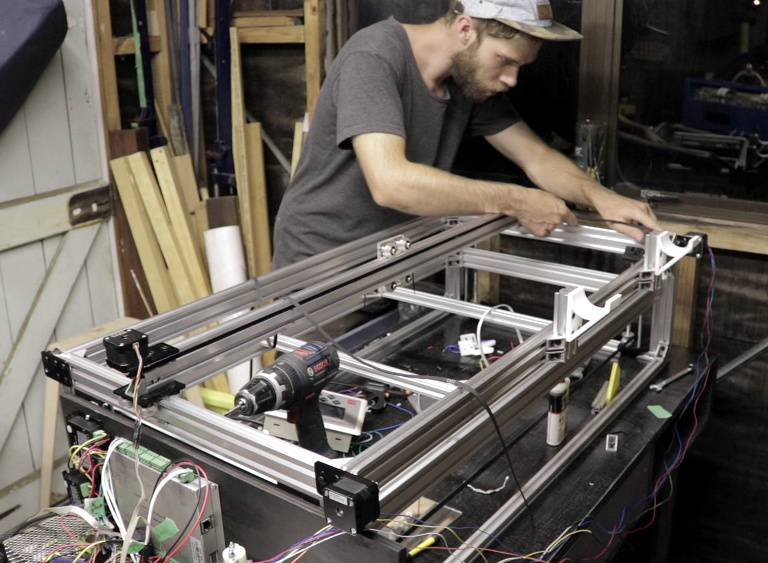
Some people have all the luck. [MakerMan] writes in to gloat tell us about a recent trip to the junkyard where he scored a rather serious looking laser cutter. This is no desktop-sized K40 we’re talking about here; it weighs in at just under 800 pounds (350 Kg), and took a crane to deliver the beast to his house. But his luck only took him so far, as closer inspection of the machine revealed it was missing nearly all of its internal components. Still, he had the frame, working motors, and laser optics, which is a lot more than we’ve ever found in the garbage.

After a whirlwind session with his wire cutters, [MakerMan] stripped away most of the existing wiring and the original control board inside the electronics bay. Replacing the original controller is an Arduino Nano running Grbl, likely giving this revived laser cutter better compatibility with popular open source tools than it had originally. Even though the laser cutter was missing a significant amount of hardware, he did luck out that both the motor drivers were still there (and working) as well as the dual power supplies to run everything.

After a successful motion test, [MakerMan] then goes on to install a new 90W laser tube. Supporting the tube is a rigged up water cooling system using a plastic jug and a cheap bilge pump. He also added an air assist system, complete with side mounted compressor. This pushes air over the laser aperture, helping to keep smoke and debris away from the beam. Finally, a blower was installed in the bottom of the machine with flexible ducting leading outside to vent out the smoke and fumes that are produced when the laser is in operation.

This machine is a considerable upgrade from the previous laser [MakerMan] built, and as impressive as this rebuild is so far, we’re interested in seeing where it goes from here. If you ask us, this thing is begging for an embedded LaserWeb server.

Continue reading “Arduino Revives Junkyard Laser Cutter”

Laser-Cut Mecanum Wheel For The Budget Roboticist

For the budding roboticist, omniwheels might be the next step in design patterns from your everyday “getting-started” robot kits. These wheels consist of tiny rollers that sit on the perimeter of the wheel and enable the wheel to freely slide laterally. With independent motor control of each wheel, a platform can freely locomote sideways by sliding on the rollers. You might think: “a wheel made of wheels? That sounds pricey…”–and you’d be right! Fear not, though; the folks at [Incubhacker] in Belgium have you covered with a laser-cut design that’s one-click away from landing on your workbench.

For anyone who’s tried to reliably mate flat laser-cut parts at an angle, we can tell you it’s no easy feat. The design here triumphs as both simple and reliable. Not only do they solve this problem elegantly, they also manage to create a design that will bear the load of a robot chassis that will travel with it. Laser-cut designs also usually suffer from a poor range of material options. Here the actual rollers need a bit more grip than what the plywood can provide. They also solve this problem effectively as well too, relying on heat-shrink tubing to provide the traction expected from a conventional wheel.

In the video below, [Incubhacker] takes you through the step-by process of making your own come to life. We’ve certainly seen some impressive laser-cut omniwheels in the past, but we like the simplicity of design combined with the composition of parts that probably already live on our workbenches.

Continue reading “Laser-Cut Mecanum Wheel For The Budget Roboticist”

Emboss Your Own Seals With A Laser Cutter

Parchment might be a thing of the past, but for those of us who still use paper an embossed seal can give everything from your official documents to your love letters a bold new feeling of authenticity. As far as getting your own seals made, plenty of folks will settle for having a 3rd party make them a seal, but not us. [Jason] shows us just how simple it is to raster our own seals with a laser cutter.

As far as the process goes, there are no tricks outside the typical workflow for raster engraving. Here, [Jason] simply creates a positive and (mirrored) negative seal pattern for each side of the seal embosser. The pattern is set for raster engraving, and the notched outline will be vector cut. From here, he simply exports the design, and the laser handles the rest.

This hack turned out so cleanly it almost seems like it could got into professional use–and it already is! Some extra Google-fu told us that it’s actually a fairly standard technique across the embossing industry for making embossing seals. Nevertheless, we couldn’t share our excitement for just how accessible this technique can be to anyone within reach of some time on a laser cutter.

[Jason] is using Delrin as his material to capture the design, which cuts cleanly and nicely handles the stress of being squished against your legal documents a couple hundred times. We’ve had our fair share of love on these pages for this engineering plastic. If you’re looking to get a closer look at this material, have a go at our materials-to-know debrief and then get yourself equipped with some design principles so that you’re ready to throw dozens of designs at it.

It’s not the first time the crafting and hacking communities intermingle and start sharing tools. In fact, if you’ve got yourself a vinyl cutter kicking around, why not have a go at churning out a few pcb stencils?

Thanks for the tip, [Doug]!

Continue reading “Emboss Your Own Seals With A Laser Cutter”