RGV Laser

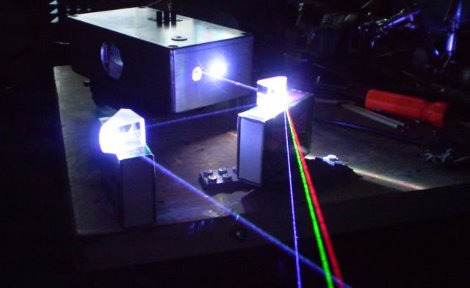
[Carl] sure has come a long way with laser modifications, now introducing his portable RGV Full Colour Laser. Although it feels just like yesterday when he showed us his green spiro and his Lego diffraction grating projector.

But enough of the past, the RGV laser is built using a White Fusion Mixing Kit and his own Full Colour Driver Extension. We couldn’t find any circuit diagrams or code to build your own at the moment, but it appears fairly straight forward and you can always take a look at [c4r0’s] Colour Laser.

Building A Bigger, Better Laser Engraver

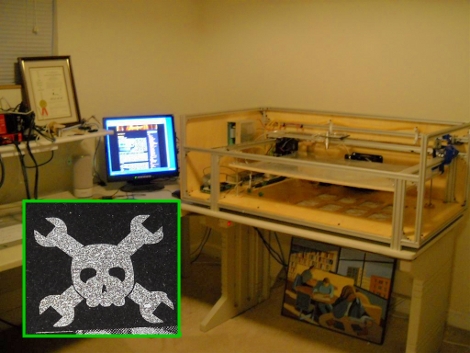
[Bart] built a giant laser etcher from scratch. One of his first test engravings included the Hackaday skull-and-wrenches on a polished granite floor tile (we love it when people do that). He used an XMOS controller and Mach3 CNC software to handle the device. With just two axes to worry about this seem like an easy project. The difficult bit is controlling, cooling, and focusing the laser.  Oh, and if you screw up, you could be blinded, burned or horribly maimed. But if you start from the beginning you’ll see that [Bart] knows what he’s doing.

Phaser-to-laser Mod Puts Out 465mW

Here’s another Star Trek phaser toy with a laser added. [Jay] started with a 1994 Star Trek phaser and added a 12X Blu-Ray diode. The sound effects of the toy still work, a nice touch that you can check out in the video after the break. That video shows him popping balloons with the laser, a feat made possible by the 465 mW that it puts out when the diode is driven at 320 mA of current. He’s made a nice carrying case for the weapon but we didn’t see a spot in there for protective glasses like we’ve seen with other phaser hacks. He did make one safety consideration by adding a safety switch and indicator LED to signal when the laser diode is armed.

Continue reading “Phaser-to-laser Mod Puts Out 465mW”

Arduino Security With Frickin’ Laser

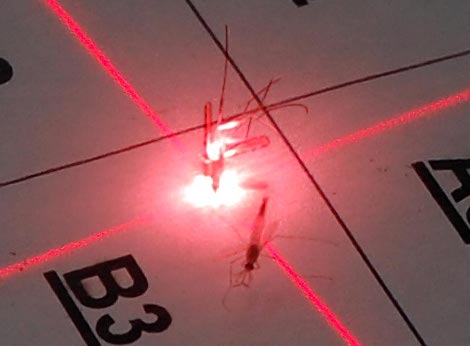
[over9k] used his Arduino to set up a laser trip wire. The laser is mounted along side the Arduino, reflects off of a mirror, and shines on a photoresistor that interfaces via a voltage divider. The signal from the voltage divider is monitored for a change when the laser beam is broken. [over9k] set things up so that a webcam snaps a picture of the intruder and Twitters the event for easy notification. Video after the break walks through each of these steps.

This build is a bit rough around the edges but unlike other laser trip wires this keeps all the electronics in one place. The laser interface could be a bit more eloquent, and we’re wondering just how much current it is pulling off of the Arduino pins. But if you’re bored and have this stuff on hand it will be fun to play around with it. Continue reading “Arduino Security With Frickin’ Laser”

Laser Harp

[Jared] had a bunch of lasers left over from a previous project that he put to use by producing this laser harp. The look of it reminds us of a very small Koto or perhaps an Autoharp (although the chords can’t be changed on this model).

We’re so glad that [Jared] spent the time to produce such a fine looking body for the instrument. The strings that would traditionally produce the sound on a harp have been replaced with laser diodes shining at Cadmium Sulfide photo resistors. When a beam of light is broken, an Arduino detects the change via the CdS cell and plays a sound through an Altec Lansing speaker inside of the case.

Unfortunately there’s no video available but we’re pretty sure it makes a “pew-pew” sound. There is a link to download the source code but it points to the overview page instead of downloadable code. From the fritzing diagram the CdS cells are part of a voltage divider which provides digital logic to the Arduino. That should be pretty easy to replicate even without seeing [Jared’s] code and we’re sure you can source other Arduino instrument projects for tips on wave shield or midi functionality.

[Thanks The Cheap Vegetable Gardener]

A Random USB… Hourglass

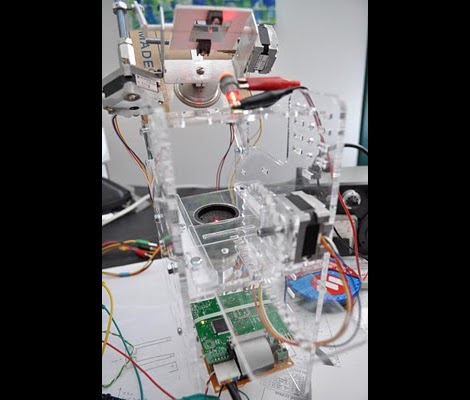
[Peter] thought of a creative, way to generate random entropy for under $100.

The USB Hourglass combines a sand timer with a rotating mechanism and an optical beam through the center of the timer to observe the falling sand. The amount of light reaching a detector is digitized at frequent intervals and processed by a microcontroller to determine when to rotate the hourglass. The digitized light levels are also sent by USB to a host PC where they can be used as a source of random entropy. Power is supplied over the USB cable.

With the USB Hourglass, the user can look at the sand falling through the center of the hourglass and monitor the randomness in the USB output data. And one can read the code line-by-line, compile it, and upload it to the microcontroller using only open-source and widely supported tools.

Scan Room, Explore Virtually

[Patrick] directed us to his project for alternate realism. The final goal is to be able to walk around in a space wearing a head mounted display, exploring a virtual representation of that space. This virtual representation could be altered, stylized, augmented and modified in countless ways. It is an exploration in perception, similar to enjoying different styles of painting, we could enjoy different styles of viewing a real space. Currently, it isn’t quite real time. He has to scan a room with a somewhat bulky device, then plug into his display to explore it. Being able to scan quickly and reliably enough shouldn’t be far off. [Patrick] notes that others have done almost real time scans at home already.