Create Cheap Philips Hue Compatible Devices

The Philips Hue range is a great way to add wirelessly controllable lighting to your home, but the protocol is proprietary which makes it difficult to add our own custom hardware. [Peter] found a way to create his own Hue compatible devices based on cheap JN5168 modules that are able to connect to the Hue bridge. This means you can roll out your own lamps using cheap RGB or White LEDs, a power supply and the JN5168 Zigbee Light Link module.

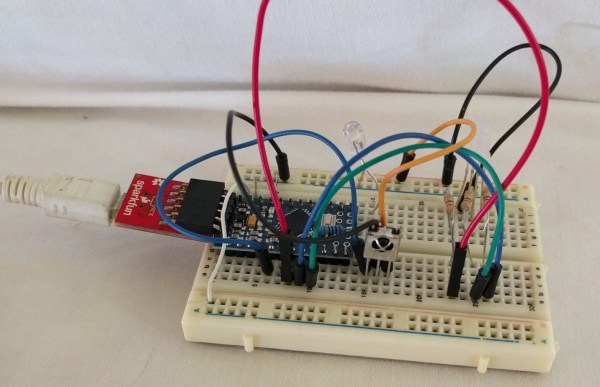
He started off by trying to clone a Zigbee Light Link device to a MeshBee — Seeed studio’s open source Zigbee Pro module based on the NXP JN5168. Even though the MeshBee used the same device as a Hue lamp, it would not connect to the Hue bridge. But another clone lamp called Innr that he purchased from the local hardware store did connect quite easily. Using NXP’s open source tools, he was able to download the flash and EEPROM contents from the Innr and copy them to the MeshBee which did the trick.

After the EEPROM transfer trick, he figured out how to modify the two keys used for the ZigBee protocol — one for Home Automation and the other for the Light Link. With this final discovery he is able to take the ZigBee Light Link demo project, edit it using Beyond Studio, and then load the binaries on the MeshBee device so it can connect to the Hue bridge.

All of this work culminates in two custom firmware binaries; one for white dimmable lights and another for RGB dimmable ones. It even runs on these cheap JN5168 breakout kits he found for a few bucks. With all of the software taken care of, and having cheap ZigBee Light Link compatible modules on hand, building low cost Hue compatible lights becomes pretty straight forward.

Thanks [wind-rider] for the tip.

Enter The Space Tunnel

What’s better than 1 string of LED lights? 96. That’s how many. Each string of the 96 has 60 ws2812b LEDs, for a total of 5760 individually addressable RGB LEDs.  That’s not the cool part of [jaymeekae]’s Space Tunnel installation, the cool part is that they’re interactive.

Starting out with some PVC piping, dark cloth was used as a backdrop and the LED strips were attached to it. Several power supplies are used to supply the voltage necessary and each strip controlled by FadeCandy chips which connect to, in this case, a Windows PC via USB. Initially, computer power supplies were used, but they couldn’t supply the current necessary. [jaymeekae] used them for the first installation, but switched to better power supplies for further installations.

Once the lights were up and powered, [jaymeekae] started work on the interface to control them. Starting with a used bureau, [jaymeekae] cut out a section for the touchscreen, and installed the controlling computer in the bottom half. Processing is used to interface with the FadeCandy controllers and HTML is used for a user interface. Each mode runs a different Processing program for different effects, including audio visualization, a space tunnel mode (hence the name) and a cool drawing app where the user draws on the touchscreen and sees the results in the lights overhead.

Over several iterations, the Space Tunnel has evolved, with better power supplies and a better interface. It’s a great art installation and [jaymeekae] takes it to festivals, including one in Spain and one in the UK. There are some other LED string projects at Hack-a-Day, including this one with ping-pong balls, and this one that involves drinking a lot of beer first.

[via Reddit]

Continue reading “Enter The Space Tunnel”

Tesseract Infinity Desk

We’ve all seen infinity mirrors. Even Mr. Spock had one in the Star Trek movies. Usually, these aren’t very large and hang on the wall. [QuackMasterDan] decided (after watching another movie, Interstellar) to try making a desk using the same idea. We aren’t sure it will make you more productive, but if you want to up your office cool factor, consider building his tesseract infinity desk. In fact, we imagine it would be pretty distracting. Sure to be a conversation starter, though.

Unlike a regular two-plate infinity mirror, [Dan’s] desk has six plates. He used metal for the structural parts of the desk and the top is a sandwich of an acrylic mirror and a large piece of half-inch tempered glass (available–unsurprisingly–on Amazon). There’s also privacy film to make the glass into a one-way mirror. He also includes instructions on how to make a wood version, too. You can see the desk in a video, below.

Continue reading “Tesseract Infinity Desk”

An 840 Segment Display

A while back, [limpfish] bought a few four-digit seven-segment displays from a seller on eBay. A month or two later, thirty displays ended up in [limpfish]’s mailbox. Instead of using the one or two displays he thought he ordered, [limpfish] decided to do something very cool with these bits of seven-segment displays. He’s controlling all of them at once.

[limpfish]’s usual method of controlling a lot of LEDs is the MAX7219 LED driver. This chip can easily — and cheaply — control eight common cathode seven segment displays. There’s a problem with this plan, though: the LEDs received from eBay are common anode. That’s actually not a problem, because with a little effort and even more thinking [limpfish] got these displays to work with the MAX7219 driver chip.

With chips in hand, [limpfish] designed a small breakout board for the MAX7219 and two common anode 4×7 segment displays. These displays can be daisy chained, and connecting them all together results in a very weird but very cool visualization.

[limpfish] is treating this display as a bitmap display, which means it’s demo time. You can check out a 1337 01d skool demo playing on this 840-segment display in the video below.

Continue reading “An 840 Segment Display”

Cheap LCD TV Gets Cheaper Fix

Most hacks need some fair bit of skill and knowledge if you want to come out successful at the other end. Others, you just plunge in blindly with a “heck, it’s already broken so I can’t make it any worse” attitude. Throwing caution to the wind, you dive in, rip things up, and see if you can manage to catch the bull by the horns.

[Jim]’s cheap LCD TV, barely a few years old, died. It was purchased from the store whose blue polo-shirted cashiers can drive you nuts with their incessant questions. [Jim] just rolled up his sleeves and rather haphazardly managed to fix his TV while adding an extra feature along the way.

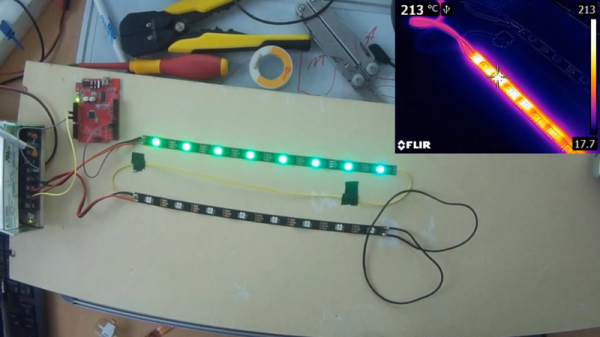
His initial check confirmed that the LCD panel worked. Using a flashlight, he could see that the panel was displaying video which meant it was the backlight that wasn’t working. Opening up the TV, he located the LED driver board whose output turned out to be zero volts. [Jim] happened to have a lot of WS2812B strips lying around, along with their power supplies and RGB color controllers. The obvious solution was to ditch the existing LEDs and power supply and use the WS2812B strips.

Surprisingly, the original backlight consisted of just 21 LEDs arranged in three rows. He ripped those out, put in the WS2812B strips, and taped the jumble of wires out of sight. After putting it back together, [Jim] was happy to see it worked, although the new strips were not as bright as the old ones, causing some uneven light bands. He solved this by adding a few more strips of LEDs. It took him a couple of hours to fix his TV, but by the end of it, he had a TV whose backlight could be adjusted to any color using the external color controllers — although we’re not too sure what good that would be.

Valentine’s Heart With Awesome Animations

January has drawn to a close, and for many of you that means: “Oh no! Less than two weeks’ time until Valentine’s day.” But for us here at Hackaday, it means heart-themed blinky projects. Hooray!

[Dmitry Grinberg] has weighed in with his version of the classic heart-shaped LED ring. It’s hard to beat the BOM on this one: just a microcontroller, five resistors, and twenty LEDs. The rest is code, and optionally putting the name of your beloved into the copper layer. Everything is there for you to download.

Continue reading “Valentine’s Heart With Awesome Animations”

Horten Fyr Is Norwegian For Blinkie

Our Norwegian is pretty weak, so we struggled a little bit with the documentation for a big public LED art project in the lighthouse (translated) in Horten, Norway. But we do speak the universal language of blinkies, and this project has got them: 3,008 WS2812b LEDs ring the windows at the top of the lighthouse and create reactive patterns depending on the wave height and proximity of the ferry that docks there.

This seems to be an evolving project, with more features being added slowly over time. We love the idea of searching for the WiFi access point on the ferry to tell when it’s coming in to port, and the wave height sensor should also prove interesting data, with trends at the low-frequency tidal rate as well as higher frequency single waves that come in every few seconds. What other inputs are available? How many are too many?

It’s so cool that a group of tech-minded art hackers could get access to a big building like this. Great job, [Jan] and [Rasmus] and [everyone else]!

Continue reading “Horten Fyr Is Norwegian For Blinkie”