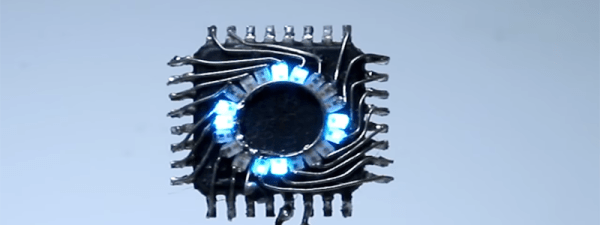
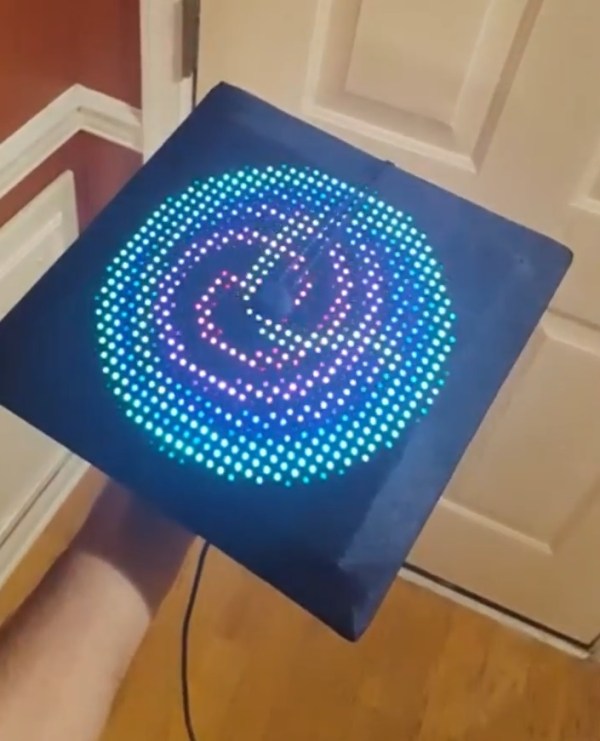
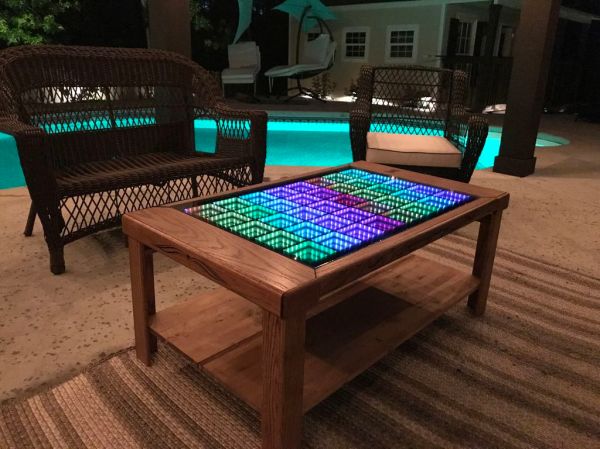
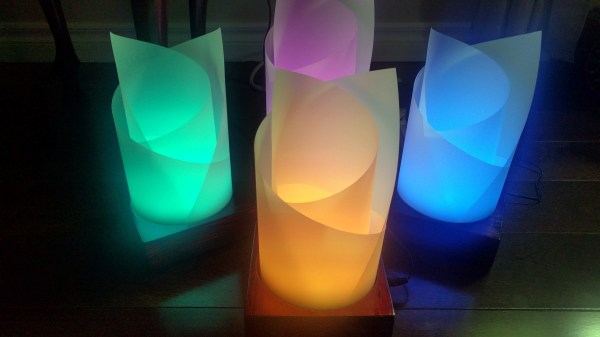
Swear Bleep Detecting Eyebrows

Swear on broadcast television and they’re going to bleep out the audio to protect the sensibilities of the general public. Swear bleeps are fairly standardised at 1kHz, or so [mechatronicsguy] tells us. You learn something new every day.

OK, it’s not as though there’s an ISO document somewhere detailing the exact tone to use when someone says a naughty word on camera, it is far more likely that a 1kHz tone is the most likely frequency to be at hand in a studio. It’s so ubiquitous that even audio engineers with nowhere near perfect pitch can identify it, and one to which an acquaintance of ours swears years of exposure have given his ears a selective notch filter.

Armed with this information, [mechatronicsguy] created a fun project. As a fan of the [electroBOOM] Youtube channel he made a set of LED eyebrows for a picture of his bleep-prone hero, and using a Teensy with its audio and FFT libraries he made them light up whenever a 1kHz tone is detected. It’s not the most amazing of hacks, but if you find yourself in need of a smile on a chilly November morning then maybe it’ll have the same effect on you as it did with us. He’s posted a quick video of the ‘brows in action which we’ve embedded below the break.

Continue reading “Swear Bleep Detecting Eyebrows”

Really Big Digital Clock Finds Use For Really Big 3D Printer

What does it take to make a really big digital clock? If [Ivan Miranda]’s creation is any gauge, it takes a really big 3D printer, an armful of Neopixel strips, and a ton of hot melt glue.

It looks like [Ivan]’s plus-size clock is mainly an exercise for his recently completed large-bed custom 3D printer, in itself a project worth checking out. But it’s a pretty ambitious project, and one that has some possibilities for enhancements. Each of the four seven-segment displays was printed separately, with a black background, translucent white for the segments, and recesses for five RGB LEDs each. The four digits and colon spacer are mated together into one display, and an ESP8266 fetches the time from a NIST server and drives the segments. What’s really interesting about [Ivan]’s projects is that he constrains himself to finishing them each in a week. That explains the copious amount of hot glue he uses, and leaves room for improvements. We’d love to see this display built into a nice walnut case with a giant red diffusing lens. Even as it stands it certainly makes a statement.

We’ve featured other outsized seven-segment displays before, but few as big as this one.

Continue reading “Really Big Digital Clock Finds Use For Really Big 3D Printer”

LED Matrix Shades You Can Actually See Though

[Gal Pavlin] admits to enjoying the occasional dance music show. For those who have never been to one, LED one-upmanship at these shows is a real and terrible thing, so much so that an entire market exists around it. To that end, [Gal] built a pretty spiffy set of LED glasses.

It took quite a bit of work to arrive at the final design. All the circuitry and LEDs fit entirely within the envelope of the lenses on a pair of sunglass frames of dubious parentage. The batteries squeeze in between the user’s head and temples.

On top of the clever packaging is an equally impressive set of features. Each lens is a matrix of 69 LEDs. They have an accelerometer, a microphone, and a light sensor. There’s even a vibrating alert motor, which we feel is just showing off.  Best of all, you can actually see through the glasses, thanks to clever layout and very tiny LEDs.

The device requires a tag connect or soldering on a pigtail to program. If you’d like to build one yourself all the files are available on [Gavin]’s site. There’s a video of it in operation after the break.

Continue reading “LED Matrix Shades You Can Actually See Though”

Easy UFO Lights On Your Drone For Halloween

Sometimes it’s not so much what you put together, it’s how you use it. The folks at Adafruit have put up a project on how to dress up your drone with ‘UFO lights’ just in time for Halloween. The project is a ring of RGB LEDs and a small microcontroller to give any quadcopter a spinning ‘tractor beam light’ effect. A 3D printed fixture handles attachment. If you’re using a DJI Phantom 4 like they are, you can power everything directly from the drone using a short USB cable, which means hardly any wiring work at all, and no permanent changes of any kind to the aircraft. Otherwise, you’re on your own for providing power but that’s probably well within the capabilities of anyone who messes with add-ons to hobby aircraft.

One thing this project demonstrates is how far things have come with regards to accessibility of parts and tools. A 3D printed fixture, an off-the-shelf RGB LED ring, and a drop-in software library for a small microcontroller makes this an afternoon project. The video (embedded below) also demonstrates how some unfamiliar lights and some darkness goes a long way toward turning the otherwise familiar Phantom quadcopter into a literal Unidentified Flying Object.

Continue reading “Easy UFO Lights On Your Drone For Halloween”

Building The Brightest Light Sabre In The World

If you are looking for a Star Wars light sabre, sometimes your choices can be a little disappointing. “Replica” sabres from toy and novelty vendors may superficially look the part, but with their tinny speakers and lacklustre show of LEDs they often have less of the Force about them and more of the Farce.

[Jeremy Lee] offers a solution; he’s built what he claims to be the brightest light sabre in the world. That’s a bold assertion, and one which we think might even throw down a gauntlet to other sabre builders and spark an arms race among Jedi wannabes.

The super-bright sabre uses a 144 LED double-sided strip of Neopixels in a polycarbonate tube, with a DC to DC converter powered by a 1000mAH LiPo battery. Sound effects come from a SparkFun Pro Micro powering a 2W speaker through a small audio amplifier. The handle meanwhile is constructed from PVC pipe fittings.

His first attempt at the sabre had the LEDs at full power, and promptly melted his tube. Thus the final version runs at 40% of its maximum rating, with a “burst” mode for those moments at which combat demands it.

His write-up is a series of posts, with plenty of video at all points. It might seem odd to show you the shortest of them here at only a few seconds long, but since the unique selling point is its brightness we think the best way to show that is at night.

Continue reading “Building The Brightest Light Sabre In The World”

A Vintage Single Transistor LED Blinker

[Eric Wasatonic] had a box of SWB2433 transistors that he had very little information about. In order to discover their properties, he fired up his curve tracer to compare these transistors with more common ones. He noticed the SWB2433 exhibited negative resistance while the similar curves of a 2n3904 didn’t. Then he reverse-biased the two transistors: the negative resistance region on the 2n3904 was less than that of the SWB2433, but it was there, and a 2n2222 had a bigger region. Using this knowledge, he developed a relaxation oscillator circuit which uses a negatively biased transistor.

Using one transistor, one resistor and one capacitor, he describes the circuit and how the components affect the frequency of the sawtooth wave the oscillator creates. [Eric] uses the oscillator to build a simple LED blinker and shows what happens when he changes the transistor and adjusts the voltage or resistance. He also shows the circuit as a tone generator and adjusts the tone by replacing the resistor with a potentiometer. And then, for fun, he modifies the circuit to show the oscillator as an AM transmitter. Check out his video after the break.

Continue reading “A Vintage Single Transistor LED Blinker”

Blinking An LED – Extreme Edition

This hacker’s video on blinking LEDs never got the recognition it deserves. At the time of writing clocking in at just 61 views, but it is indeed a work of art. Just trust me, scroll to the bottom of the article and watch it, you wont be disappointed.

Not convinced? OK, let me tell you about it and the world it has opened up in the Japanese maker scene. We’ve all blinked an LED. Maybe it was just to test a microcontroller, like the simplest Arduino example.

blink555

Or we’ve been a tad more old school and used the classic 555 to do it. Or maybe like me, you went through a phase of hacking together Phase Shift and other oscillators because well… it’s fun!

But [Junichi AKITA] has more extreme tastes, deciding that a custom IC layout is the way to go. [Junichi] designed a ring oscillator composed of flip-flops, then hand laid out each MOSFET placing each layer exactly where it should be fabricated.

The resulting design was then fabricated by an academic shuttle service in Japan (a bit like the well known MOSIS service). The result is a tiny circuit in the top right corner of the IC. Which of course [Junichi] then had to wirebond (check the video for a cool 1980s style Westbond machine which are still hugely popular in Japan).

[Junichi] bonded the die directly to a PCB (COB). I assume, purely for irony, a 555, and ATtiny based oscillator were also laid out on the board.

makelsi_icI guess you might have a couple of lingering questions. First you’ll likely bemoan your lack of your own fabrication facility (I’m still eyeing those used 1 micron fab lines that crop up on eBay from time to time). And secondly you might be asking yourself… why?

Both these questions are somewhat answers by the MakeLSI project. This growing project in Japan seems to have opened up semiconductor fabrication to all kinds of projects.

While my Japanese isn’t good enough to fully understand what’s happening it’s clear there are many awesome projects going on. Including joys such as IC layouts designed in vector graphics packages (Inkscape) and die images packed with interesting layouts, anime characters and QR codes.

For more awesome images and information (unfortunately all in Japanese) you can check them out on Facebook or on their homepage.

Continue reading “Blinking An LED – Extreme Edition”