The Easiest Infinity Mirror Build

Infinity mirrors are awesome. They’re great conversation pieces, and even more fun to stare into forever and ever and ever and ever… They can be tricky to build, but there’s actually a really easy way to do it, and [William] shows us how.

The way a infinity mirror works is it uses a one-way mirror with lights around the perimeter in front of a regular mirror. The majority of the light gets bounced back and forth between the two mirrored surfaces, and because you can see into the one-way mirror, you get that really cool infinity effect.

Now if you went out and bought a one way mirror, built the frame, and put it all together — it’d be a lot of work. But there’s an easier way to do it on the cheap. Mirrored car tint foil. Although it’s illegal on your car in most states, it’s still pretty easy to find.  Continue reading “The Easiest Infinity Mirror Build”

Akiba’s Awesome Lighting Tutorial

[Akiba] over at FreakLabs just put up a detailed tutorial outlining how to control and sequence lighting wirelessly using an Arduino and Vixen lighting sequencer software.

For those that don’t know [Akiba], he’s the guy behind Wrecking Crew Orchestra (TRON Dance) and their EL wire costumes. [Akiba] hacks on his projects at Hacker farm out in rural Japan.

board1

In the tutorial, he sets up a simple 6 LED circuit on a Fredboard (an Arduino compatible board with integrated breadboard). [Akiba] then describes configuring the Vixen sequencer software to control the Arduino, providing simple example code to decode the Vixen serial protocol. Finally [Akiba] shows how to use the ChibiArduino protocol stack to build a wireless illumination system.

[Akiba] has used these tools in many stage performances including with the Wrecking Crew Orchestra (shown above) and the world number 1 flair bartending crew, UPT.

This tutorial is particularly awesome, as it includes both step-by-step videos and a text reference. The videos give a great overview of the process, while the text provides a handy reference to refer to as you hack on your own illumination projects.

Thanks for the writeup [Akiba]! With Christmas just round the corner we hope to see readers using these techniques in their own festive illuminations soon!

Continue reading “Akiba’s Awesome Lighting Tutorial”

Full-Color Edge-Lit Laser Cut Acrylic

Edge-lit art has been around for a very long time, and most people have probably come across it in a gift shop somewhere. All it takes is a pane of transparent material (usually an acrylic sheet) with the artwork etched into the surface. Shine a light into the sheet from the edge, and refraction takes over to light up the artwork. However, this technique is almost always limited to a single pane, and therefore a single color. [haqnmaq] wanted to take this idea and make it full-color, and has written up a great Instructables tutorial on how to accomplish this.

If you want to make something like this yourself, the only thing you really need is a laser cutter and some basic electronics equipment. The process itself is so straightforward that it’s surprising that it isn’t more common. You start by taking a photo of your choice and use an image editor to break it up into three photos, one for red, one for green, and one for blue. Each of those photos is then etched into an acrylic pane with a laser cutter. When the panes are positioned in front of each other and edge-lit with their respective LEDs, a full-color image comes to life.

This isn’t the first edge-lit artwork project we’ve featured, but it definitely has the highest fidelity. Because [haqnmaq’s] technique uses three colors, you can use his tutorial to reproduce any photo you like. You could even take this a step further and create animated photos by adding more panes and lighting them up in the correct sequence!

Gravity Pong Reaches Into The Sky

For a recent event [Norwegian Creations] decided to make something fun. They built what might just be the tallest free-standing gravity pong game out there. It’s 4.5m tall, and the LEDs in it draw over 100 amps!

What is Gravity Pong anyway? Well it’s a single person game where you get three “bounces”. A ball of light will drop from the top of the tube and the closer to the bounce-line you hit the button, the higher it will bounce. Your high score consists of how high you get the light — but if you miss the bounce line, you lose!

The structure itself is quite impressive. They’ve wrapped acrylic tubes with 1792 individually controllable RGB LEDs, in groups of four. Each section requires a power supply capable of putting out 27A @ 5V! The game is controlled by a Raspberry Pi 2 which controls a Pixelpusher to manipulate the LEDs. It’s connected to the Internet, so high scores can be automatically uploaded!

When it comes to pong though, we quite enjoy playing it with $5,000 construction crane controllers — because why not?

Continue reading “Gravity Pong Reaches Into The Sky”

Knappa Tutu: Some Dancing Required

Sometimes, you see a lamp shade and you’re just intoxicated enough to put it on your head like a hat and dance around on the table. Other times, you see the same lamp shade, and decide to wire it up with Neopixels, an accelerometer, and an Arduino and make a flowery, motion-activated light show when you wear it as a dress. Or at least that’s what we’ve heard.

[Cheng] gets full marks for the neo-IKEA name for the project and bonus points for clean execution and some nice animations to boot. The build is straightforward: build up the lamp so that it fits around your waist, zip-tie in the RGB LED strip, and connect up accelerometer and microcontroller. A tiny bit of coding later, and you’re off to the disco. It looks like a ridiculous amount of fun, and a sweet weekend build.

Continue reading “Knappa Tutu: Some Dancing Required”

Three Watt Individually Addressable RGB LEDs

While the gold standard for colorful blinky projects are individually controllable RGB LEDs, the usual offerings aren’t really that impressive. Yes, a few hundred Neopixels, WS2812, or other RGB LEDs will sear your retinas, but what if you wanted blinky glowy stuff that is so over the top as to be an affront to whatever creator you believe in?

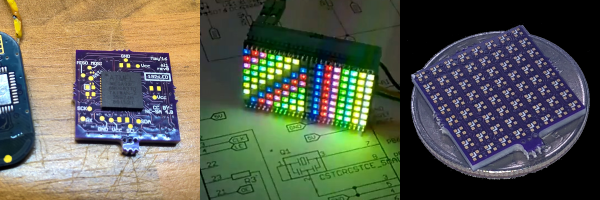
This is it. [Ytai Ben-Tsvi] created an individually addressable RGB LED called the Pixie that is perfect for all the times when you need something bright, colorful, and want to blind a few people in the process.

WS2812s and Neopixels are basically RGB LEDs with a small microcontroller tucked tucked away inside, and so far there is no design house or fab plant in China that is crazy enough to add one of these tiny dies to an already overpowered LED. To build the Pixie, [Ytai] took a bare RGB LED module and added a microcontroller – a PIC12FF157X in this case. It’s not exactly a powerful microcontroller, but it can handle the shift register-like function of an individually addressable RGB, and adds gamma correction, over heating protection (something necessary when you’re dumping this much power into a tiny board, and other safeguards for each individual LED.

[Ytai] is working with Adafruit to produce these Pixies, and although they’re rather expensive at $15 per LED, you won’t need very many to blind yourself.

Home Made Tumbler Diffuses Clear LEDs

What happens when you have a large stash of clear LED’s but you want or need diffused models for a project? You could go buy some more, but [Tyler] says no! Go grab some scrap from the shop, and make yourself a sand tumbler to diffuse the LED’s you already have.

The tumbler mechanism is similar to a rock tumbler, but is crafted out of bits of wood, some rods, a spaghetti sauce jar, and a DC motor which is available out of the types of machines we already tear apart. Once constructed, fine dry sand and the LED’s are loaded in the jar and is set to tumble for several hours.

Once done its easy to fish out the now diffused LED’s, which have a more even glow over their clear counterparts which shoot most of the light directly out of the end. Although it takes time, its a lot easier than trying to manually diffuse LED’s by hand, and if you need more than just a few its a massive labor saver.

Join us after the break for a quick video showing the results of different attempts during the learning process.

Continue reading “Home Made Tumbler Diffuses Clear LEDs”