Sometimes, you see a project that isn’t a technical powerhouse but just looks so good you can’t help but think about duplicating it. That’s how we felt with the mini-neon signs made by [makerverse]. From an electronics point of view, it is just some filament LEDs and a 3D-printed casing. But, as you’ll see in the video below, these look like little miniature neon signs, and they look great.
Although we might use a different set of tools to get there, the idea is to create your text in DXF, extrude it in CAD, and then print a dark shell with a light or translucent center using a filament change. Glow-in-the-dark filament is also an option. Obviously, if you are handy in any CAD tool, you could easily pull this off.
The build uses a 16×16 addressable LED matrix. [Jens] then ported some “Bouncy Bubbles” Processing code from Keith Peters to the Arduino Mega, and set it up to display on the matrix. An accelerometer was used to control the bouncing ball animations, while a second Arduino was then tapped to act as a musical synthesizer to add more vibes. The whole kit was then built into a 3D-printed housing with a nice hazy diffuser to give the LEDs a smoother, even look. [Jens] steps through how he got the diffuser just right, including a support structure that made all the difference to the aesthetic of the finished product. Getting diffusion right is key to making a nice LED project, and [Jens] got it very right here.
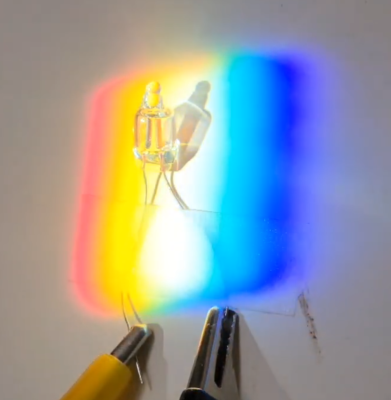
Neon lamps are fun to play with. These old-school indicators were once heavily utilized in many types of equipment for indication purposes but now seem largely relegated to mains voltage indication duties. Here’s a fun video by [Ashish Derhgawen], discussing the photoelectric effect of neon lamps with some simple demonstrations.
Orange light makes it light!
[Ashish] demonstrates the well-known photoelectric effect by triggering a sub-biased neon lamp with visible light from an LED. Neon bulbs work on the principle of voltage-induced ionization, creating a visible glowing plasma. If the applied voltage is high enough, around 60 to 80 V, electrons get knocked off the neutral neon atoms. The now free electrons, roaming around highly energized, will eventually come across a neon ion (missing an electron) and recombine to make it neutral again.
The results are a lower total energy state, and the difference in energy is resolved by the emission of a photon of light, which, in the case of neon, is a dull reddish-orange. Nothing unusual there. However, nothing will happen if the applied voltage bias is just below this device-specific threshold. There’s not enough energy to strip electrons.
Apply an external light source, and this threshold can be exceeded. The photons from the LED are just energetic enough to strip a small number of electrons from the surface of the electrodes, and this causes a cascade, or avalanche effect, lighting up the plasma and turning on the neon lamp. Take away the external light source, and it dies down and goes dark.
Expect dice roll stat tracking to become a big thing in the D&D community.
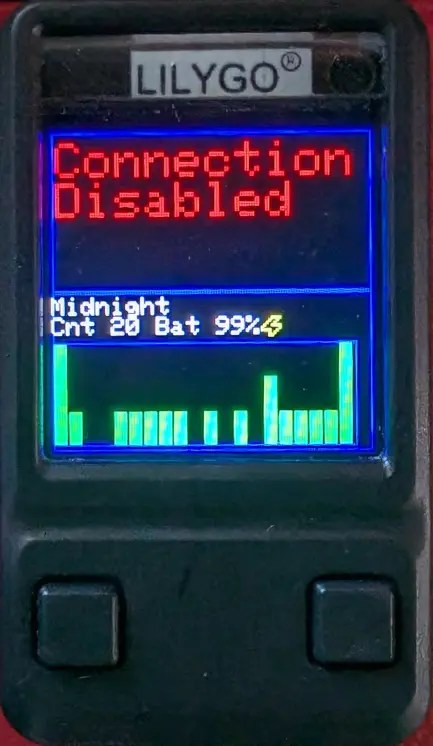
The build is based around Pixels Dice. They’re a smart type of IoT dice that contains Bluetooth connectivity and internal LEDs. The dice are literally capable of detecting their own rolls and reporting them wirelessly. Thus, the dice connects to the dice box, and the dice box can literally log the rolls and even graph them over time.
The project was built in a nice octagonal box [Jonathan] picked up from a thrift store. It was fitted with a hidden battery and ESP32 to communicate with the dice and run the show. The box also contains integrated wireless chargers to recharge the dice as needed, and a screen for displaying status information.
The dice and dice box can do all kinds of neat things, like responding with mood lighting and animations to your rolls—for better or worse. There are some fun modes you can play with—you can even set the lights to sparkle if you pass a given skill check in your tabletop RPG of choice!
If you play a lot of tabletop games, and you love dice and statistics, this is a project well worth looking into. Imagine logging every roll so you can see how hot you are on a given night. Or, heck—whether it was the dice’s fault you lost your favorite player character in that foreboding dungeon.
We love close-up pictures of intricate work, and [w] hits the spot with a tiny joule thief in a fuse case (social media post, embedded below) powered by an old coin cell from a watch. It’s so tiny!
Ethernet transformers contain tiny coils.
A joule thief is a sort of minimum-component voltage booster that can suck nearly every last drop of energy from even seemingly-drained batteries, and is probably most famously used to light LEDs from cells that are considered “dead”.
Many joule thief designs feature hand-wound coils, which is great for junk box builds but certainly becomes more of a challenge for a tiny build like this one.
We really like that [w] salvaged a miniscule coil from an Ethernet transformer, most of which look like blocky SMD components from the outside but actually contain tiny coils.
The joule thief has been the basis of plenty of hacks over the years, and it’s always nice to see new twists on the concept.
[mitxela] has a tiny problem, literally: some of his projects are so small as to defy easy programming. While most of us would probably solve the problem of having no physical space on a board to mount a connector with WiFi or Bluetooth, he took a different path and gave this clever light-based programming interface a go.
For initial experiments he wisely chose his larger but still diminutive LED matrix badge, which sports a CH32V003 microcontroller, an 8×8 array of SMD LEDs, and not much else. The video below is a brief summary of the effort, while the link above provides a much more detailed account of the proceedings, which involved a couple of false starts and a lot of prototyping that eventually led to dividing the matrix in two and ganging all the LEDs in each half into separate sensors. This allows [mitxela] to connect each side of the array to the two inputs of an op-amp built into the CH32V003, making a differential sensor that’s less prone to interference from room light. A smartphone app alternately flashes two rectangles on and off with the matrix lying directly on the screen to send data to the badge — at a low bitrate, to be sure, but it’s more than enough to program the badge in a reasonable amount of time.
We find this to be an extremely clever way to leverage what’s already available and make a project even better than it was. Here’s hoping it spurs new and even smaller LED projects in the future.
We all love a nice strip or grid of addressable LEDs. It can add flair or an artistic touch to many projects, and it can make gaming computers look extra 1337. However, providing enough current to a long strip of addressable LEDs can sometimes be difficult. Often a separate voltage rail is needed to supply enough juice. At the same time, continually sending out data to animate them can often use 100% of the microcontroller’s CPU power, especially if the serial bus is being bit-banged. A crash or badly timed interrupt can leave the system in a weird state and sometimes with the LEDs not displaying the correct colours. Or you might just want to enter a power-saving mode from time to time on your main MCU? Well, the BAPPR is designed to address all of these problems.
[TheMariday] created the BAPPR and made it fully open-source. It’s a switch-mode power supply that can accept anywhere from 7 V to 17 V and converts it into a strong 5 V rail for typical addressable LEDs. It also has a “smart” mode where it monitors the data line going to the LEDs to see if there is activity. If for some reason the system stops sending data, the BAPPR can intervene and shut off the power to the LEDs, which can help prevent strange colour combinations from being displayed while the system recovers. Once data starts flowing again, power is restored and the light party can resume.