What if you could give yourself a standard eye exam at home? That’s the idea behind [Joel, Margot, and Yuchen]’s final project for [Bruce Land]’s ECE 4760—simulating the standard Snellen eye chart that tests visual acuity from an actual or simulated distance of 20 feet.
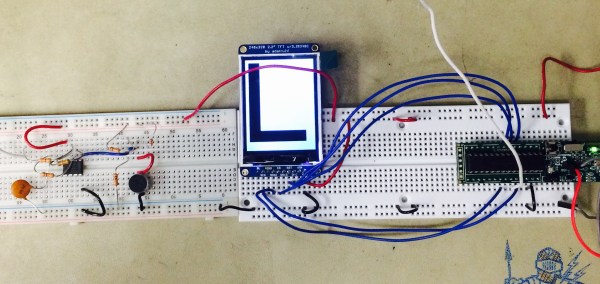
This test is a bit different, though. Letters are presented one by one on a TFT display, and the user must identify each letter by speaking into a microphone. As long as the user guesses correctly, the system shows smaller and smaller letters until the size equivalent to the 20/20 line of the Snellen chart is reached.
Since the project relies on speech recognition, the group had to consider things like background noise and the differences in human voices. They use a bandpass filter to screen out frequencies that fall outside the human vocal range. In order to determine the letter spoken, the PIC32 collects the first 256 and last 256 samples, stores them in two arrays, and performs FFT on the first set. The second set of samples undergoe Mel transformation, which helps the PIC assess the sample logarithmically. Finally, the system determines whether it should show a new letter at the same size, a new letter at a smaller size, or end the exam.
While this is not meant to replace eye exams done by certified professionals, it is an interesting project that is true to the principles of the Snellen eye chart. The only thing that might make this better is an e-ink display to make the letters crisp. We’d like to see Snellen’s tumbling E chart implemented as well for children who don’t yet know the alphabet, although that would probably require a vastly different input method. Be sure to check out the demonstration video after the break.
Don’t know who [Bruce Land] is? Of course he’s an esteemed Senior Lecturer at Cornell University. But he’s also extremely active on Hackaday.io, has many great embedded engineering lectures you can watch free-of-charge, and every year we look forward to seeing the projects — like this one — dreamed and realized by his students. Do you have final projects of your own to show off? Don’t be shy about sending in a tip!