Using DMA To Drive WS2812 LED Pixels

It’s pretty well known by now that the LED pixel hardware which is starting to be commonplace, both WS2811 and WS2812, needs pretty strict timing in order to address them. There are libraries out there which mean almost no work on your part, but that’s no fun. [Elia] started looking into what it takes to drive the hardware, trying out a few 8-bit micros before moving to 32-bit with the help of an STM32VL Discovery Board. The move to a beefier processor brings a lot of speed, but why bit bang everything? He came up with a way to use the PWM and DMA features of the chip to drive the LEDs.

DMA is the Direct Memory Access unit that allows you to change the values being sent to the pixel without interrupting the processor. This is done by pre-loading the data at a memory location. This buffer is automatically read by the DMA unit — its values are used to set the PWM timer compare trigger in order to send out logic values show in the diagram above.

If you do want to delve further into this topic here’s a collection of techniques for driving the WS2811.

Continue reading “Using DMA To Drive WS2812 LED Pixels”

Arduino-Based Power Failure Alert System

arduinoPowerFailBox

When the power went out at his parents’ shop and ruined the contents of their fridge, [Lauters Mehdi] got to work building a custom power failure alert system to prevent future disasters. Although some commercial products address this problem, [Lauters] decided that he could build his own for the same cost while integrating a specific alert feature: one that fires off an SMS to predefined contacts upon mains power failure.

The first step was to enable communication between an Arduino Micro and a Nokia cell phone. His Nokia 3310 uses FBus protocol, but [Lauters] couldn’t find an Arduino library to make the job easier. Instead, he prototyped basic communication by running an Arduino Uno as a simple serial repeater to issue commands from the computer directly to the phone, and eventually worked out how to send an SMS from the ‘duino. [Lauters] then took the phone apart and tapped into the power button to control on/off states. He also disconnected the phone’s battery and plugged it into an attached PCB. The system operates off mains power but swaps to a 1000mAH 9V backup battery during a power outage, logging the time and sending out the SMS alerts. A second message informs the contacts when power has been restored.

Head over to [Lauters’s] project blog for schematics and photos, then see his GitHub for the source code. If you want to see other SMS hacking projects, check out the similar build that keeps a remote-location cabin warm, or the portable power strip activated by SMS.

Battery Backup For RasPi Keeps Your Data Safe

We’ve all raised a clench fist in anger over lost data, and it’s usually the result of unjustified optimism and lack of planning. [George] shared his solution that prepares for the worst: a circuit that provides backup power to a RasPi and its hard drives. [George’s] Pi setup runs as both an Apple Time Machine server and a website backup server, and a power outage could corrupt the data stored on the Pi’s attached hard drives.

Rather than turn to commercial solutions, however, [George] wanted to take advantage of the Pi’s low power consumption and create an inexpensive custom circuit that would safely and automatically power down the devices upon loss of power. To detect a power failure, the build connects one of the Pi’s GPIOs to an opto-isolator, which—through a zener diode—connects to the 12V wall adapter: though [George] welcomes suggestions for alternative methods of safely identifying a mains power loss. The rest of the circuit serves as a trickle charger for the two attached 9V batteries and as a regulator to supply the correct voltage to the RasPi. Power MOSFETs connected to a GPIO handle the delayed power off.

You can view (and edit!) the circuit online here and find the relevant source code on [George’s] website. If you want to build your own RasPi file server, try cramming all the parts into an old optical drive enclosure.

Real-Life Raspi-Controlled Redstone Lamp

redstone-lamp

Minecraft fanatics keep finding impressive ways to bring 8-bit components into the real world, and [Chris Tompson’s] Redstone Lamp Replica is no exception. [Chris] wanted to extend his connection to the game world by not only replicating this block, but also by controlling its light-up effect when an in-game cube is lit.

The lamp is a product of the gang at Hive76, who worked together to develop a quick prototype using the Minecraft Python client pyCraft, an Arduino, a transistor and a temporary papercraft lamp mockup. Hive76 member [Kyle] pitched in to write the plugin for pyCraft, which listens for an on/off message and sets one of the RasPi’s GPIO pins accordingly. The hardware for the actual lamp was designed to smooth out the 8-bit quality into something a bit more precise. The result are laser-cut pieces of MDF with a zebra wood veneer laminated on top. The interior was finished off with amber cathedral glass and then the cube’s sides were glued together. The RasPi, PCB and LEDs fit inside, all snugly affixed together.

Swing over to the Hive76 project page for more details and links to the plugin, and see the video demonstration below. For another Minecraft-inspired real-life project, check out [Bill’s] take on the BatBox.

Continue reading “Real-Life Raspi-Controlled Redstone Lamp”

Automated Aquarium Is Kitchen-Sinky

fishtankAutomation

People have been converting their old Power Macs and Mac G5s into fish tanks for a few years now, but [Hayden’s] Internet-enabled tank is probably the most awesome ever crammed into an aquarium along with the water and the fish—and we’ve seen some fascinating builds this summer. After gutting the G5 and covering the basic acrylic work, [Hayden] started piling on the electronics: a webcam, timed LED lighting, an LCD for status readouts, filter and bubble control via a servo, an ultrasonic sensor to measure water levels, thermometer, scrolling matrix display, an automatic feeding mechanism, and more. He even snuck in the G5’s old mainboard solely for a cool backdrop.

The build uses both a Raspberry Pi and an Arduino Mega, which sit underneath the tank at the base. The Pi provides a web interface written in PHP and jQuery, which presents you with the tank’s status and allows changes to some settings. Nearly every component received some form of modification. [Hayden] stripped the webcam of its case and replaced the enclosure with a piece of acrylic and a mountain of silicone, making it both waterproof and slim enough to fit in the appropriate spot. Though he decided to stick with an Amazon-bought Eheim fish feeder, he disabled the unit’s autofeed timer and tapped in to the manual “feed” button to integrate it into his own system.

It’d take half of the front page to explain the rest of this thing. We’ve decided to let the aquarium tell you the rest of its features in the video below. Yeah…it can talk.

Continue reading “Automated Aquarium Is Kitchen-Sinky”

Arduino Astronomic Clock Automates Lights

ardAst

[Paulo’s] garden lights are probably a bit more accurately automated than anyone else’s on the block, because they use latitude and longitude clock to decide when to flip the switch. [Ed Note from the far future: this page no longer exists, but you can still read it on the Wayback Machine. The TimeLord library has also been superceded, so you’ll have some porting to do.]

Most commercial options (and hobbiest creations) rely on mechanical on/off timers that click on an off every day at the same time, or they use a photosensitive element to decide it’s dark enough. Neither is very accurate. One misplaced leaf obscuring your light-dependent resistor can turn things on unnecessarily, and considering the actual time of sunset fluctuates over the year, mechanical switches require constant adjustment.

[Paulo’s] solution addresses all of these problems by instead relying on an algorithm to calculate both sunrise and sunset times, explained here, combined with swiftek’s Timelord library for the Arduino. The build features 4 7-segment displays that cycle through indicating the current time, time of sunset and of sunrise. Inside is a RTC (real time clock) with battery backup for timekeeping along with an Omron 5V relay to drive the garden lamps themselves. This particular relay comes with a switch that can force the lights on, just in case.

Check out [Paulo’s] project blog for the full write-up, links to code and more details, then take a look at some other home automation projects, like the SMS-based heater controller or occupancy-controlled room lighting.

A Simple Servo Hack For An Iron Man Helmet

iron man helmet

[James] makes some seriously awesome Iron Man props. In one of his latest helmet builds, he came across a handy hack to lock the faceplate servo in place.

You see, as awesome as it is walking around like Iron Man all day, you’re going to want to keep your faceplate up for extended periods of time. Simply holding the servo in place electronically is a waste of power, and results in the annoying sound of a servo under strain. On the other hand, cutting power to it will keep it in place momentarily — but it will also start to close under the force of gravity.

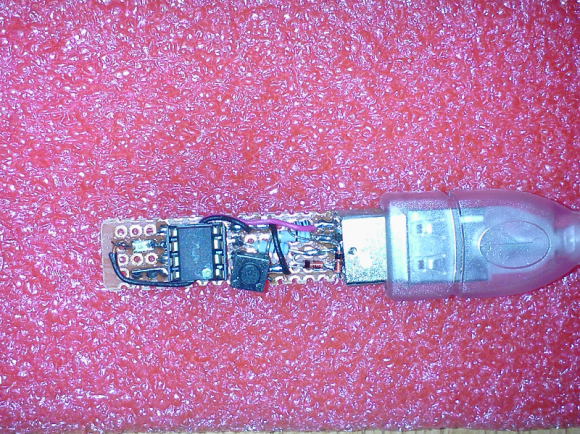
The solution is actually quite simple, by reprogramming the Picaxe-08M microcontroller, the board now shorts the motor terminals to hold it in place. This is called magnetic motor braking, and it works by creating a closed loop that makes it much harder to induce a current under load. We once added this feature to a motorized push-scooter — it’d stop on a dime, although you wouldn’t…

Stick around after the break to see an extremely in depth video on how he setup the entire system.

Continue reading “A Simple Servo Hack For An Iron Man Helmet”