The Many Iterations Of [Joe’s] PCB Business Card

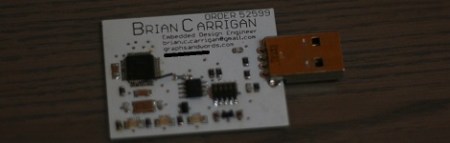
[Joe Colosimo] is putting on a show with his PCB business card project. The idea isn’t new, but his goal is to keep it simple and undercut the cost of all other PCB cards he’s seen. This is the third generation of the board design, and he’s just waiting on some solder mask solution before he tries running it through the reflow oven.

The first two prototypes used some through-hole parts. Notably, the battery was to be positioned in a circular cut-out and held in place by a metal strap and some bare wires. But he couldn’t quite get it to work right so this design will transition to a surface-mount strap for one side, and the large circular pad for the other. At each corner of the board there is a footprint for an LED. He tried milling holes in the board to edge-light the substrate. Now he just mounts the LED upside down to give the board a blue glow. The LEDs are driven by an ATtiny10 microcontroller which takes input from the touch sensor array at the bottom right.

He etched a QR code on the board which seems to work better than the milled QR experiments we saw back in April. The link at the top point’s to [Joe’s] main page on the card. Don’t forget to follow the links at the bottom which cover each part of the development more in-depth.

[Thanks Skitchin]

Lightweight Web Server Using The MSP430

Need a tiny web server? [Rob] over on the 43oh forums made an Ethernet booster pack for the very popular TI MSP430 microcontroller. If that’s not enough, [Rob] also put together an all-in-one solution with a MSP430 and Ethernet controller that can be powered by a battery. Along with the web server that fits in just 5k of flash, we’re going to say [Rob] has a very good solution for remote sensing and data logging.

For his Ethernet-enabled 430, [Rob] chose to use the WIZnet W5200 Ethernet controller. This chip communicates with the 430 via and SPI interface and has a hardware TCP/IP stack that supports TCP, UDP, and PPPoE, offloading all the low-level stuff off of the 430 and onto the Ethernet controller.

After the break there are a pair of videos of [Rob] showing off his tiny web server. A few neat features include a full memory dump of the 430, as well as a reading the states of all the pins via an HTML page. If you’re looking for a way to collect data over Ethernet, we don’t think you could do better than [Rob]’s tiny 430-based web server. Also, if you’d like to control a few devices over the Internet, [Rob] included a few optoisolators  for lights or appliances.

The code is available on the 43oh forum page, but [Rob] says he’ll clean that up and put it in a Git.

Continue reading “Lightweight Web Server Using The MSP430”

A Detailed Tutorial On Speeding Up AVR Division

[Alan Burlison] is working on an Arduino project with an accelerometer and a few LEDs. Having the LEDs light up as his board is tilted to one side or another is an easy enough project a computer cowboy could whip out in an hour, but [Alan] – ever the perfectionist – decided to optimize his code so his accelerometer-controlled LEDs don’t jitter. The result is a spectacular blog post chronicling the pitfalls of floating point math and division on an AVR.

To remove the jitter from his LEDs, [Alan] used a smoothing algorithm known as an exponential moving average. This algorithm uses multiplication and is usually implemented using floating point arithmetic. Unfortunately, AVRs don’t have floating point arithmetic so [Alan] used fixed point arithmetic – a system similar to balancing your checkbook in cents rather than dollars.

With a clever use of bit shifting to calculate the average with scaling, [Alan] was able to make the fixed point version nearly six times faster than  the floating point algorithm implementation. After digging into the assembly of his fixed point algorithm, he was able to speed it up to 10 times faster than floating point arithmetic.

The takeaway from [Alan]’s adventures in arithmetic is that division on an AVR is slow. Not very surprising after you realize the AVR doesn’t have a division instruction. Of course, sometimes you can’t get around having to divide so multiplying by the reciprocal and using fixed point arithmetic is the way to go if speed is an issue.

Sure, squeezing every last cycle out of an 8 bit microcontroller is a bit excessive if you’re just using an Arduino as a switch. If you’re doing something with graphics or need very fast response times, [Alan] gives a lot of really useful tips.

Adding A Heart Rate Monitor To Your Exercise Equipment

This is the readout which [Remick] added to his stationary bicycle. It displays heart rate, calories burned, and a few other items to help motivate his workout routine.

Back when he was ordering a TI Chronos watch he also picked up a heart rate chest strap and receiver. The receiver can be read using a UART, making it easy to interface with the ATmega328 which drives the system. The screen is a graphic LCD, which gave him a lot of control on how to organize the displayed data. Three buttons on the side operate the menu system into which a user can enter sex, age, and weight information. This is used to calculate the calories burned and the percentage of maximum heart rate. The three readouts to the right are for time spent in each workout zone (fat burning, fitness, or performance). The final product looks great because of the PCB he etched and the case he housed it in.

Digital Picture Frame That Rotates To Match Image Orientation

This digital picture frame physically rotates in order to match the image’s orientation. [Markus Gritsch] built the frame, including a Python script to translate the photos to a format which makes the best use of the 2.4″ LCD screen.

The screen is addressed in 8-bit parallel by a PIC 32MX120F032B processor. Image are read from an SD card in a raw format, with 16-bit colors pushed to the display for each pixel. To get them into this format [Markus’] script converts the JPEG files to RAW, resizes them, uses dithering to reduce to 16-bit color, then applies a sharpening filter to improve the final look. During this process it also includes orientation information. That is parsed by the microcontroller and used to drive the servo motor to which the screen is attached.

To finish off the project he spray painted a piece of acrylic to act as a bezel for the frame. Check out the demo after the break and we think you’ll agree the rotating feature, along with image scrolling, really makes this a piece you’ll want on your own desk.

Continue reading “Digital Picture Frame That Rotates To Match Image Orientation”

PhilRobokit Anito Is Not An Arduino

A few people over at the Philippine hackerspace PhilRobotics a PIC-based dev board that takes a lot of cues from ‘the microcontroller board everyone loves to hate,’ the Arduino.

There are a few differences between the PIC16F877a used in the Anito and the ATMega328 used in the Arduino: The PIC has a little less than half the Flash memory of the ‘Mega and less RAM, but has a slightly higher clock rate. It would have been nice to have a dev board with Arduino style headers powered by one of those new PIC32MX chips, if only because of a few really, really awesome projects we’ve seen. We’ll take whatever we can get, though, even if it provides a little more ammo for the PIC/AVR holy war.

One really interesting aspect of the Anito is the IDE. Written in Python, the PhilRoboKit IDE has all the features of everyone’s favorite IDE that is written in Wiring, plus a few extra features: autocomplete is a huge bonus, as is the ability to upload programs over Pickit2 ISP header. The IDE is available for Windows and Linux (no Mac port yet), and should be enough to get you off the ground in the PIC dev world.

Energia Brings Arduino IDE To The TI Launchpad

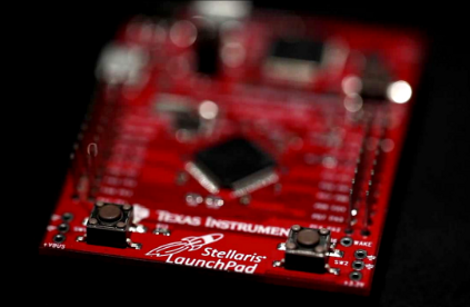
The Arduino IDE is an abstraction layer for the AVR chip which the board is based around. So it’s no surprise that it is now possible to use the Arduino IDE with the TI Launchpad board. This makes it dead simple for beginners to play around with the inexpensive and low-power MSP430 platform. This is all thanks to a lot of hard work on part of the Energia developers.

The project branches from Arduino so the look, feel, and function are all about the same. Most notably, the color scheme has migrated to red to match the board color of the Launchpad. You can configure the hardware the same way by selecting a COM port and target board. Almost everything is already working, but you should check the known issues page so that you don’t try to use a function that hasn’t been ported. Right now the list includes the random and random seed functions, as well as tone, notone, and micros. There is also an issue with analogWrite; it will only produce half the requested frequency and duty cycle can only be set from 0-50%. Still this is a great development if you’re most comfortable working from this IDE.