Music Visualization Generator With A Propeller

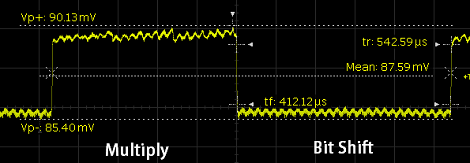
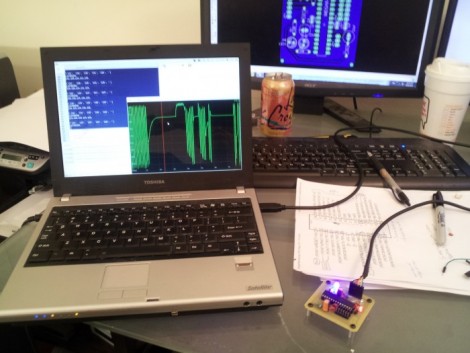
The folks over at Gadget Gangster have been working on a music visualization system using a Parallax Propeller. The visualizations are awesome in their early-90s demoscene way, and of course we love anything using the oft under-appreciated Propeller.

The project is called Video Beats and it generates music visualizations in the style of a blocky but very complex Atari 2600 game. There’s really not much to the build – just two RCA jacks for the audio input and video output along with a couple of resistors – but we do appreciate how nicely this project would fit in at a chiptunes show.

The Gadget Gangster team says the input isn’t limited to just audio – a potentiometer, accelerometer, or even a light sensor can be added to the build for a more dynamic output. After the break, you can see the demo of Video Beats, and a [Family Sohn] music video that used an early version of this circuit.

Continue reading “Music Visualization Generator With A Propeller”

Metal Detection Using An Inductor Instead Of A Clock Crystal.

This project from a few years back is an interesting take on a metal detector. Instead of building a detection circuit, [Bruno Gavand] replaced the external clock crystal with an inductor. Here you can see the inductor coil next to the PIC 12F683. You can see two components jumping from one breadboard to the other. These are smoothing capacitors on the inductor lines.

The watchdog timer for the chip is run by the internal RC oscillator. When the external crystal receives a pulse due to metal inducing a current in the coil, the value of the watchdog timer is compared to it. This data is filtered and if the proper parameters are present the green LED blinks. This is bicolor LED. If the inductor circuit is functioning properly it will blink red at power up. [Bruno] says that results will vary based on that inductor so you may need to try a few to get the calibration light to blink.

We’re thinking this would make a simple stud finder (by detecting where the nails/screws are in the wall). Check out the demo after the break, then let us know what you would use this for by leaving a comment.

Continue reading “Metal Detection Using An Inductor Instead Of A Clock Crystal.”

Light Programming For A Clock

+

So at first glance we were thinking there wasn’t much special about this clock. It’s based on an Arduino and displays the time using a character LCD screen. But then we realized that there’s no battery-backed RTC and no buttons. How the heck do you set the time on this thing? [Mossblaser] is using a light programmer to set the time using a computer screen.

We’ve tried nearly the same data transfer technique before, using a white and black flashing computer screen to push Manchester encoding to a light dependent resistor. We were met with limited success, but you can see that [Mossblaser’s] rig is much more reliable and we think there’s a few reasons behind this. First, he’s only sending five bits per seconds, a very slow speed when it comes to digital transmissions. This helps to make up for slow LCD screen refresh. Also, the LDR is surrounded by material on the back of the case that will help to block out ambient light. And finally, he’s using a smaller part of the screen instead of flashing the whole thing. This may result in more accurate timing. You’ve got to admit, this is pretty slick!

Continue reading “Light Programming For A Clock”

Firefly Cap Has No Battery And Is Meant For Indoor Light Harvesting

[Michael Ossman] wrote in to show off his newest project. He calls it the Firefly cap, which we think is something of a play on words. You can see that it serves as the cap of a Mason jar, but it also uses a supercap instead of a rechargeable battery.

Posts about firelfly jars go way back. And [Michael] mentions that a similar firefly project was his first embedded project. The concept uses LEDs suspended in a jar. When a light detector senses the target level of darkness, the lights inside begin to twinkle like their insect namesakes.

We like this design for two reasons. It’s aimed at collecting light in an indoor environment so you don’t have to worry about placing it in the sun. And it uses a super capacitor instead of a battery so this should truly keep going and going without wearing out the energy storage components. We also like the fact that although this is a Kickstarter project, everything you need to build your own is already available at the Github repository.

16FUSB — It’s Like V-USB For The PIC 16F628

If you have an idea for a fairly simple USB device but don’t want to invest in the more expensive microcontrollers, this library will be of interest to you. It’s a software implementation of the low-speed USB protocol for PIC 16F628. You can pick these up for around $2, and it just takes a few other components to complete the circuit. And hey, you don’t even need a proper PIC programmer to flash the code. This is the same chip for which we just saw an Arduino act as the programmer.

The circuit design looks exactly the same as the V-USB stack, which provides USB functionality to lower-end AVR microcontrollers. In addition to the chip you need a crystal oscillator, a couple of 3.6V zener diodes, and a handful of passive components. There are a couple of LEDs in the design, but we assume these are for feedback and are not crucial to the functionality of the circuit.

There’s no shortage of data included in the project post so you may want to bookmark this one for later reference.

Creating A Multimedia Elevator Ride

[Ben Peoples] works in theatrical electronics. Sounds like fun, and here’s an example of the kind of stuff he does. We’re not sure what event this installation was used for, but if the elevator ride needed something flashy just think of what the party room must have looked like. These HDTV screens on the ceiling of the elevator play different clips when the elevator is moving up or down. The challenge for [Ben] was to find a way to make it work without tapping into the elevator electronics or requiring any button presses.

The first attempt at sensing the elevator’s travel was done with an accelerometer. The problem with this approach is that an accelerometer only senses change in acceleration and this method proved to be fairly error prone. [Ben] switched over to a reflective sensor which performed quite well. Since most of these sensors will only work within about an eighth of an inch he ended up building his own with a LDR and a couple of amber LEDs.

[via Reddit]

Arduino PIC Programmer Writes To 18F Family

[Kirill] wrote in to share his Arduino-based PIC programmer. It is capable of writing to the 18F family of chips, including 18F2XXX and 18F4XXX. We think that’s pretty exciting because this line of chips has USB functionality and there are bootloaders out there that let you program them via USB. So if you wanted to build your own PIC dev-board (like this one) you can use your Arduino to flash the bootloader.

This post comes hot on the heels of the Arduino being used as a PIC 16F programmer. That hack has a rudimentary programming GUI, something that [Kirill] admits his lacks but has no plans to implement himself. Perhaps someone will do a little porting work to merge the projects, adding to the range of chips supported by this programming technique.