ATtiny Hacks: ATtiny10 Game – Doing More With Less

ATtiny Hacks Theme Banner

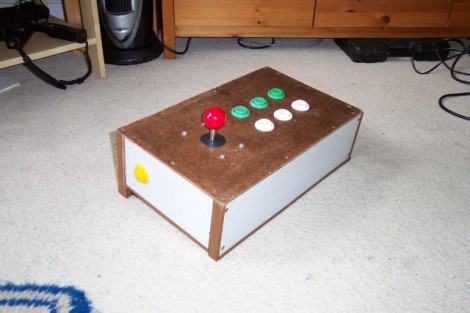
Okay, you’ve got a six-pin microcontroller with 1k of program memory, 32 bytes of SRAM, and it can’t be programmed using an In-System-Programmer. Do you think you can use it to develop a game? [Wrtlprnft] managed to build a Simon Says game based on the diminutive device that has four buttons and four LEDs. Judging from the video after the break, we’d say he nailed it!

There are so many design challenges here. First off, with only six pins total getting eight devices connected and working means doubling up on each I/O pin and using the reset pin as a doubled-up I/O. We’ve seen momentary push buttons on the same pins as LEDs before, so that’s not too hard to get working.

But if you’re using the reset pin how do you flash the thing? It doesn’t use the same ISP programming protocol that it’s bigger cousins do, so [Wrtlprnft] used an ATmega1284P to program it, hooking up to the three I/O pins and using a transistor to push 12V on the reset pin. But there’s still the matter of writing the code. It has half of the 32 registers you’d expect to find. He ended up ditching C and went straight to writing Assembly because of the diminished instruction set. It’s the first thing he’s written in Assembly, and a great way to learn the ropes.

It may not be as polished, but we do like it just as much as the Karate Chop Simon Says game which has a lot of other bells and whistles.

Continue reading “ATtiny Hacks: ATtiny10 Game – Doing More With Less”

USB Stick Propeller Development Board

[Parker Dillmann] is nearing the end of the prototyping process for his Propeller development board. He wanted a tool that let him work on projects without the need for a bunch of equipment, while still maintaining the ability to extend the hardware when necessary. His last dev board used a large piece of protoboard to host through hole components including the Propeller chip, 3.3V and 5V regultors, an SD card reader, and female pin headers. This version migrates to a PCB from a fab house and mostly surface mount components.

He decided to use a USB-stick design having been happy with some of TI’s prototyping tools. The Parallax branded development boards use an FTDI 232RL chip for easy programming and that’s what he’s gone with as well. A P8X32A chip in the QFP package was chosen for easier soldering than the smaller QFN option. There’s also a 64kb EEPROM on board to give you plenty of room for your SPIN programs. All the pins are broken out to DIL female headers and there’s a power header on the end opposite the USB plug. [Parker] plans to do a bit of testing to make sure there’s no problems with signal routing below the 5Mhz crystal footprint. This run of prototypes came from the Seeed Studios Fusion PCB servcie–he got more than 10 boards for a total of $13… that’s almost unbelievable.

ATtiny Hacks: Reading From A Motorcycle’s J1850 Data Bus

ATtiny Hacks Theme Banner

[TZ] has been using ATtiny microcontrollers to read and pass along data from his Harley Davidson motorcycle. The image you see above is using an ATtiny 4313 to read data from the J1850 bus.

The J1850 protocol is an older standard which may not be available in newer vehicles. But if your vehicle has it, you may be able to tap into the bus through an ODB-II connector. [TZ] is decoding the data with the 4313, then using an inexpensive Bluetooth module to send the information to an Android tablet. Fortunately, someone has already written a nice GUI to display the speed and tachometer.

This isn’t the only approach to data harvesting with an ATtiny chip that he’s explored. There’s a second video after the break that shows a much more complicated setup. It still harvests the J1850 data in the same way, but also uses additional I2C sensors and an embedded ARM board to gather GPS data. Everything is pushed to his smart phone, which displays current gear, RPM, speed, engine temperature, fuel level, and GPS information via a WiFi connection.

Continue reading “ATtiny Hacks: Reading From A Motorcycle’s J1850 Data Bus”

Karate Chop Is Simon Without All The Touching

[Alan Parekh] and his daughter [Alexis] just premiered their entry in the Avnet Dog Days of Summer contest. It’s a game called Karate Chop that is basically an electronic Simon Says. The video after the break shows a demonstration of the device. When switched on it’ll play a little tune and start cycling the LEDs on the front of the case. Players interact by breaking the infrared beams in the two cutouts on either side of the case. You need to keep your hand flat to do this, which is where the name comes from. There are four different game modes which are selected at the start of the game. There are two difficulty levels of a Simon Says game which shows the player a pattern in light and sound, then watches for the user to repeat that pattern back. The other mode that [Alexis] demonstrates is a reflex game which requires the player to quickly react to randomly illuminated LEDs.

The circuit is built on a breadboard hiding behind the front bezel and uses a PIC 16F1827 microcontroller to drive the game. The case itself is made from laser cut MDF and plywood. We’re not sure how much time [Alan] spent on the case, but we think it looks wonderful. If you’re planning to participate in the contest you better get rolling, the entry deadline is tomorrow.

Continue reading “Karate Chop Is Simon Without All The Touching”

Microchip Puts Up Two $1000 Prizes For USB And TCP/IP Stacks!

microchip_call_for_open_source

A couple of weeks ago we put up a post titled Addressing Microchip’s open source problem where we talked about some of their shortcomings as far as open source code goes, specifically the TCP/IP stack and the USB stack. The comments were predictably fairly negative. The interesting part here is that Microchip actually listened. If you read through all of the comments, you will get a bit of an inside look at what is going on internally at Microchip. At the very end, [Marc] from Microchip left a couple of comments outlining a pair of prizes for independently ported stacks for TCP/IP and USB. Microchip can’t fully open the ones that they have because of legal reasons so they need the help of the development community and they are putting up $1000 for each one to prove that they are serious. If you follow this link you will arrive at a page outlining the rules for the contest.

The gauntlet has been dropped! Do you have chops to pull this off and earn yourself a cool $1000?

ATtiny Hacks: Look Ma, No Batteries!

ATtiny Hacks Theme Banner

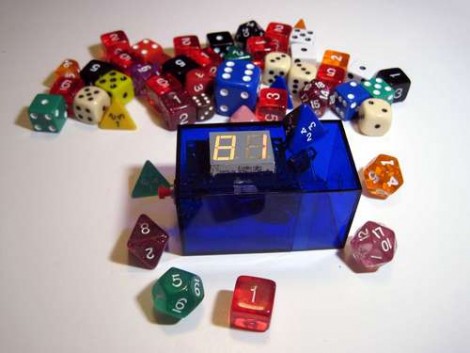
[Gadre] built his own ATtiny project without using any batteries. It’s an electronic Dice (or die if you’re being critical) which uses induction to charge a storage capacitor to act as the power source. The voltage generator is made from a tube of Perspex which houses a set of rare-earth magnets. At the enter of the tube [Gadre] machined a channel wich accepts about 1500 windings of 30 AWG magnet wire. When someone shakes the tube back and forth the magnet passes the wire, inducing a current.  The product is stored in a 4700 uF capacitor, which feeds a boost converter to power the rest of the circuit.

The ATtiny13V that controls the circuit is running its internal RC oscillator at 128 kHz, the lowest setting possible in order to minimize power consumption. After a good shake the user can press a button to roll the die, which is then displayed for several seconds on a group of seven LEDs. See for yourself in the video after the break.

Continue reading “ATtiny Hacks: Look Ma, No Batteries!”

Spinning UV Light Writer

uv_light_writer_ring

[David] has always wanted use UV LEDs to write on a phosphorescent surface ever since saw an article about it on Make. He accidentally purchased UV LEDs when he meant to buy purple ones, so he figured that his mistake was all the reason he needed to give UV light writing a try.

He built a PIC16F628 UV POV board using the LEDs, and while manually swiping the writer across various glow in the dark surfaces was cool, he wanted to keep the POV board stationary, moving the writing medium instead. He bought some phosphorescent vinyl, but found that it wasn’t too flexible, meaning he could not use a conveyor belt approach for his display. One day it dawned on him that a vinyl ring might work pretty well, and using a motor from an old cassette player, he constructed the UV writer you see above.

It seems to work pretty well despite a small flaw in the UV ring, and while [David] is happy with the results, he already has plenty of ideas in mind for the second revision.

Check out the video of his UV light ring in action after the jump.

[Thanks, Riley]

Continue reading “Spinning UV Light Writer”