Bread Head Makes AVR Programming A Snap

bread_head_quick_avr_programming_header

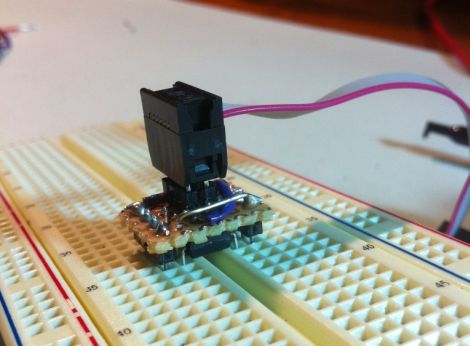
[Quinn] over at Blondihacks has been working with AVR microcontrollers a lot recently, and wanted a quick way to program the ATtiny13a (her current AVR of choice) while the chip is still seated in a breadboard.

To speed up code revision and testing, she built a small programming header that she calls the Bread Head. The device is wonderfully simplistic, consisting of little more than snappable header pins and a bit of upside-down protoboard.

She soldered six headers to the top (formerly the bottom) side of the board, while a set of eight oversized headers were soldered to the opposite side of the programmer. Small bits of wire were soldered in to connect all of the appropriate pins together before [Quinn] slipped the header snugly over the top of the ATtiny and gave it a quick test. Everything worked perfectly, so she slathered in in epoxy for sturdiness and called it a day.

She says that the programmer works so well that she’s likely to make a similar header for other common AVRs too.
Getting The Lead Out Of The Arduino Runtime

mhvlib_arduino_efficiency_runtime

Ah, the Arduino.

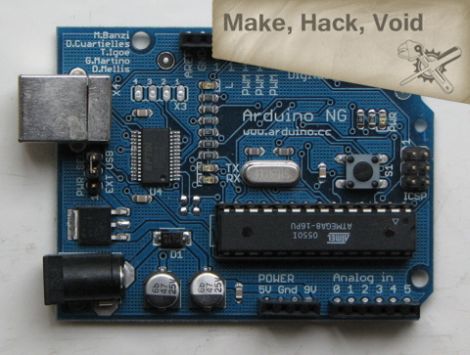
Love it or hate it, there’s no denying that part of its accessibility comes at the expense of speed and efficiency. We honestly like the platform as well as all of the others out there, because we believe that everything has its proper place and purpose. The crew over at Make, Hack, Void think that the Arduino dev boards are well and good, but that the core of the Arduino runtime could use some improvement.

They have taken it upon themselves to dig deep into the code and make some of the improvements that many advanced Arduino users have been clamoring for. Their MHVLib is an efficiency oriented runtime library which works on all AVR microcontrollers, whether they be standalone uCs or Arduino-branded hardware.

They have changed the way that the Arduino handles pin and port information, as well as how object and buffers are allocated in memory. Their code still relies on an Arduino-style bootloader, though they recommend Optiboot since it’s about a quarter of the size of the Arduino version.

There’s a complete list of what has been implemented available on their site, and you can grab the code via their GIT repository if you want to give it a try yourself.

Hacking SPOT Personal Satellite Tracker To Pass More Information

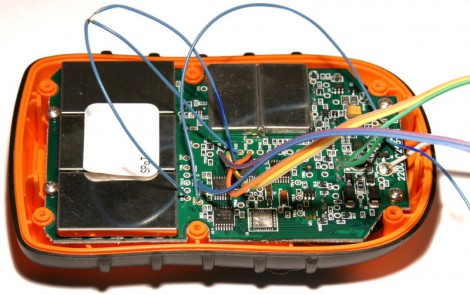
For less than $100 you can buy a little tracking module that will upload your location to a satellite. But you’ll only get latitude and longitude information. [Natrium42] spent some time reverse engineering the hardware, and the communications protocol, to allow custom data to be transferred using a SPOT module.

The flat fee for the hardware includes a one-year service plan allowing you to tack your device on the SPOT website. [Natrium42] started poking around in the transmitted data packages, and figured he could push custom messages like altitude data if he had some way to encode it as a valid latitude/longitude package. He found that location data is transmitted as two sets of three bytes each. The four least significant bits of each set get rounded by the server, leaving a total of 40 usable bits between the two data sets. He wrote encoding and decoding functions that will allow you to transfer whatever information you want.

So what is this good for? To get the process working he removed the MSP430 microcontroller from the board and is using his own replacement. So you can transmit GPS data from the onboard module, your own module, or sensor data for anything you’re able to hook up the to the replacement uC.

Passive RFID Tag Cloning

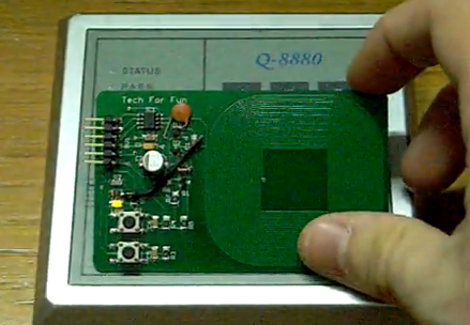
Here’s an open source RFID cloner design that is about the same size as a standard RFID key card. It doesn’t need a battery to capture key codes, just the magnetic field generated by an RFID reader. You can see the functionality demonstrated in the video after the break. By holding the bottom button as the cloner is moved in range of the RFID reader, the microcontroller goes into learning mode. Now just hold up the card you wish to clone and the LED just above the buttons will light up when it has captured the code. Now the device will act just as the original RFID tag did.

This was developed by [Ramiro], the same person who built the barebones RFID emulator we saw a few days ago. When researching that story we complete skipped over this gem. He’s posted a ton of information on the tag itself. It doesn’t look like he has any PCBs or kits left, but the schematic and code are available for download. You should check in on the design considerations section because it discusses the read/write function that isn’t built into the current version. That’s why you see some add-on components on the hardware used in the demo video.

It seems like this is a lot more user-friendly than the last RFID spoofer we looked at.

Continue reading “Passive RFID Tag Cloning” →

Basic Micro ATOM Nano Giveaway

basic_micro_atom_nano_giveaway

UPDATE:
As several readers have already noted, these things sold out very quickly – in less than 15 minutes!  Big thanks to Basic Micro!

If you have been considering the purchase of a Basic ATOM Nano product, but you weren’t quite ready to lay down the cash for a dev board and Nano microcontroller, boy to we have a deal for you. The kind folks at Basic Micro informed us that they have 55 Basic ATOM Nano Development boards, complete with Nano 28 microcontrollers that they would like to give away to the Hack a Day community for the low, low cost of $0.

That’s right. Zero. Zip. Zilch.

The dev boards come complete with an LCD header, a small solderless breadboard, USB connectivity, a pair of servo connectors, and more! The Nano 28 is based on the PIC16F886 microcontroller, and features an 8MHz clock,  24 I/O pins, 14K of flash memory, 368 bytes of memory, and 256 bytes of EEPROM storage.

The total value of the package is just around $50, so this is an incredible deal! Basic Micro will even ship your kit to you for free via USPS.

Just add this item to your shopping cart on the Basic Micro site, and use the coupon code “freehack” at checkout – they’ll take care of the rest.

There are a few caveats to this giveaway, and they are as follows:

1) To participate, you must reside within the contiguous United States – i.e. anywhere in the lower 48 (Sorry readers from Alaska or Hawaii!)

2) The offer is limited to one kit per individual. Let’s not be greedy here, give your fellow hackers a chance at this deal as well.

3) Once these dev boards are sold out, they are gone for good. There are no rain checks or back orders available.

4) You must build something cool with your kit and share it with us in our forums or via the tip line*

*Not really, but it would be pretty cool if you did.

[Thanks to Dale at Basic Micro for putting this together for us!]

MSP430-based Wristwatch Project

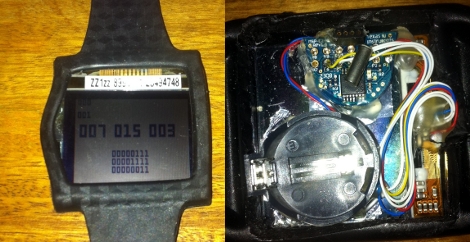
[Nav] is working on a scratch-built wristwatch. Although it is based on an MSP430 microcontroller, it’s not the ready-to-hack ezCronos that you might be thinking of. Instead, [Nav] started with a different TI development tool that we’ve looked at before, the ez430-F2013.

The breakout board for the F2013 is small enough to meet his needs, but still provides easy soldering with 0.1″ vias that break out each pin. To make sure the timepiece is accurate he added a 32.768 kHz clock crystal. A small, square, LCD screen acts as the face of the watch, but we didn’t find specific part information for the display.

Currently the watch can run for a few days on the CR2032. We’d bet some work with sleep modes for the microcontroller can help with that. The watch has a couple of buttons that let you control it, and [Nav] discovered that he could fit everything into the watch case for an iPod nano. That’s creative!

We’ve seen other hacks with tiny batteries. The next logical step here would be to swap out the disposable coin cell for something that can be topped off with an external charger.

Running The Linux Kernel On A DE0-nano FPGA Board

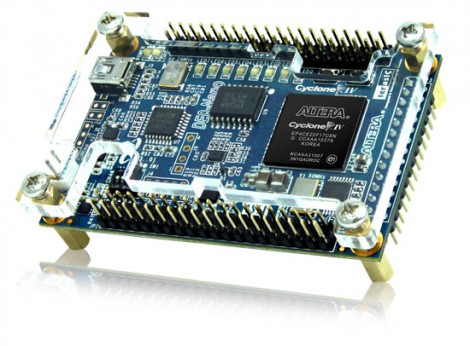
[Mike] has been filling up a rather intense wiki entry outlining how to run uClinux on a DE0-nano FPGA board. This is an inexpensive dev board that will run you somewhere between $80 and $100. Right off the bat he goes into a hefty list of the reasons that this is a foolish activity. To name a few: Once you’ve complete the build the device will be tethered for reboot.  This board doesn’t have Ethernet hardware and TCP/IP is one of the beast features of the uClinux kernel. And the FPGA tools are closed-source, which doesn’t often mesh with the ideals of Linux developers. But we still like to see what it really takes to get these large-scope firmware builds to compile and load correctly.

After his preamble you’ll find three main chunks. The first deals with setting up the toolchain on Fedora 14. From there, he installs packages necessary for cross-compiling, pulls down the source packages, and gets to work. Once the kernel is compiled and running on the FPGA [Mike] goes on to show you how to build out a simple hardware add-on in the form of a couple of LEDs connected to extra FPGA pins. The final portion of the wiki details rolling support for toggling the LEDs into the software distribution.