Three-Stage Thrust Vectoring Model Rocket With Tiny Flight Computers

Flying a thrust-vectoring rocket can be a challenge, and even more so if you stack multiple stages and a minimalist flight computer on top of it all. But [Joe Barnard] is not one to shy away from such a challenge, so he built a three stage actively guided rocket named Shreeek.

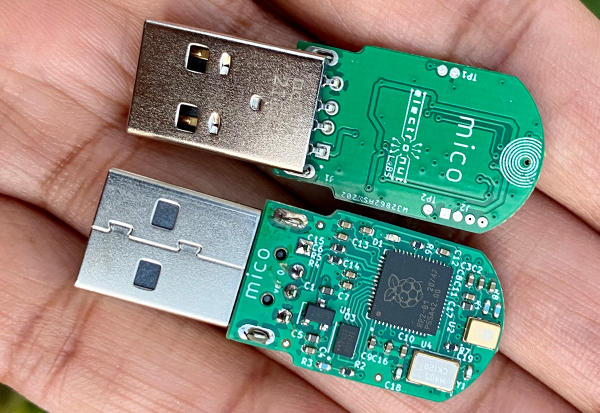
[Joe] is well known for his thrust-vectoring rockets, some of which have came within a hair’s breadth of making a perfect powered landing. Previous rockets have used larger, more complex flight computers, but for this round, he wanted to go as small and minimalist as possible. Each stage of the rocket has its own tiny 16 x 17 mm flight computer and battery. The main components are a SAM21 microcontroller running Arduino firmware, an IMU for altitude and orientation sensing, and a FET to trigger the rocket motor igniter. It also has servo outputs for thrust vector control (TVC), and motor control output for the reaction wheel on the third stage for roll control. To keep it simple he omitted a way to log flight data, a decision he later regretted. Shreeek did not have a dedicated recovery system on any of the stages, instead relying on its light weight and high drag to land intact

None of the four launch attempts went as planned, with only the first two stages functioning correctly in the test with the best results. Thanks to the lack of recorded flight data, [Joe] had to rely on video footage alone to diagnose the problems after each launch. Even so, his experience diagnosing problems certainly proved its worth, with definitive improvements. However, we suspect that all his future flight computers will have data logging features included.

Continue reading “Three-Stage Thrust Vectoring Model Rocket With Tiny Flight Computers”

Pi Pico Emulates ROM For Speedy Retro Hacking

If you’ve ever worked on a system that loads its software from a ROM or EPROM, you know how much of a hassle it can be to make frequent changes to the code. Pulling the chip, flashing it, and sticking it back into the socket each time you change a line isn’t anyone’s idea of a good time. Which is why [Nick Bild] has come up with the PicoROM, a way to emulate a ROM chip using the Raspberry Pi Pico.

With the Pi Pico standing in for the original ROM, updating firmware takes a fraction of the time and doesn’t require you to actually disconnect any of the hardware. [Nick] had done something similar with FPGAs in the past, but the far cheaper and easier to work with Pi Pico makes this version particularly appealing. The secret to getting it to work is the overclocking potential of the Pico, which he says has been pushed to 400 MHz for this particular application.

PicoROM on a breadboard.

The downside is that you can’t access the Pico’s onboard flash when the chip is running that fast. To get around that limitation, all of the code is loaded into the microcontroller’s RAM. With a healthy 264 KB of memory this isn’t really a problem when emulating 32 KB chips, but [Nick] says his method would quickly fall apart for larger ROMs.

Beyond the Pi Pico itself, [Nick] is using a trio of 74LVC245AN 8-bit logic level shifters so the chip can talk to the 5 V logic of his homebrew 6502 computer. With everything wired up on a simple breadboard, PicoROM has no trouble serving up the operating system as it hums along at 2 MHz.

Of course, a modern high-performance microcontroller isn’t strictly necessary. In the past we’ve covered devices that could emulate an EPROM using 1990s era silicon.

SYPHCOM, the compact CO2 sensor

Compact Sensor Keeps You Safe By Watching CO2 Levels

Remember when work meetings were just a bunch of people filling up a small, poorly ventilated room with their exhaled breath? Back in the good old days, all you had to worry about was being lulled to sleep by a combination of the endless slide deck and the accumulation of carbon dioxide. Now? Well, the stakes may just be a little bit higher.

In either situation, knowing the CO2 level in a room could be a handy data point, which is where a portable CO2 sensor like this one could be useful. Or at least that’s [KaRMaN]’s justification for SYPHCOM, the “simple yet powerful handheld carbon dioxide meter.” The guts of the sensor are pretty much what you’d expect — an Arduino Pro Micro, a SenseAir S8 CO2 sensor board, and the necessary battery and charging circuits. But the build does break the mold in a couple of interesting places. One is in the choice of display — a 1980s-era LED matrix display. The HDSP2000 looks like it belongs in a nice bench meter, and is surprisingly legible without a filter. It looks like it flickers a bit in the video below, but chances are that’s just a camera artifact.

The other nice part of this build is the obvious care [KaRMaN] put into making it as small as possible. The layout of boards and components is very clever, making this a solid, compact package, even without an enclosure. We’ve seen CO2 sensors with more features, but for a quick check on air quality, SYPHCOM looks like a great tool.

Continue reading “Compact Sensor Keeps You Safe By Watching CO2 Levels”

ESP8266 weather widget with touchscreen display

Nothing Should Cloud The Build Of This Wieldy Weather Widget

Weather is one of those things that seems to be endlessly interesting to hackers. We may decry the notion that weather can be accurately predicted two days out, much less seven, but if there’s an extended forecast available, by gosh we’re gonna take a gander at it.

So why pick up your phone or open a browser tab every time you want to check the temperature? If you’re so into it, you should build a desktop weather widget. [opengreenenergy] has written a great guide to a tidy build of this classic and oh-so-useful project that covers everything from the soldering to obtaining an API key. Inside is an ESP8266 and a 2.8″ touch screen display that shows localized conditions via Open Weather Map. The main screen shows the time, date, current weather, 7-day forecast, and the moon phase for each day, and subsequent screens go into further detail. It’s informative without being busy.

We love the streamlined look of the snap-fit enclosure. This may be a fairly simple project, but the build as designed is challenging due to the space constraints inside. Check out the video after the break, which features the venerable Stickvise.

What? You’ve never heard of the Stickvise? You must be new around here. Allow me to introduce you two.

Continue reading “Nothing Should Cloud The Build Of This Wieldy Weather Widget”

Pomodachi: A Productivity Pet You Feed By Working

Being productive doesn’t have to be a lonely endeavor. Even if you’re a lone wolf, who wouldn’t benefit from having a cute little productivity pet to cheer them on? That’s the idea behind [droxpopuli]’s Pomodachi, which combines a hardware implementation of the Pomodoro technique with a virtual pet. It adds some fun, but doesn’t overly gamify time tracking to the point of distraction. And this is way more fun than just sticking a pair of googly eyes on a tomato-shaped timer.

Inside the box is an Adafruit HalloWing M4 Express and a NeoKey FeatherWing with two Kailh box white switches for a satisfying clack. [droxpopuli] printed up a PyPortal-inspired case and added a glass lens for a spiffy tube TV look.

Pomo himself is a cute little jack-o-lantern looking creature with a teddy bear face and no arms or legs. He could eat with his face, but prefers to be fed. That’s where you come in. You feed him by completing a set of four 20-minute work intervals.

Don’t worry about keeping track of time, because he does that for you and spends the time foraging for food. When it’s break time, Pomo lets you know and suggests an activity. This is when you press the button and feed him. If your productivity begins to flag a bit, don’t freak out — there’s a multiplier for catching up, and you have seven chances before Pomo runs away forever.

The Pomodoro Technique is pretty great for productivity, and it’s versatile, too. Here’s a hydration-based Pomodoro that will flood your desk if you don’t drink enough water.

[via Hackaday.io]

Hacked IKEA Air Quality Sensor Gets Custom PCB

Last month we brought word of the IKEA VINDRIKTNING, a $12 USD air quality sensor that could easily be upgraded to log data over the network with the addition of an ESP8266. It only took a couple of wires soldered to the original PCB, and since there was so much free space inside the enclosure, you didn’t even have to worry about fitting the parasitic microcontroller; just tape it to the inside of the case and button it back up.

Now we’ve got nothing against the quick and dirty method around these parts, but if you’re looking for a slightly more tidy VINDRIKTNING modification, then check out this custom PCB designed by [lond]. This ESP-12F board features a AP2202 voltage regulator, Molex PicoBlade connectors, and a clever design that lets it slip right into a free area inside the sensor’s case. The project description says the finished product looks like it was installed from the factory, and we’re inclined to agree.

Nothing has changed on the software side, in fact, the ESP-12F gets flashed with the same firmware [Sören Beye] wrote for the Wemos D1 Mini used in his original modification. That said [lond] designed the circuit so the MCU can be easily reprogrammed with an FTDI cable, so just because you’re leaving the development board behind doesn’t mean you can’t continue to experiment with different firmware builds.

It’s always gratifying to see this kind of community development, whether or not it was intentionally organized. [lond] saw an interesting idea, found a way to improve its execution, and released the result out into the wild for others to benefit from. It wouldn’t be much of a stretch to say that this is exactly the kind of thing Hackaday is here to promote and facilitate, so if you ever find yourself inspired to take on a project by something you saw on these pages, be sure to drop us a line.

Incredibly Slow Films, Now Playing In Dazzling Color

Back in 2018 we covered a project that would break a video down into its individual frames and slowly cycle through them on an e-paper screen. With a new image pushed out every three minutes or so, it would take thousands of hours to “watch” a feature length film. Of course, that was never the point. The idea was to turn your favorite movie into an artistic conversation piece; a constantly evolving portrait you could hang on the wall.

[Manuel Tosone] was recently inspired to build his own version of this concept, and now thanks to several years of e-paper development, he was even able to do it in color. Ever the perfectionist, he decided to drive the seven-color 5.65 inch Waveshare panel with a custom STM32 board that he estimates can wring nearly 300 days of runtime out of six standard AA batteries, and wrap everything up in a very professional looking 3D printed enclosure. The end result is a one-of-a-kind Video Frame that any hacker would be proud to display on their mantle.

The Hackaday.IO page for this project contains a meticulously curated collection of information, covering everything from the ffmpeg commands used to process the video file into a directory full of cropped and enhanced images, to flash memory lifetime estimates and energy consumption analyses. If you’ve ever considered setting up an e-paper display that needs to run for long stretches of time, regardless of what’s actually being shown on the screen, there’s an excellent chance that you’ll find some useful nuggets in the fantastic documentation [Manuel] has provided.

We always love to hear about people being inspired by a project they saw on Hackaday, especially when we get to bring things full circle and feature their own take on the idea. Who knows, perhaps the next version of the e-paper video frame to grace these pages will be your own.

Continue reading “Incredibly Slow Films, Now Playing In Dazzling Color”