[Jānis]’s entry for the Flashing Light Prize was doomed from the start. Or should we say Doomed? It was a complicated mess of Rube-Goldbergery that essentially guaranteed that he’d have no time for making a proper video and submitting and entry. But it also ran Doom. Or at least ran on Doom.
(Note: [Jānis] sent us this hack in the e-mail — there’s no link for this blog post. You’re reading it here and now.)
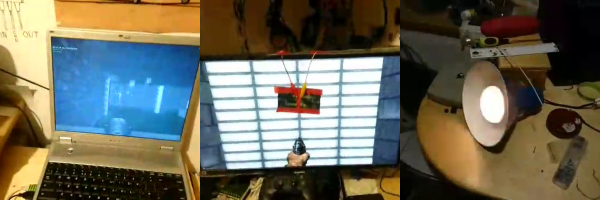
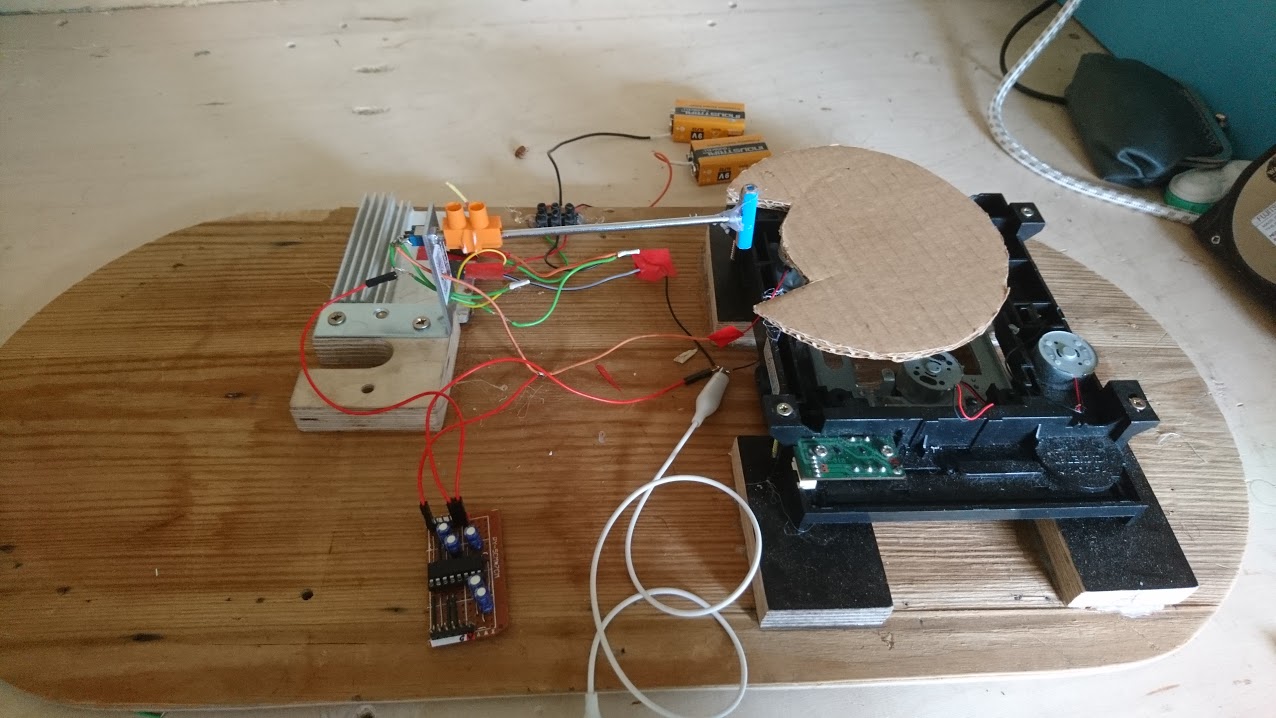 It starts with a DC motor salvaged from a DVD player that spins a wheel that flips a switch back and forth, which in turn flips the polarity of the power on the motor. It’s like a most-useless machine, but with no human involved. This contraption periodically presses a button on a gutted mouse.
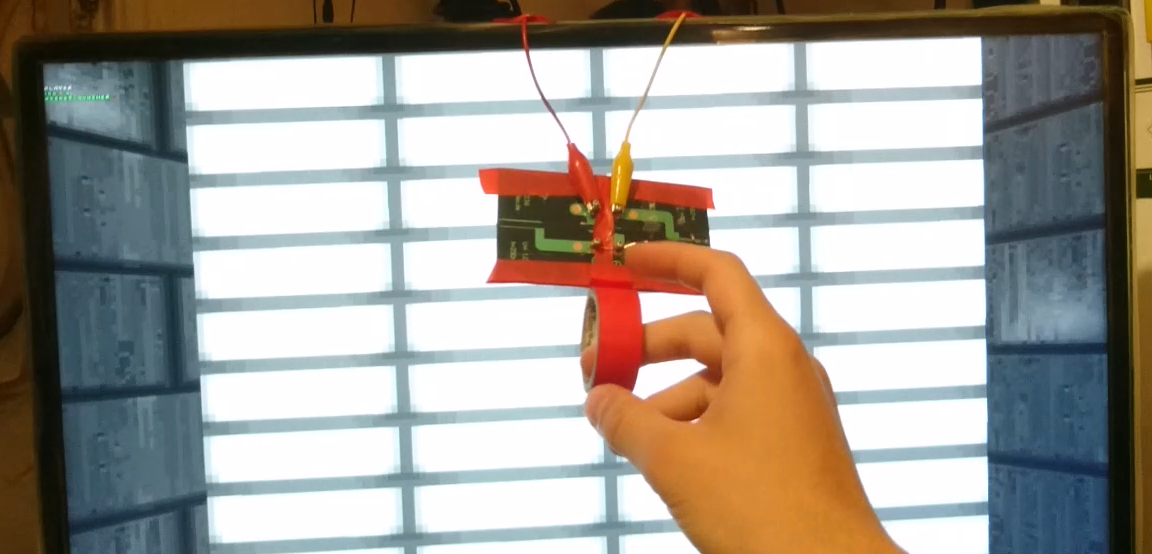 Pressing the mouse button on one computer fires a rocket in a multiplayer Doom game, and triggers a light on a wall when it does. A second Doom player, on another computer, sits facing the wall. Solar cells dangled in front of Player 2’s monitor emit high and low voltages as the LCD blinks on and off. That output goes into the ADC of an Arduino clone that drives a transistor that drives a relay that turns on and off a lightbulb.
We had a lot of fun watching all of the entries for the Flashing Light Prize, and we were also stoked by the presence of so many Hackaday regulars in the Honourable Mention list. (Sad to see [Sprite]’s ping-flasher didn’t make the cut!)
If you, like [Jānis] are still sitting on a design, don’t fret. It looks like the prize will make a return next year. Woot!