When you think about additive manufacturing, thoughts naturally turn to that hot-glue squirting CNC machine sitting on your bench and squeezing whatever plastic doodad you need. But 3D printing isn’t the only way to build polymer structures, as [Riley] shows us with this fascinating attempt to create electrospun heart valves.
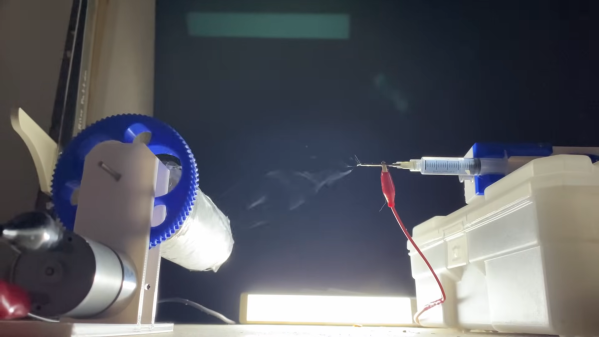
Now, you may never have heard of electrospinning, but we’ll venture a guess that as soon as you see what it entails, you’ll have a “Why didn’t I think of that?” moment. As [Riley] explains, electrospinning uses an electric field to build structures from fine threads of liquid polymer solution — he uses polycaprolactone (PCL), a biodegradable polyester we’ve seen used in other medical applications, which he dissolves in acetone. He loads it into a syringe, attaches the positive terminal of a high-voltage power supply to the hypodermic needle, and the negative terminal to a sheet of aluminum foil. The charge turns the PCL droplets into fine threads that accumulate on the foil; once the solvent flashes off, what’s left is a gossamer layer of non-woven plastic fabric.
To explore the uses of this material, [Riley] chose to make an artificial heart valve. This required a 3D-printed framework with three prongs, painted with conductive paint. He tried a few variations on the design before settling on a two-piece armature affixed to a rotating shaft. The PCL accumulates on the form, creating a one-piece structure that can be gingerly slipped off thanks to a little silicon grease used as a release agent.
The results are pretty impressive. The structure bears a strong resemblance to an artificial tricuspid heart valve, with three delicate leaves suspended between the upright prongs. It’s just a proof of concept, of course, but it’s a great demonstration of the potential of electrospinning, as well as an eye-opening look at what else additive manufacturing has to offer.