Blinking LEDs For A Timeless Fountain

We’ve seen a few of these builds before, but the build quality of [Mathieu]’s timeless fountain makes for an excellent display of mechanical skill showing off the wonder of blinking LEDs.

This timeless fountain is something we’ve seen before, and the idea is actually pretty simple: put some LEDs next to a dripping faucet, time the LEDs to the rate at which the droplets fall, and you get a stroboscopic effect that makes tiny droplets of water appear to hover in mid-air.

Like earlier builds, [Mathieu] is using UV LEDs and is coloring the water with fluorescein, a UV reactive dye. The LEDs are mounted on two towers, and at the top of the tower is a tiny, low power IR laser and photodiode. With the right code running on an ATxmega16A4, the lights blink in time with the falling water droplet, making it appear the drop is hovering in midair.

Blinking LEDs very, very quickly isn’t exactly hard. The biggest problem with this build was the mechanics. The frame of the machine was machined out of polycarbonate sheets and went together very easily. Getting a consistent drip from a faucet was a bit harder. It took about fifteen tries to get the design of the faucet nozzle right, but [Mathieu] eventually settled on a small output hole (about 0.5 mm) and a sharp nozzle angle of about 70 degrees.

[Mathieu] created a video of a few hovering balls of fluorescence. You can check that out below. It’s assuredly a lot cooler in real life without frame rate issues.

Continue reading “Blinking LEDs For A Timeless Fountain”

Brass Clock Face Etched With PCB Techniques

Over the last few months, [Chris] has been machining a timepiece out of brass and documenting the entire process on his YouTube channel. This week, he completed the clock face. The clock he’s replicating comes from a time before CNC, and according to [Chris], the work of engraving roman numerals on a piece of brass would have been sent out to an engraver. Instead of doing things the traditional way, he’s etching brass with ferric chloride. It’s truly artisan work, and also provides a great tutorial for etching PCBs.

[Chris] is using a photoresist process for engraving his clock dial, and just like making PCBs, this task begins by thoroughly scrubbing and cleaning some brass with acetone. The photoresist is placed on the brass, a transparency sheet printed off, and the entire thing exposed to four blacklights. After that, the unexposed photoresist is dissolved with a sodium carbonate solution, and it’s time for etching.

The clock face was etched in ferric chloride far longer than any PCB would; [Chris] is filling these etchings with shellac wax for a nice contrast between the silvered brass and needs deep, well-defined voids.

You can check out the video below, but that would do [Chris]’ channel a disservice. When we first noticed his work, the comments were actually more positive than not. That’s high praise around here.

Continue reading “Brass Clock Face Etched With PCB Techniques”

Pneumatic Multiplexer

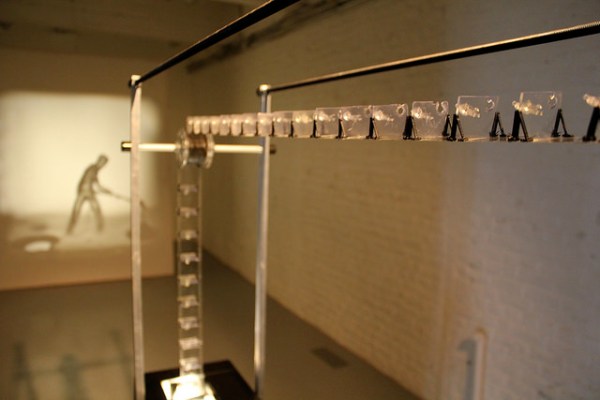
This is a pretty cool project [Sebastian Morales] is working on – a 3D printed Pneumatic Multiplexer. Large interactive installations, kinetic art and many other applications require large numbers of actuators to be controlled. For these type of projects to work, a large number of actuators equals higher resolution and that allows the viewer to be captivated by the piece.

The larger the system becomes, the more complex it becomes to control all of those actuators. [Sebestian] wanted to move a large number of components with a relatively low number of inputs. He thought of creating a mechanical equivalent of the familiar electronic X-Y matrix that can control large quantities of outputs using only a few inputs – in a more descriptive form, Outputs=(Inputs/2)^2.

airlogic_01He looked at chemical reactions that change liquids in to gases, but that seemed pretty complicated. Refrigerants used in air conditioning looked promising, but their handling and safety aspects looked challenging.

Eventually, he decided to look at using “air logic“. Air logic uses pneumatic devices to create relays, limit switches, AND gates, NAND gates, OR gates, amplifiers, equivalent to electrical circuits. Electrical energy is replaced with compressed air. His plan was to build a multiplexer whose elements would open only if the combination of pressure between both lines was the right one. As in electronics, NAND logic is easy to implement. A moving element creates a seal and only allows air out if the bottom line was low and the top line was high.

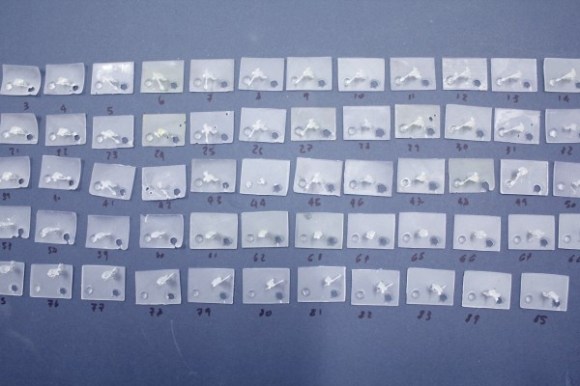
He had access to a high resolution, resin based 3D printer which allowed him to create fully air-tight systems. He started with prototyping a small 4×4 matrix to test out his design, and had to work through 6 to 7 iterations before he could get it to work. The next step was to create a larger matrix of 100 elements controlled by 20 inputs (10×10 matrix). He created Omnifarious – a kinetic sculpture demonstrating the concept of shapeshifting objects. The Omnifarious is a hexecontahedron which would be able to transform its surface to render different geometries via 59 balloons on its surface. Below, you can check the videos of his progress building the various prototypes and another video showing the Omnifarious sculpture.

Continue reading “Pneumatic Multiplexer”

Steering High Altitude Rockets With Cold Gas

Amateur rocketry has been popular for ages, with designs ranging from small toy-scale model rockets to large-scale liquid fuel designs with steerable fins. A team out of Portland State works on some large-scale amateur rockets that can fly to very high altitudes. Since the atmosphere is thin the further the rocket flies, steering fins aren’t incredibly effective once the rockets reach high altitude. A team of students tackled this problem by designing a cold-gas reaction module to steer high-altitude rockets.

The team chose nitrogen as their cold-gas propellant, which is stored in a carbon fiber tank. After passing through a regulator, the gas is routed to several gas solenoids and then to a custom 3d-printed de Laval nozzle. An Intel Edison is used to drive the system, which calculates the rocket’s orientation with a MPU-6050. Control loops use the orientation information and fire gas through any of several nozzle ports to steer the rocket.

The system does have some limits: the solenoids are either on or off, not variable, and they aren’t incredibly fast. Even with these limitations, the team is confident that their module will work great when it embarks on its maiden flight in a brand-new custom rocket next year. The team was also awesome enough to make all of their design files open-source so you can build your own (although they warn that it’s a bit complicated and dangerous). Check out the video after the break to see a test-run of the cold-gas reaction system.

Thanks for the tip, [Nathan]!

Continue reading “Steering High Altitude Rockets With Cold Gas”

Give Me A Welder And Rod Stock And I’ll Build You The World

Metal fabrication is a an art that often goes under appreciated. The ability to take common stock in the form of sheet, pipe (square or round), and in this case rod, and make it into anything is intoxicating for the artist and super villain inside of each of us. Recently [asciiArtVandaly] took on an interesting job and was thoughtful enough to make a photo album of the process. He literally created the world out of metal.

The build is a wire-frame globe. The latitude and longitude rods are rolled to the proper arc, but holding them in place is a bit of a trick. This image shows the welding jig built just for this project. It has large and small nobs to match the increasing spacing of the rods, with washers holding down ever other joint. If you want to see an example of rod-rolling check out the unrelated How It’s Made segment found after the break.

This jig is visually stunning to look at, but the math used to lay something like this out is only mildly interesting compared to the work done to add the continents to the piece. Each of these were cut out and then hand hammered to match the curve of the globe before being welded in place and outfitted with lighting for cities. That’s a skill you can’t get without a lot of practice — and get this, [asciiArtVandalay] does it as a hobby. Who knew robot engineers needed hobbies?

The finished globe is about eighty pounds of stainless steel. The build ends up being corporate art for a company sure to turn [Tyler Durden’s] eye.

Continue reading “Give Me A Welder And Rod Stock And I’ll Build You The World”

Quadrotor Control Systems And Kerbal Harriers

Kerbal Space Program, the game that teaches engineers at JPL and SpaceX the basics of rocket design and orbital mechanics, recently had a giant update. There are now science contracts that require you to fly Kerbals all over their tiny globe, collect data, and transmit it back to the Kerbal Space Center. As would be expected, this is a grind for XP, and the contracts sometimes don’t make sense – you need to collect data from cliff faces and mountain tops. Landing a Kerbal jet at these places is hard.

[Matt Thiffault] wanted to do these science contracts more efficiently. The best way to get to a remote location without a landing strip would be a helicopter, but a harrier jump jet would do just as well. This isn’t supported in the stock game, so [Matt] wrote a complete control system for four engines to control a hovering Kerbal jet.

[Matt]’s work is built on kOS, a scriptable autopilot mod for Kerbal that was originally intended to be something like the Apollo Guidance Computer. People have been using it to make computerized skycranes and automated rendezvous and docking programs, but these are actually relatively simple examples; there’s far more math involved in flying a quadcopter than there is getting into orbit.

To build his automated hovering harrier, [Matt] needed an aircraft. His Kerrier has parts from the Kerbal Aircraft Expansion, B9, and Infernal Robotics mods for KSP, but this is only half the problem. Anyone can put four tilt jets on an airplane, and it takes a real wizard to force a control system to hover. Hover control of the Kerbal harrier is accomplished with a complete control system for a four-engined aircraft, with proper PID control loops and code updating at 20Hz.

With kOS, the proper plane, and the right software running on this emulated guidance computer, [Matt] is able to park his plane in mid-air, have a Kerbal descend the ladder, perform some science, and return to base. It’s an impressive amount of work for a video game. A good thing, too: [Matt] is looking to get into controls engineering professionally. Whether this will go on his resume is another question entirely.

Subwoofer Vortex Cannon: 300V Of “Thwup!”

Need a cool toy for your kids? How about something with a bunch of fun fluid dynamics and a tinge of higher-than-average-voltage danger? Did we mention the subwoofer and bank of high-voltage capacitors? Have we got the project for you: [Robert Hart]’s vortex cannon design.

We’ve seen vortex cannons before, where you usually fix a balloon to the back of a trash can. Pull on the balloon membrane and then let it go with a snap, and it sends out a swirling donut of high-pressure air that travels surprisingly far. It’s like smoke rings, but amped up a bit.

[Robert]’s addition is to bolt on a high-power subwoofer in place of the balloon’s rubber membrane, and generate the air pulse by dumping a capacitor bank into the speaker.

6699171432446530681The circuit design is a bit more clever than we thought at first. The bottom half is a voltage inverter followed by a diode bridge rectifier that essentially makes 320V DC (peak) out of 12V, and stores this in four fairly large capacitors. A pushbutton activates a relay that dumps the capacitors through the speaker.

On top of the circuit is a -12V voltage inverter. Just before firing, the speaker is pulled back a little bit by applying this -12V to the speaker, and then the relay is triggered and the capacitors dump, shooting the speaker cone forward.

6973681433156869012[Robert] is still developing and testing the device out, so if you’re curious or just want to say hi, head on over to Hackaday.io and do so! Be sure to check out his videos. The smoke tests are starting to look good, and we love the control box and high-voltage warning stickers.