Copper-clad Enclosures

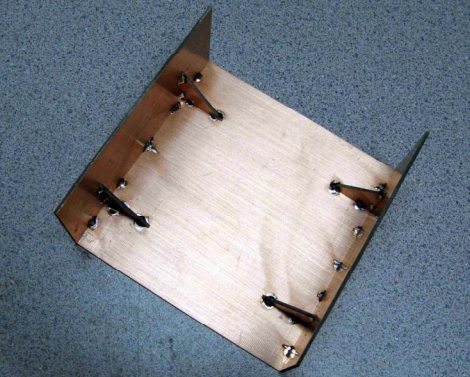
Building a great looking box for your projects can be a challenge. [Ken] boils down his process of building enclosures out of copper clad (PDF) circuit board material into an illustrated guide in case you want to try this for yourself. Why would you want to use PC board? The fiberglass substrate makes for a strong and lightweight material. Also, [Ken] is a ham radio operator and the copper coating acts as an electrical shield for delicate components inside.

As you can see above he uses solder to tack the pieces together. There’s some important considerations that go along with this method. First, he cuts the pieces just a bit oversized and then sands them flat and square before assembly. Next, he uses some 20 gauge wire as a shim between a ninety-degree joint and a right angle jig. This shim compensates for the shrinking that occurs as the solder cools, making sure the joint gets pulled to a right angle. He even solders nuts in place so that screws can be used to attach the case cover to the chassis.

Yesterday we saw toner transfer used to make labels on an ABS case. If you make your enclosure out of copper clad, using toner transfer for panel labels will be a snap!

Tuesday Two-Fer: Battery Cases And ABS Lettering

These are both interesting, unrelated, and can’t quite stand on their own so we threw them into one post.

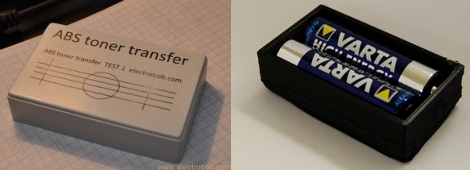
On the left you see the product of using toner transfer on ABS plastic. [Bogdan] tried this out as a way to make front panels for his enclosures. It really shouldn’t work very well because ABS has a lower melting point than toner does. But it seems that it takes a while for the ABS to heat up. If you’re quick, ironing for about 10 seconds, you can get the toner to stick to the plastic and then soak the paper off, leaving your printed design looking nice and clean.

To the right you see a printed battery case. [Nikolaus Gradwohl] ran across the same problem we’ve face many times: how to attach batteries to your projects? We’ve duct-taped them together, used the blister packs they’re sold in, Dremeled them out of thrift-store toys and just about every other thing you can imagine. He decided to make them easy to manufacture with a 3D-printer. This is accomplished with an OpenSCAD file he wrote. Plug in the size and number of batteries and a printable package will be automatically generated.

Nerf Gun Converted To CO2 Powered Semi-automatic

[Philysteak527] modified a Nerf rifle, making it semi-automatic thanks to the powers of compressed air. This is not a simple change to make, and rests on his ability to design and manufacture a bolt-action that fits in the gun, works with the Nerf ammo, and uses a CO2 canister and solenoid valve for the firing action. Knowing that, it’s not surprising to find that he’s an engineering student at Stony Brook University. He started with some POM, or polyoxymethylene plastic sold under the brand name Delrin, and used a CNC lathe to machine the parts for the bolt. Add in some brass fittings, a solenoid, tubing, and the electronics and you’re in business.

We’ve embedded the test footage after the break. Looks like the new internals allow a rather fast firing rate (maybe 2-3 shots per second?) and achieve a distance between seventy and one hundred feet.

Continue reading “Nerf Gun Converted To CO2 Powered Semi-automatic”

Water-blob Launcher

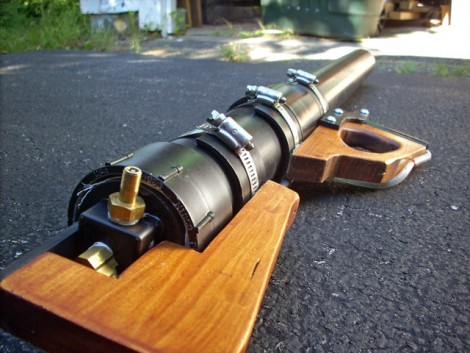
This rifle-shaped water cannon looks great and packs a big punch. We guess you could say that it’s a water balloon launcher, but the balloons are torn off and drop like the wad from a shotgun shell when fired. So we think this launches water blobs, or orbs, or something along those lines.

[Wolf] built it using PVC and some brass fittings that allow for the injection of compressed air. There’s a slick valve system that he developed which we don’t get a great look at in the build pictures. Fortunately, there’s an animated GIF that shows the various stages. Using his valve there’s no need for any electrical system like a lot of other pneumatic launcher systems use.

Just like the water-filled ping-pong gun, you’ve got to be careful with this thing. As you can see in the clip after the break there’s lethal force behind these projectiles. Especially when [Wolf] swaps out the water balloons for big steel darts.

Continue reading “Water-blob Launcher”

Hopefully Detect Trolls Before They Devour You

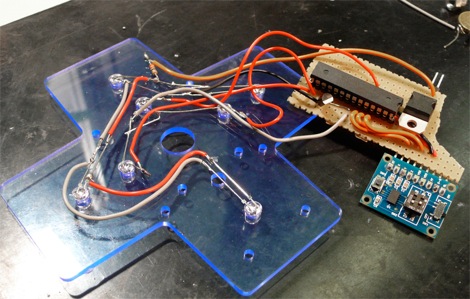
In the cold and mysterious wilderness of Norway, it pays to be ready for anything–especially heavy-walking trolls. The team at [nullohm] decided to prepare thoroughly for their trek into the woods to witness the Leonids meteor shower by putting together an Arduino-based “troll detector”.

The device is based on the superstition of hammering a steel spike into a tree to keep trolls away from camp. This goes one step further by including an accelerometer and LED indicators so that you can tell exactly what type of troll is just about to feast upon your tender human flesh.

When the detector is installed into a nearby tree, it takes an average seismic measurement and then looks for telltale footfalls. Even if you’re not concerned with perpetuating superstitions, you might find a use for the source code for simple seismic activity monitoring at home to supplement your miniature seismic reflector.

Making Model Rocket Motor Igniters

[Stephan Jones] has an easy method for making your own model rocket engine igniter. The solid state motors used in this hobby consume one igniter with each electrically triggered launch. Whether you’re making your own motors or not, this construction technique should prohibit you from every buying an igniter again. The process involves bending some nichrome wire around a paper clip, adding some structural support to the leads using masking tape, and insulating the business end with a quick dip in paint.

Now would be a good time to send us your launchpad hacks. All we’ve seen so far is a launchpad for water rockets.

[via Make]

Final Take On The Machine: Winners

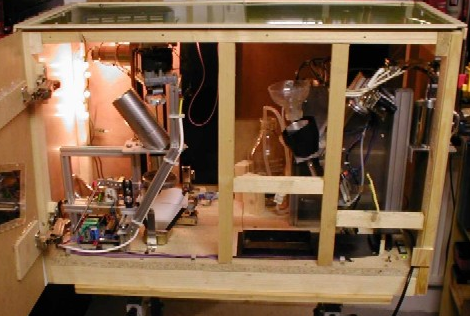
It’s finally here, the last episode of Scion’s Take on the Machine with Mitch Altman. In this episode all the teams are given a recap over their success and failures, and the clear winner is placed on top. We’re not ones to spoil the surprise so you’ll just have to click the link and watch to find out.

But lets take a moment to remember each team, The Transistor and their live action zombie game. Crash Space and their musical building. Pumping Station: One and their ice cream maker. Artisans Asylum and their breakfast machine. And lastly, NYC Resistor and their drink mixing slot machine.

Who’s ready for next season? There isn’t a next season you say? Perhaps a new influx of sponsored hackerspace competitions will spring up, or the whole concept will die out as quickly as it came. Either way, it’s all about the money fun and educating experience, right? And that’s all that matters.

[Thanks Deven, sorry you guys didn’t win.]