Homebrew Sounder Maps The Depths In Depth

For those who like to muck around in boats, there’s enough to worry about without wondering if you’re going to run aground. And there’s really no way to know that other than to work from charts that show you exactly what lies beneath. But what does one do for places where no such charts exist? Easy — make your own homebrew water depth logger.

Thankfully, gone are the days when an able seaman would manually deploy the sounding line and call out the depth to the bottom. [Neumi]’s sounding rig uses an off-the-shelf sonar depth sounder, one with NMEA, or National Marine Electronic Association, output. Combined with a GPS module and an Arduino with an SD card, the rig can keep track not only of how much water is below it, but exactly where the measurement point is. The whole thing is rigged up to an inflatable dinghy which lets it slowly ply the confines of a small marina, working in and out of the nooks and crannies. A bit of Python and matplotlib stitches that data together into a bathymetric map of the harbor, with pretty fine detail. The chart also takes the tides into account, as the water level varies quite a bit over the four hours it takes to gather all the data. See it in action in the video after the hop.

There’s something cool about revealing the mysteries of the deep, even if they’re not that deep. Want to go a little deeper? We’ve seen that before too.

Continue reading “Homebrew Sounder Maps The Depths In Depth”

Lightning Detector Keeps A Tally

Lightning is one of the great forces of nature. The huge releases of electricity release detectable electromagnetic emissions, as you might expect. The team at the [LVL1 Hackerspace] put together a lightning detector of their own; one which keeps count of the number of discharges in the atmosphere.

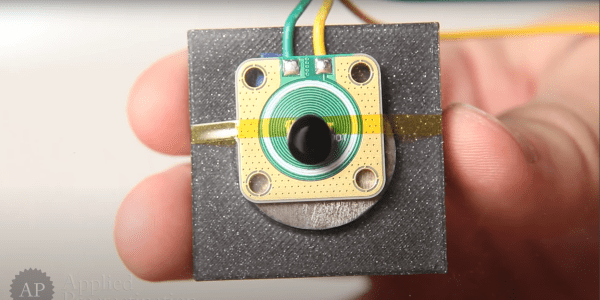
The device consists of a typical tank circuit tuned to 300kHz, paired with a small telescopic antenna. Lightning strikes in the area induce an oscillation in the circuit which is amplified and then detected by an Arduino. The Arduino measures the voltage of the pulse, which is proportional to the magnitude of the signal detected. A ring of Neopixel LEDs are then switched on relative to the intensity of the signal. Additionally, when not actively detecting strikes, the Arduino instead uses the LEDs to display the current time and a binary count of the number of strikes detected since it has been running.

It’s a simple build, and one that would serve as a great introduction into the world of addressable LEDs and environmental monitoring. If you’d like to go about it another way, you can detect lightning with an SDR, too!

Building A Levitating Turbine Desk Toy

Magnetic levitation is a beautiful thing to watch. Seeing small objects wobble about while seemingly hovering in thin air never gets old. If you want something suitably distracting in this vein for your own desk, consider building this levitating turbine from [JGJMatt].

The build uses a combination of 3D printed parts and metal rods to form a basic frame.  The turbine is also 3D printed, making it easy to create the complex geometry for the curved fins. Rare earth magnets are then slotted into the parts in order to create the levitation effect. Two magnets are fitted to each frame piece, and one magnet is inserted into each end of the turbine. When aligned properly, the turbine will hover over the frame and can spin freely with almost no friction.

One concession made to functionality is a sewing needle inserted into the turbine. This presses against one part of the frame in order to keep the turbine from being pushed out of the magnetic field entirely. It’s possible that with very careful attention to detail in alignment, the pin could be eliminated, but it makes the system far more robust and reliable to have it there.

Floating in the magnetic field, a simple puff of air is enough to set the turbine spinning for quite some time. It makes for a captivating desk ornament, and one that can be tinkered with by changing the turbine blades for different performance. It may be frivolous, but at the larger scale, magnetic levitation is put to more serious uses like high-speed transport. Video after the break.

Continue reading “Building A Levitating Turbine Desk Toy”

‘Quiet On The Set’ Goes For Objects, Too

Unless you’re sonically savvy, trying to sleep, or simply on edge, you probably don’t realize just how noisy common items can be. Pretty much everything makes enough racket to ruin a sound man’s day, or at the very least, their chance of picking up the dialogue between two characters. What you need on a set are noiseless but realistic versions of common noisemakers like paper bags, ice cubes, and to a lesser extent, billiard balls.

If you’ve spent any time at all on Reddit, you’ve probably seen frustratingly short GIFs of [Tim Schultz] quickly explaining how this or that noiseless prop is made. Embedded below is a compendium of prop hacks with more information worked in along the way. Talk about dream job! Problem solving and then hacking together a solution for a living sounds terrifying and delightful all at once.

Speaking of terrifying and delightful hacks, there’s still plenty of time to enter our Halloween Hackfest contest, which runs through Monday, October 11th. Halloween is the best time to go all out, so show us what you can do!

Continue reading “‘Quiet On The Set’ Goes For Objects, Too”

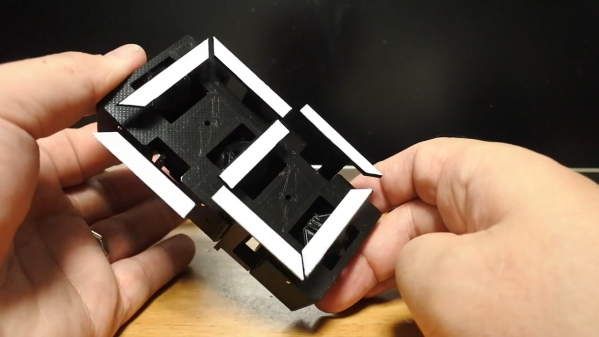
A homemade seven-segment OLED display

Making OLED Displays In The Home Lab

Just a general observation: when your project’s BOM includes ytterbium metal, chances are pretty good that it’s something interesting. We’d say that making your own OLED displays at home definitely falls into that category.

Of course, the making of organic light-emitting diodes requires more than just a rare-earth metal, not least of which is the experience in the field that [Jeroen Vleggaar] brings to this project. Having worked on OLEDs at Philips for years, [Jeroen] is well-positioned to tackle the complex process, involving things like physical vapor deposition and the organic chemistry of coordinated quinolones. And that’s not to mention the quantum physics of it all, which is nicely summarized in the first ten minutes or so of the video below. From there it’s all about making a couple of OLED displays using photolithography and the aforementioned PVD to build up a sandwich of Alq3, an electroluminescent organic compound, on a substrate of ITO (indium tin oxide) glass. We especially appreciate the use of a resin 3D printer to create the photoresist masks, as well as the details on the PVD process.

The displays themselves look fantastic — at least for a while. The organic segments begin to oxidize rapidly from pinholes in the material; a cleanroom would fix that, but this was just a demonstration, after all. And as a bonus, the blue-green glow of [Jeroen]’s displays reminds us strongly of the replica Apollo DSKY display that [Ben Krasnow] built a while back. Continue reading “Making OLED Displays In The Home Lab”

An Earthquake Display To Keep You Abreast Of Rumblings Worldwide

The Internet has brought us the ability to share data all over the globe, and nearly instantaneously at that. It’s revolutionized the sharing of science across the world, and taking advantage of this global data network is this earthquake display from [AndyGadget].

The build relies on an ESP32 fitted with an ILI9486 TFT display. The screen is in color and has a nice 480×320 resolution. This enables it to display a reasonably legible world map using the Web Mercator projection to fit the rectangular screen. The microcontroller then pulls in information from Seismic Portal, a site that aggregates data from seismographs and other sensors scattered all over the world.  Data from the site is pulled into the device live and overlaid on the world map, allowing the viewer to see the location of any current earthquakes at a glance.

It’s a great project, and one that we reckon would make a great addition to any university geology department. If it’s sparked an interest, consider diving deeper into the world of seismic analysis and data yourself!

A Giant Engine Needs A Giant Engine Stand

Engine stands are great to have on hand for when you need to work on an engine outside a vehicle. However, if your engine is particularly large, you might find off-the-shelf solutions difficult to find. [Liebregts] was recently contacted by someone in just such a pickle, who had an 8-litre Bentley engine from 1928 and nothing to put it on. Thus, constructing a custom engine stand was in order.

The original home of the hefty 8-liter engine.

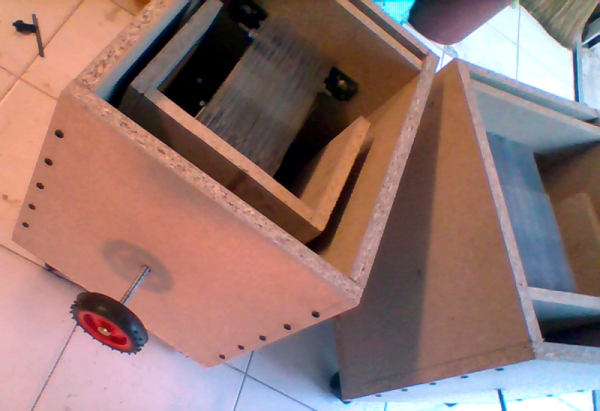
The stand is built out of stout 50x50x4mm steel tubing in order to handle the weight of the gigantic vintage engine. It’s designed with an eye to ground clearance, such that an engine crane can easily slide under the stand when it’s time to lift the engine back in the car. It also allows the whole engine to be turned upside down, and even raised and lowered. This makes it easier to get to different parts of the engine, while keeping the center of gravity where it needs to be to avoid the whole assembly falling over.

It’s not a hugely complicated build, but it goes to show just how much of a difference it can make when you have the right tools for the job. With the engine out and on its stand, it’s much easier to work on and handle the many complicated tasks in its restoration. It also benefits from being custom built to suit the dimensions of the Bentley engine. Everything fits and it just works!

While few of us have rare 1928 Bentleys in need of an engine-out service, it’s a build that should serve as great inspiration for those working on similar tasks. Meanwhile, consider building yourself a custom engine crane to help out around the garage.