Time-of-flight sensors used to be expensive obscurities, capable of measuring the travel time of photons themselves and often used for tracking purposes. However, the technology is cheaper now, such that [jean.perardel] has used TOF sensors to build a useful and affordable gesture-tracking system.
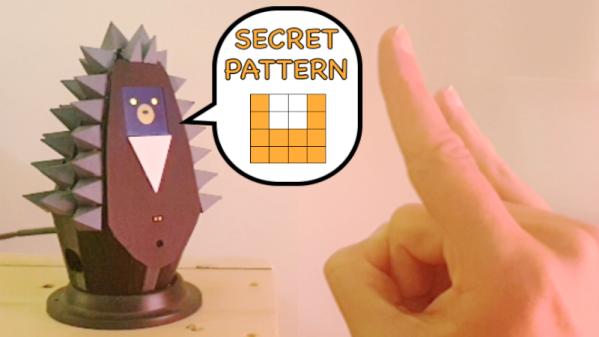
The system relies on four VL53L1X time of flight sensors, which have a 16×16 scanning array and communicate over the I2C bus. Controlling the show is an Arduino MKR1010, though the project should be achievable with a range of other microcontrollers, too.
The device is built into a cute hedgehog-like form factor, with an LCD screen acting as the face. It displays facial expressions which show how the system is interpreting and responding to gestures. It gives the project lots of personality, which makes using the system more fun. Gestures from the system can be used to send keystrokes over USB, control relays or servos, or even fire IR signals to control TVs and other hardware.
It actually seems like a useful gesture control interface, one that could become a useful part of a workstation setup. We’ve seen gesture controls put to other uses too, like controlling robot arms. Video after the break.
Continue reading “Hedgehog Gesture Sensor Built With Cheap Time-of-Flight Modules”