Rotary Subwoofer Combines A Speaker Coil W/ A Fan

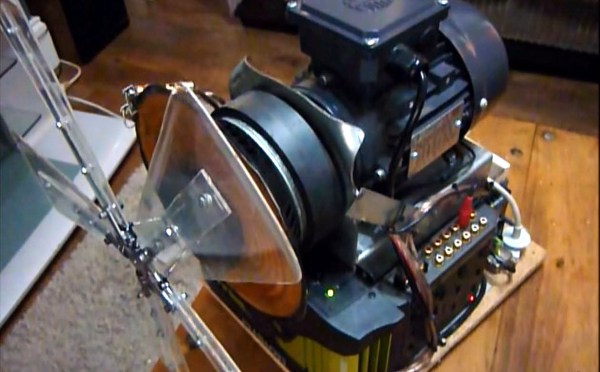
What happens when you combine a fan with a sub-woofer? Apparently, you get a high-efficiency ultra low hertz (3-5hz) rotary subwoofer!

First thing’s first, believe it or not, these things really do exist. [Chris] got the idea to build his own after seeing the TRW-17, a commercial offering of a rotary subwoofer.

The concept is pretty simple. If you use a giant subwoofer, you can get low frequency response, but it uses an immense amount of power to move a giant speaker coil. So what if you put something on a smaller speaker coil to increase airflow? Like, a fan or something?

Continue reading “Rotary Subwoofer Combines A Speaker Coil W/ A Fan”

The Infrared Theremin

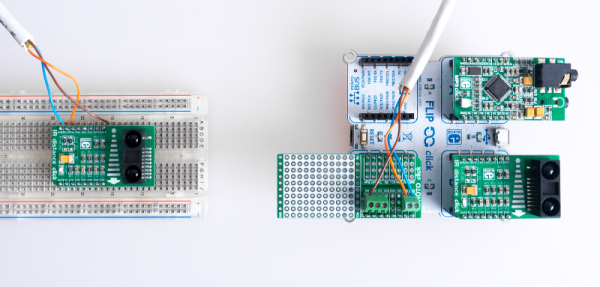
The traditional theremin is more or less an audio oscillator with two metal rods. Using proximity sensing, one rod controls the pitch of the oscillator and the other controls the volume. [Teodor Costachiou] apparently asked himself the excellent question: Why does the proximity sensor have to use capacitance? The result is an Arduino-based theremin that uses IR sensors to determine hand position.

[Teodor] used a particular type of Arduino–the Flip and Click–because he wanted to use Click boards for the IR sensors and also to generate sound via an MP3 board based around a VS1053. The trick is that the VS1053 has a realtime MIDI mode, and that’s how this Theremin makes it tones.

Continue reading “The Infrared Theremin”

Fuzzy Blanket Hides Serious Tech

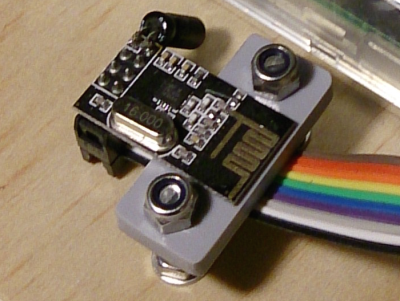
Who needs the Internet of Things? Not this interactive, sound playback blanket! Instead, hidden within its soft fuzzy exterior, it makes use of a NRF24L01+ module to speak directly with its sound server.

The project was built for a school, and let the students record whatever sounds they think are important into a Raspberry Pi. Then, the students assembled the physical felt blanket, with the sensors sewn inside, and could play back their favorite sounds by clambering all over the floor. It’s a multi-sensory, participatory, DIY extravaganza. We wish we did cool stuff like that in grade school.

3520911454640205800

What? Your “blankie” doesn’t transmit data to a Pure Data application? Well, [Dan Macnish] is here to help you change that. This well-written entry on Hackady.io describes the setup that he used to make the blanket’s multiple touch sensors send small packets over the air, and provides you with the Pd code to get it all working on GitHub..

8178811454644034915We like DIY music controllers a lot, and this simple setup stands to be more useful than just blanket-making. And in this age of everything-over-WiFi, it’s refreshing to see a straight-up 2.4 GHz radio build when that’s all that was necessary.

[Dan]’s complaint that the NRF24 modules could only reach 3m or so strikes us as strange though. Perhaps it’s because of all of the metal in close proximity to the NRF24’s antenna?

ARM Board Transmits FM

There is more than a casual link between computer people and musicians. Computers have created music since 1961 when an IBM7094 sang the song Daisy Bell (later inspiring another computer, the HAL 9000, to do the same).

[Vinod.S] wanted to create music on an STM32F407 Discovery board, but he also wanted it to play on his FM radio. He did it, and his technique was surprising and straightforward. The key is that the ARM processor on the Discovery board uses an 8MHz crystal, but internally (using a phase-locked loop, or PLL) it produces a 100MHz system clock. This happens to be right in the middle of the FM radio band. Bringing that signal back out of the chip on a spare output pin gives you the FM carrier.

That’s simple, but a carrier all by itself isn’t sufficient. You need to FM modulate the carrier. [Vinod.S] did the music playback in the usual way and fed the analog signal via a resistor to the crystal. With some experimentation, he found a value that would pull the crystal frequency enough that when multiplied up to 100MHz, it would produce the desired amount of FM deviation. You can see a video of the whole thing in action, below.

Continue reading “ARM Board Transmits FM”

Upcycle Old Speakers With C.H.I.P.

Sometimes you get a piece of hardware that’s so cool you can’t help but fix it back up. There are a lot of companies after that sweet, sweet Raspberry Pi money, and the $9 US Dollar C.H.I.P. is a very interesting contender for the space. We have been especially enjoying the stream of neat hacks and example projects they’ve been putting out.

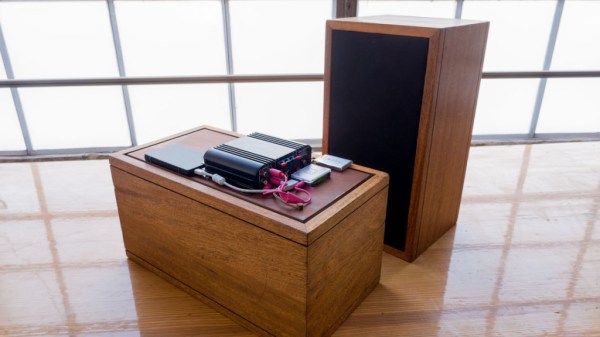
In this case, [Peter] wanted to get a pair of walnut speakers up to modern standards. Already suffering from a glut of audio equipment in his personal space, he decided to sweeten the deal by adding support for his library of music.

The first step was ordering a new set of drivers to replace the aged 40-year-old ones occupying the set. After he got them installed, he added C.H.I.P., a power supply, an amplifier, and a 500GB hard-drive. The controlling software behind the installation is the venerable mpd. This way he can control the speakers from any device in his house as long as he had an interface installed for the daemon.

We’re glad these speakers didn’t end up in the garbage behind a goodwill somewhere, and they do look good.

Wifi Enabled Center Speaker

[Ronald] has been improving his audio set-up for a while now, his latest revision culminating in this WiFi enabled center channel speaker. It all started with feature creep as you can see in this direct quote, “Being an engineer, I couldn’t stop here, not now that I had a way of adding more features…”

He had purchased a new amplifier for his system, but was irritated that the loudness setting would re-enable itself every time he switched inputs. First he thought he might just have a little board that intercepted the signals from his remote and tacked on the loudness off signal. It occurred to him that it would be even cooler if he could control it from his computer or phone. So he opened the case on his new amp and discovered an i2c break-out. We can guess how it went after that.

In version 2.0 he kept most of his work from 1.0, but wanted to simplify the set-up and build it all into a center speaker unit since an amplifier and two speaker cabinets takes up too much room. He fit a similar set-up as before in the center speaker casing, but added a touch screen and a few other improvements.  Though, strangely, he ran into some problems upgrading to the Raspberry Pi 2.0 and had to revert.

The final result is very nice, though obviously not done. As the engineer’s mantra goes, “If it ain’t broke, it doesn’t have enough features yet.”

Incredible Marble Music Machine

We tried to figure out how to describe the band [Wintergatan]. It took a lot of googling, and we decided to let their really incredible music machine do it for them. The best part? Unlike some projects like this that come our way, [Wintergatan] documented the whole build process in an eight part video series.

The core of the machine is a large drum with two tracks of alternating grey and black Lego Technic beams and pins. The musician sequences out the music using these. The pins activate levers which in turn drop ball bearings on the various sound producing devices in the machine. The melody is produced by a vibraphone. At first we thought the drum kit was electronic, but it turns out the wires going to it were to amplify the sound they made when hit. At the end of their travel the bearings are brought up to the hopper again by a bucket conveyor.

The final part count for the machine sits at 3,000 not including the 2,000 ball bearings rolling around inside of it. If you’ve ever tried to make a marble machine, then you’ll be just as impressed as we were that the machine only appeared to lose a few marbles in the course of a three minute song. Aside from the smoothness of the machine, which is impressive, we also enjoyed the pure, well, hackiness of it. We can spy regular wood screws, rubber bands, plywood, bits of wire, and all sorts of on-the-spot solutions. Just to add bonus cool, the whole project appears to have been built with  just a bandsaw, a drill press, and a few hand power tools.

The machine is great, but we also really appreciate the hacker spirit behind it. When a commenter on a YouTube video told him he was a genius, he replied, “Thank you for that! But I do think, though, that it is mostly about being able to put in the time! I mean the talent of being stubborn and able to see things through are more important than the abilities you have to start with. If you work hard on anything, you will learn what you need and success! Its my idea anyway! So happy people like the machine!”. Which we think is just as cool as the machine itself. Video of the machine in action and part one of the build series after the break!

Continue reading “Incredible Marble Music Machine”