Laptop Trackpads And MIDI Controllers

pads

A bunch of pads connected to a MIDI out port is as old an idea as the Akai MPC. creating a homebrew version is great, but [Scott] took his version one step further. He used old laptop trackpads to control note on and note off commands when the each pad is tapped, and also added MIDI CC values for the touch pressure and the x and y-axis position.

The trackpads were identical models, each having their own PS/2 output. A few ribbon cable to 8-pin header adapters were manufactured, and the entire ensemble encased in a wonderful maple and aluminum enclosure.

The electronics are based on an Arduino Mega with 16 clock and data points for each touchpad eating up 32 of the 54 available pins on the ‘duino. The PS/2 protocol is well documented, but running 16 separate PS/2 id most certainly not. [Scott] ended up writing his own asynchronous PS/2 communications library to get the latency of his midi device down to about 50ms.

It’s an amazing bit of kit and comparatively inexpensive, given that [Scott] now has a 16-channel Kaoss pad. Video of the device hooked up to a MicroKorg below.

Continue reading “Laptop Trackpads And MIDI Controllers”

HeartBeat Boombox Creates Bio Beats

sophi1

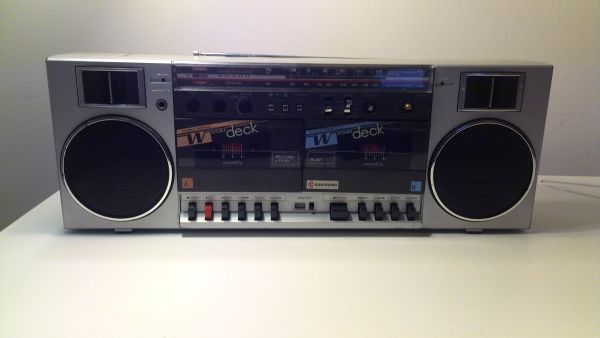
If you happened to be wandering the hall of science during MakerFaire NY, you may have noticed a woman walking around with a rather odd boombox strapped around her neck. That was [Sophi Kravitz] with her HeartBeat Boombox. Thankfully [Sophi] lives within driving distance of Makerfaire, and didn’t attempt to get through airport security with her hardware. She started with three medical grade pulse oximeters. These oximeters output a “beep” for every beat of your heart. [Sophi] rolled her own AVR board running Arduino firmware to capture pulses on their way to the oximeter audio transducer. The AVR uses a sound board to convert the pulses into various percussion sounds. The pulse indicators also activate one of three LED strips.

[Sophi’s] biggest frustrations with the hack were the JST connectors on the LIPO batteries powering the entire system. She found that they fell apart rather easily. We’ve used JST connectors in the past with no problem, so we’re guessing she ended up with one of the many knock off connectors out there. [Sophi] tied the entire system together with a custom milled acrylic plate mounted to the front of the boombox.

The final result was very slick. With three people connected to the finger inputs of the pulse oximeters, some complex beats could be formed. We thought we were listening to dubstep when she first walked by. One feature we would like to see implemented would be the ability to record and play back some of the beats created by the boombox.

Piano Repurposed As A Resonant Synth Speaker

piano-synth

[Richard] recently rediscovered some files from a hack he did back in 2004. He was experimenting with exciting piano strings via electromagnetic fields. The idea shares some elements with the self tuning piano we saw back in 2012. Piano strings, much like guitar strings, are made of steel alloys. This means they create electricity when vibrated in a magnetic field. This is the basic principle upon which electric guitar pickups are built. The idea also works in reverse. The strings will vibrate in response to a modulated electromagnetic field. Anyone who has seen an E-bow knows how this can be applied to the guitar. What about the piano?

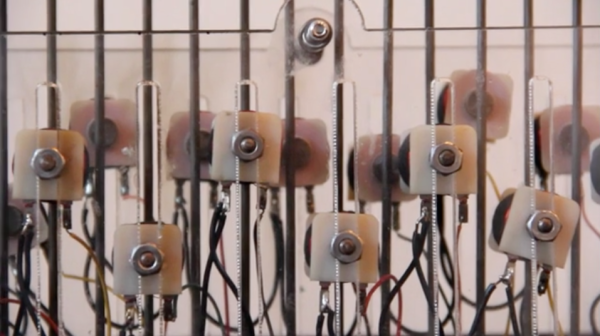
[Richard] started with the Casio CZ-101, a classic synth in its own right. The Casio’s output was run through a Peavy 100 watt amplifier. The amplified output was then used to drive custom coils mounted on a piano. The coils had to be custom wound to ensure they would be compatible with the 4 – 8 ohm impedance expected by the amplifier. [Richard] ended up winding the coils to 28 ohms. Six of these coils in parallel put him just over the 4 ohm mark. The coils effectively turned the piano into a giant speaker for the synth. In [Richard’s] write-up (word doc link) he mentions that the strings basically act as a giant comb filter, each resonating strongly in response to frequencies in its harmonic series.

The results are rather interesting. The slow attack of the magnetic fields coupled with the synth’s patch results in a surprising variety of sound. The three examples on [Richard’s] blog vary from sounding like a power chord on a guitar to something we’d expect to find in an early horror movie. We would love to see this idea expanded upon. More efficient coils, and more coils in general would add to the effect. The coils on various string groups could also be switched in and out of the system using MIDI control, allowing for even more flexibility. Continue reading “Piano Repurposed As A Resonant Synth Speaker”

Polyphonic Arduino Sketches

MIDUINO

Creating music for the Arduino is simple – just use the tone() library – but it truthfully doesn’t sound that great. That’s because this library is monophonic, making chords difficult or at the very least sound a little weird. [Connor]’s miduino aims to change that, turning raw MIDI files into polyphonic Arduino sketches.

To convert MIDI files into Arduino sketches, [Connor] whipped up a Python script based on midiCSV that reads the notes and channels of a MIDI file and converts it into the language of the Arduino. Unlike the built-in tone() library, miduino is polyphonic making the music produced from any Arduino sound great. It’s basically the difference between writing music for a PC speaker and a true keyboard; sure, you’re only getting square waves, but it sounds much better.

Oddly, [Connor] hasn’t put up his Python script as far as we can tell. All the MIDI songs are being converted on [Connor]’s own Raspberry Pi. This is supposed to be cheaper than a VPS, and makes for a very cool project to boot.

Edit: Miduino isn’t polyphonic yet, but [Connor] says he should have that wrapped up in a week or two.

FlightDeck: A “Touchless” MIDI Controller

flightdeckmidi

[Edward] wanted a different way to modulate notes on his MIDI controller, so he decided to go touchless. Inspired by the pressure-sensing modulation on his Edirol keyboard, [Edward] aligned eight sensors into a row of playable notes and used infrared to sense the distance of a player’s hand from the keys. He also included some function buttons to cycle through 10 octaves and RGB LEDs beneath the table that perform alongside the music.

He chose SHARP GP2D120 sensors (direct link to datasheet) for their low threshold, which allowed the board to detect distance close to the sensor. Each is mounted onto a sheet of frosted acrylic along with its own “hold note” button and an LED to indicate the key is playing. The lower panel houses an Arduino Mega that drives the system along with an RGB LED strip and its driver board. [Edward] used Maxuino and OSC-Route to interface the Mega to a Max/MSP patch which runs the show.

Learn more about the FlightDeck’s features in a video demonstration of the controller and the software after the break, then check out some other MIDI hacks like this organ pedal or the Arduino-driven MIDI sequencer.

Continue reading “FlightDeck: A “Touchless” MIDI Controller”

Keyboard Spoofs 4 NES Controllers For Chiptune Goodness

NES-keyboard

This toy keyboard is being used to play music on an NES. As you probably already know, the hardware inside those original controllers was dead simple. They’re just a parallel to serial shift register that reads from all of the keys. To get this keyboard up and running [heavyw8bit] simply mounted eight chips inside the gutted toy, connecting two of them to the keyboard keys, and the rest to the array of push buttons he added to the right.

So what’s the point of using this as a quadruple game controller? Are you expecting to see what a full speed-run of Contra looks like using this as the controls? That’s not the point at all. This becomes a musician-friendly frontend for the NES synthesizer ROM called NESK-1. [heavyw8bit] wrote the game/program in order to allow you to use the original console hardware to play all of the sounds you know and love. Our favorite is the arpeggio example heard at about 2:35 into the clip after the break.

Continue reading “Keyboard Spoofs 4 NES Controllers For Chiptune Goodness”

Build A DIY Plate Reverb

PlateReverb

[Telegraphy] needed a reverb for his recording studio. There are hundreds of computer-based and standalone digital reverb systems out there, but he decided to build his own plate reverb. Reverb is an effect used in many professional audio and music recordings. Reverb adds thousands of echos to an audio signal. These echos decrease in amplitude over time. When used correctly, the effect is generally very pleasing to the ear.

A plate reverb uses a plate of sheet metal to generate the reverb. An audio driver is placed in contact with the metal plate. Audio is fed into the driver, which vibrates the plate. The vibrations travel along the surface of the plate, bouncing off the edges and reflecting back. These reflections are captured by a pickup, which then converts them to a voltage signal. The final reverb effect is actually created in the sound engineer’s mixing board when the “dry” source signal is mixed with the signal returned by the plate.

[Telegraphy’s] plate reverb was built almost entirely from found, Radio Shack, and hardware store parts. The plate and frame are from Lowes. The audio driver is a cut up speaker from an old car stereo. The pickup is a modified piezo transducer from Radio Shack. As [Telegraphy] states several times, there are a lot of differing opinions on exactly how and where to mount the various parts of the reverb. Any placement will generate some reverb. The question is where and how to mount things for the best effect. Much like beauty and the eye of the beholder, the answer to that question is in the ear of the listener.

Jump past the break for a tour of a slightly more involved plate reverb at Gallery Acoustics Studio.

Continue reading “Build A DIY Plate Reverb”