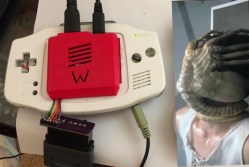
There’s A Mew Underneath The Truck Next To The SS Anne

Before we dig into this, I need to spend a paragraph or two conveying the knowledge of a twelve-year-old in 1996. Of course, most Hackaday readers were twelve at least once, but we’re just going to do this anyway. The payoff? This is an arbitrary-code-execution virus for Pokemon, and maybe the most amazing Game Boy hack of all time.

In the first generation of Pokemon games, there is a spectacularly rare Pokemon. Mew, the 151st Pokemon, could learn every move in the game. It was a psychic type, which was overpowered in the first gen. You could not acquire a Mew except by taking your Game Boy to a special event (or to Toys R Us that one time). If someone on the playground had a Mew, they really only had a GameShark.

There was a mythos surrounding Mew. Legend said if you went to the SS Anne and used Strength to move a truck sprite that appeared nowhere else in the game, a Mew would appear. Due to the storyline of the game, you didn’t have the ability to get to this truck the first time you passed it. However, if you started a new game – thus losing all your progress and your entire roster of Pokemon – you could test this theory out. Don’t worry, you can just trade me all your good Pokemon. I’ll give them back once you have a Mew. Screw you, Dylan. Screw you.

Now the Mew truck trick is real. You can do it on a copy of Red or Blue on an original Game Boy. If this hack existed in 1998, kids would have lost their god damned minds.

The basis for this hack comes from [MrCheeze], who created a ‘virus’ of sorts for the first generation of Pokemon games. Basically, given the ability to manually edit a save file, it is possible to replicate this save file over a Game Link cable. The result is a glitchy mess, but each Pokemon game has the same save file when it’s done.

Combine this virus with arbitrary code execution, and you have something remarkable. [MrCheeze] created a save file that allows you to move the truck next to the SS Anne. When the truck is moved, a Mew appears. It’s exactly what everyone was talking about over the sound of their sister’s Backstreet Boys marathon.

The new ‘Mew Truck virus’ is not as glitchy as the first attempt at a self-replicating save file. In fact, except for the music glitching for a few seconds, nothing appears abnormal about this Pokemon virus. It’s only when the Mew truck trick is attempted does something seem weird, and it’s only weird because we know it shouldn’t happen. Combine the self-replicating nature of this virus, and you have something that would have drawn the attention of Big N. This is a masterpiece of Pokemon-based arbitrary code execution and a hack that may never be equaled.

You can check out the video below.

Continue reading “There’s A Mew Underneath The Truck Next To The SS Anne”

Talk Like A Game Boy, Sting Like A Beep

Have you ever listened to a song and wondered how they created the robotic-sounding vocals? There’s a huge variety of ways to do so. [scythe1005] decided to take their inspiration from rock history, creating a Game Boy powered talkbox (Japanese, Google Translate recommended for those that don’t speak the language).

Human speech is generated when vibrations from the vocal chords are shaped into intelligible sounds by the motion of the mouth, tongue, and other body parts known as “articulators”. A talkbox creates robotic speech sounds by using the articulators while replacing the vibrations from the vocal chords with alternative source.

A talkbox is a device most typically used with the electric guitar. The signal from the electric guitar is amplified and played through a speaker or transducer connected to a tube that is placed in the user’s mouth. The user then proceeds to mouth the desired words they wish to say, with the vibrations provided by the guitar’s signal instead of the vocal chords. A popular example of this is Peter Frampton’s use of the talkbox in Do You Feel Like We Do.

[scythe1005] used the same basic bones in their design, using a Game Boy to feed sound into a basic audio amplifier kit and a transducer connected to a tube. This gives a very 1980s synth sound to the vocals. It’s a simple build in concept but one we haven’t seen a whole lot of before. Using off-the-shelf modules, you could build something similar in a weekend. Also featured in the video is an ArduinoBoy — a useful way of controlling a Game Boy over MIDI. It’s used here to interface the keyboard to the handheld console. Video below the break.

As we’ve seen before, the Game Boy is an incredibly popular platform for music — chiptune artists regularly modify the device for better sound.

Continue reading “Talk Like A Game Boy, Sting Like A Beep”

Neural Nets And Game Boy Cameras

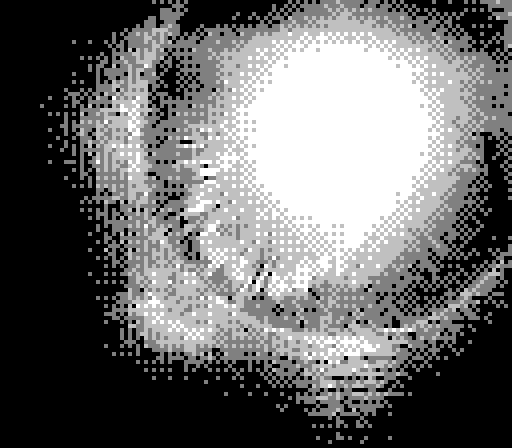
Released in 1998, the Game Boy camera was perhaps the first digital camera many young hackers got their hands on. Around the time Sony Mavica cameras were shoving VGA resolution pictures onto floppy drives, the Game Boy camera was snapping 256×224 resolution pictures and displaying them on a 190×144 resolution display. The picture quality was terrible, but [Roland Meertens] recently had an idea. Why not use neural networks to turn these Game Boy Camera pictures into photorealistic images?

Neural networks, deep learning, machine learning, or whatever other buzzwords we’re using require training data. In this case, the training data would be a picture from a Game Boy Camera and a full-color, high-resolution image of the same scene. This dataset obviously does not exist so [Roland] took a few close up head shots of celebrities and reduced the color to four shades of gray.

[Roland]'s face captured with the Game Boy Camera (left), and turned into a photorealistic image (right)
[Roland]’s face captured with the Game Boy Camera (left), and turned into a photorealistic image (right)
For the deep machine artificial neural learning part of this experiment, [Roland] turned to a few papers on converting photographs to sketches and back again, real-time style transfer. After some work, this neural network turned the test data back into images reasonably similar to the original images. This is what you would expect from a trained neural network, but [Roland] also sent a few pics from the Game Boy Camera through this deep machine artificial learning minsky. These images turned out surprisingly well – a bit washed out, but nearly lomographic in character.

We’ve seen a lot of hacks with the Game Boy Camera over the years. Everything from dumping the raw images with a microcontroller to turning the sensor into a camcorder has been done. Although [Roland]’s technique will only work on faces, it is an excellent example of what neural networks can do.

Anti-Emulation Tricks On GBA-Ported NES Games

Emulation is a difficult thing to do, particularly when you’re trying to emulate a complex platform like a game console, with little to no public documentation available. Often, you’ll have to figure things out by brute force and dumb luck, and from time to time everything will come unstuck when a random piece of software throws up an edge case that brings everything screeching to a halt.

The Classic NES series was a handful of Nintendo Entertainment System games ported to the Game Boy Advance in the early 2000s. What makes them unique is a series of deliberately obtuse programming decisions that make them operate very differently from other titles. These tricks utilize advanced knowledge of the way the Game Boy Advance hardware operates and appear to have been used to make the games difficult to copy or emulate.

The games use a variety of techniques to confuse and bamboozle — from “mirrored memory” techniques that exploit addressing anomalies, to putting executable code in video RAM and writing to the audio buffers in unusual manners.

Even more confusingly, these techniques only appear to have been used in the Classic NES series of games, and not other Game Boy Advance titles. It’s not obvious why Nintendo went to special effort to protect these ports over other titles; perhaps the techniques used were for other reasons than just an attempt at copy protection. Speculate amongst yourselves in the comments.

This isn’t the first time we’ve discussed emulation of Nintendo systems — check out this effort to reverse engineer the Sony Pocketstation.

[Thanks to [[[Codifies]]] for sending this in!]

Pi Zero Transforms To Game Boy

[GreatScott] bought a Game Boy case. Normally, you’d assume you wanted this to repair a damaged Game Boy, but in this case [GreatScott] used a Pi Zero and some 3D printing to build a game system into the tiny box. You can see some videos, below.

Two interesting parts of the project are the source of the LCD display (a rearview camera screen) and the selection of batteries. Lithium ion batteries are all the rage. But if you watch the news, you know there are some safety issues with using the batteries, especially if you use them improperly. [GreatScott] decided to go with nickel metal hydride cells which still need a protection circuit, but are typically less of a danger than the newer technology cells.

Continue reading “Pi Zero Transforms To Game Boy”

DIY Coprocessors For The Game Boy Color

Back in the olden days, when video games still came on cartridges, the engineers and programmers making these carts had a lot of options. One of the most inventive, brilliant, and interesting cartridges to come out of the 90s was Star Fox for the Super Nintendo. Star Fox featured a coprocessor chip, the Super FX, that was effectively a GPU used to draw polygons in the frame buffer. Without this, Star Fox wouldn’t be 3D, Yoshi’s Island wouldn’t be as cute, and there wouldn’t be an always-on processor in your computer with the potential to spy on everything you do.

gameboy-coprocessor-cartridgeThe Super FX chip, the Capcom-developed Cx4 coprocessor, and the Nintendo DSP all lived in a cartridge, but the technology to put a better computer in a cartridge never made it to Nintendo’s handheld devices. Cheap, powerful microcontrollers are everywhere now, and it’s not that hard to make a board with card edge connectors, leading [Anders] to build a Super FX for the Game Boy Color.

Game Boy cartridges are simple — just a memory controller and some memory is all you need. Drop in a microcontroller, and you have a Game Boy coprocessor. This cartridge features the MBC1 memory bank controller, 512kB of Flash, and 8KB SRAM. These are fairly standard parts, but there’s one last trick up the sleeve of this board: a KE04 from NXP, an ARM Cortex-M0+ microcontroller running at 48MHz . This microcontroller is, effectively, the GPU for the Game Boy.

This ARM-powered coprocessor is able to convert the framebuffer into tiles in just 2ms, giving the system plenty of time for image processing and rendering. Due to the limitations of the Game Boy, the best resolution offered by this coprocessor is either 160×96 or 128×128 pixels, short of the complete 160×144 pixel display in the Game Boy Color.

Even though [Anders] is still working on programming this thing to show off the power of his Game Boy coprocessor, he has a few demos to show off. The most impressive is a Wolfenstein-like clone. That’s extremely impressive and categorically impossible on a stock Game Boy Color.

Continue reading “DIY Coprocessors For The Game Boy Color”

Emulating A GameBoy Advance Inside Of A Gameboy Advance

[Ryzee119]’s GBA might not look so different at first glance. The screen is way better than you remember, but that may just be your memory playing tricks on you. The sound comes out of the speakers. It feels the right weight. It runs off AA batteries. Heck, even the buttons feel right.

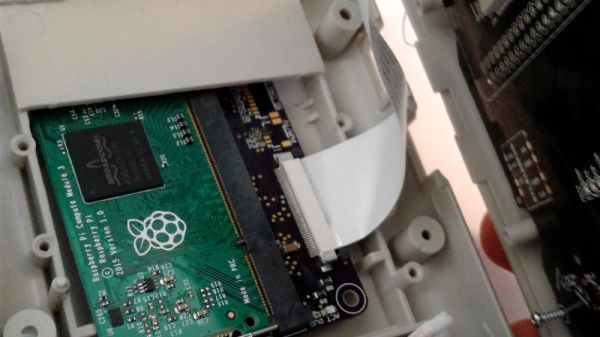
emulating-gba-inside-gbaIt’s not until you notice that it really shouldn’t be playing any games without a cartridge inserted that you know something is not right in the Mushroom Kingdom. When you look inside you see the edge of a Raspberry Pi Zero instead of the card edge connector you expected.

It took a lot of work for [Ryzee119] to convert a dead, water damaged, GBA to a thriving emulation station based around a Pi Zero. The first step was desolder the components he couldn’t find anywhere else. The LR buttons, the potentiometer, and even the headphone jack. The famously hard to see screen, of course, had to go.  It was replaced by a nice TFT. Also, the original speaker was too corroded from the water and he sourced a replacement.

Custom replacement PCB

Next he took a good photo of the GBA’s circuit board. We wonder if he used the scanner method mentioned in the comments of this article? He spent a lot of time in Dassault’s DraftSight, a 2D CAD program, outlining the board. Then, after thoroughly verifying the size of the board for the Nth time he imported the outlines to EagleCAD.

He managed to cram quite a bit onto the board while remaining inside the GBA’s original envelope. The switches, potentiometer, and jack went back to their original locations. Impressively, he made his own pad traces for the A, B, and D-Pad buttons. The mod even handles slowly decreasing battery voltages better than the original.

In the end it all snaps together nicely. He’s configured it to boot into the emulator right at start-up. If you’d like one for yourself, all his files are open source.