Have you ever wondered how the graphics in your favorite video games worked? This is the start of a series on game graphics, and what better place to start than how exactly the original Mario Bros. got those glorious pixely pixels onto the screen. Buckle in, because we’re “racing the beam” with systems like the NES, Commodore 64, and many other classics from the 1980s.
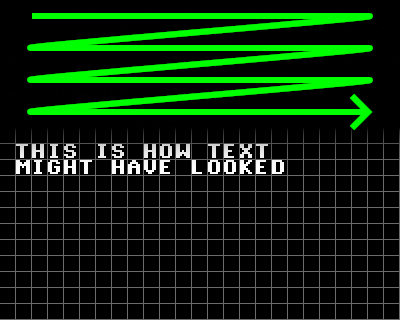
And to understand the 1980’s, it’s important to understand how the televisions of the time worked. Cathode Ray Tube (CRT) televisions work by precisely bombarding a phosphor layer with electrons, which excites the phosphor, which then releases visible light. The beam scans from left to right then top to bottom, giving each pixel a small fraction of a second of time. All of this effectively means that pixel data needs be sent at the same time as when the pixels are being lit up, which is why this type of graphics is often dubbed “racing the beam”.
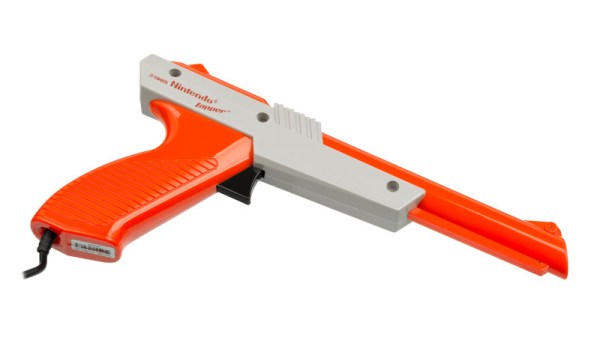
It’s an accepted part of retro gaming lore, that 8-bit consoles perform best when used with an original CRT TV. One of the reason for this is usually cited as being because the frame buffer and scaler circuit necessary for driving an LCD panel induces a delay not present on the original, and in particular this makes playing games which relied on a light gun impossible to play. It’s a subject [Nicole Branagan] takes a look at, and asks whether there are any ways to use a classic light gun with a modern TV.
Along the way we’re treated to an in-depth look at the tech behind light gun games, how the gun contained a photodiode which on the NES was triggered by the brief showing of a frame with a white square where the target would sit, and on the Sega consoles by a white screen with an on-board timer counting the screen position at which the gun was aimed.
The conclusion is that the delay means you won’t be playing Duck Hunt or Hogan’s Alley on your 4K TV, but interestingly, all is not lost. There are modified versions of the games that take account of the delay, or an interesting lightgun emulator using a WiiMote. We’d be happy at playing either way, just as long as we can take pot-shots at the annoying Duck Hunt dog.
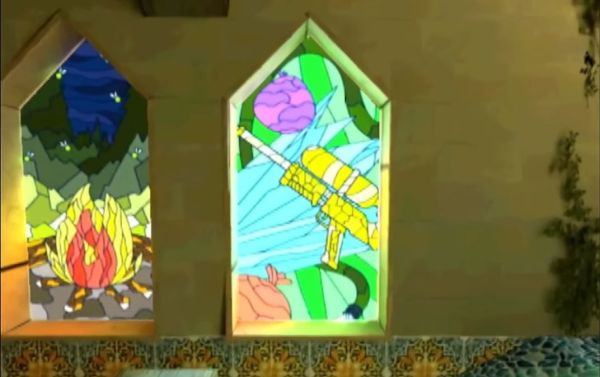
As amazing and groundbreaking as the Nintendo 64 was, over the years it has also become synonymous with blurry textures and liberal use of Gouraud shading as its most strongly defining visual features. In a recent video, [James Lambert] covers how the system’s minuscule 4 kB texture memory (TMEM) can be circumvented using mipmapping. By loading progressively more detailed textures (each in 4 kB chunks) in a level-of-detail (LoD), the visual fidelity can be maximized while keeping rendering speeds relatively zippy, as the real-time demo proves.
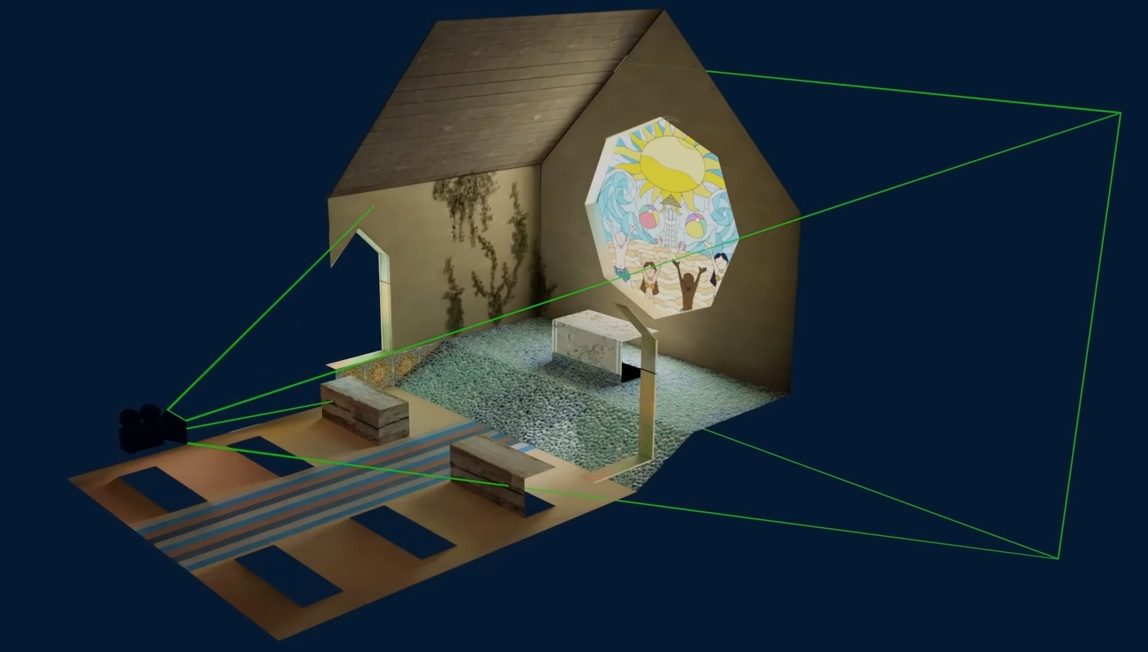
Determining which textures are visible to the player.
This project was made for the N64brew 2023, with the source code available on [James]’s GitHub account. Although impressive, it bears noting that mipmapping was not an unknown approach in 1996, and many approaches were used to work around the N64’s physical limitations.
In the case of mipmapping, [James]’s demo perfectly demonstrates the problematic nature of mipmapping, as it dramatically increases the storage requirements for the textures, hitting 40 MB just for this one single room, for a system that supports up to 64 MB cartridges.
Ultimately, this shows that the 4 kB TMEM was not the only issue with the N64, with the limited (and expensive) mask ROMs for the cartridges proving to be an insurmountable obstacle that systems like Sony’s PlayStation largely did not have to contend with. With roomy 650 MB+ optical storage, the PS1 got instead tripped up by the glacial access and loading speeds of optical media and its soggy-potato-powered GPU.
Seeing demonstrations like these manage to wonderfully highlight the bottlenecks in these old consoles, and makes one wonder about what could have been, even in an era before 1 TB solid-state drives and direct resource streaming between GPU and said storage.
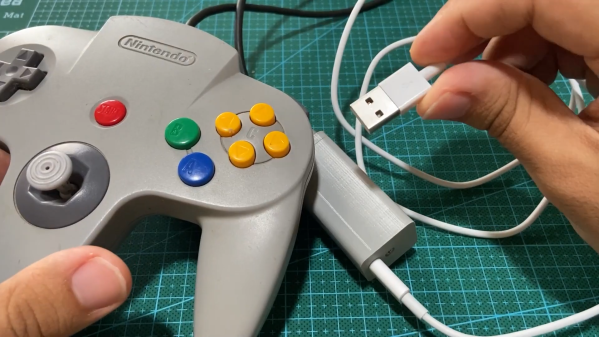
Game consoles typically support a limited number of input devices, meaning that console games are often completely optimized for the default controller supplied with that platform. Nintendo’s tendency to completely reinvent their controllers pretty much every generation can therefore become a little irritating, especially when they also enable their newer consoles to play games from their back catalog. So when [Robson Couto] found that using the Switch’s Joy-Cons was a bit awkward for playing emulated Nintendo 64 games, he decided to figure out how to connect real N64 controllers to a Nintendo Switch.
While you can buy modern N64-style controllers for the Switch, even straight from Nintendo themselves, [Robson] thought it would be way more interesting to reuse an old controller and implement the translation step from scratch. In the video (embedded below) he takes a deep dive into all the timing details of the N64 controller protocol, which is basically a 1-wire setup, and explains how to use an STM32F411 BlackPill board to read out the controller’s buttons and joystick.
Next, he explores how to map the resulting data to the USB HID protocol used by the Switch. Most of the buttons have a clear one-on-one mapping, but since the “minus”, “capture” and “home” buttons are missing on the N64 controller, he chose to map these to button combinations unlikely to be used during regular gameplay. [Robson] also ran into the common issue of the analog joystick having a poorly-defined maximum range, for which he added a rudimentary auto-calibration feature.
Finally, he designed and 3D-printed a neat enclosure for his system with an N64 controller port on one side and a USB port on the other. By 3D-printing the whole thing he also avoided having to either source the non-standard connector or permanently modify his hardware. The end result of [Robson]’s project is an unobtrusive gadget that connects classic controllers to modern hardware – but of course, the reverse process is very much possible, too. If you want, you can even play N64 games with a mouse and keyboard.
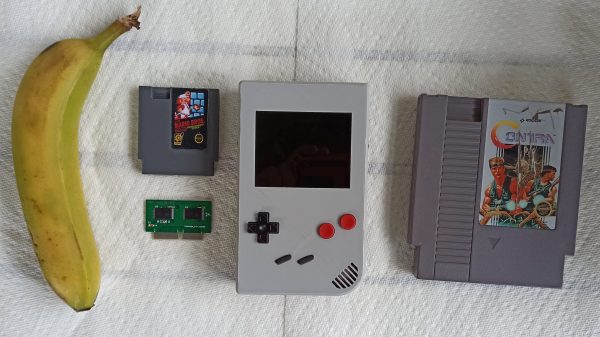
These days, it’s possible to get a single-board computer the size of a stick of gum. This will give you the power to emulate thousands of games and you can run one off batteries inside a handheld of your own devising. [Redherring32] took an altogether more creative and old-school approach with the TinyTendo, however. This is one pocket-sized NES that actually runs on genuine hardware. (Nitter)
The feat was achieved by drastically reducing the size of the original NES hardware to make it fit into a Game Boy style form factor. Key to this work was creating a custom cut-sized motherboard which uses original Nintendo DIP chips that have been machined down to become more like QFN-style surface mount packages. With that done, the chips can be assembled onto the TinyTendo PCB which is even smaller than a contemporary Raspberry Pi 3. It’s all assembled in a custom case, with USB C for charging and a bright and colorful LCD screen.
The TinyTendo is designed to use mini-cartridges created by [Bucket Mouse], a hacker who’s no stranger to impressive custom Game Boy hardware. By virtue of running genuine NES hardware, there’s also the possibility that the TinyTendo could play full-sized NES carts with a simple adapter.
This project has been a long time in the making; we first looked at [Redherring32]’s efforts back in 2021. It begs the question why the original NES was so big when Nintendo clearly had plenty of space to spare in those hefty DIP packages! It’s amazing what can be done with some creativity and perseverance. Continue reading “TinyTendo Is A Miniscule Yet Real NES”→
No matter your age or background, there’s an excellent chance you’ll recognize the Nintendo Entertainment System (NES) at first glance. The iconic 8-bit system not only revitalized the gaming industry, but helped to establish the “blueprint” of console gaming for decades to come. It’s a machine so legendary and transformative that even today, it enjoys a considerable following. Some appreciate the more austere approach to gaming from a bygone era, while others are fascinated with the functional aspects of console.
The NesHacker YouTube channel is an excellent example of that latter group. Host [Ryan] explores the ins and outs of the NES as a platform, with a leaning towards the software techniques used to push the system’s 6502 processor to the limits. Even if you aren’t terribly interested in gaming, the videos on assembly programming and optimization are well worth a watch for anyone writing code for vintage hardware.
If you were a kid anywhere in the last 30 years, it was nearly impossible to avoid at least some exposure to the Pokemon franchise. Whether that’s through games like Red and Blue to Scarlet and Violet, the brief summer everyone played Pokemon Go, or to other media such as the trading card game or anime, it seems to have transcended generations and cultures fairly thoroughly. And, if you’ve consumed all there is of official Pokemon video gaming, you may be surprised to know there are a number of slightly modified games floating around out there that can be translated onto game carts just like their official counterparts.
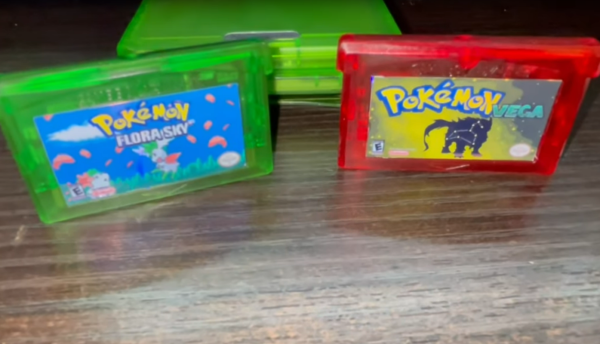
[imablisy] has played a lot of these ROM hack games but always within something like a virtual console or emulator, so he wanted something physical which would work on original hardware of the era. For this he’s making physical copies of Flora Sky and Vega, which are based on Pokemon Emerald and Fire Red originally for the Game Boy Advance. To get the cart he found a bunch of Mother 3 cartridges to use as the donor. From there he backed up his Emerald and Fire Red cartridges, modified the ROMs with the modifications, and then sent those new ROMs to overwrite the data on the Mother 3 cartridges.
A playable cartridge is only half of the build, though. He wants these to look and feel like real Pokemon games, so he added a color-appropriate translucent case and also printed custom holographic labels for each. It might seem straightforward, but from the style of [imablisy]’s video it’s clear he is very familiar with processes like these, from the artwork all the way to the hardware and software side. We’re also pleased no classic hardware was damaged during this build, much like this version of Doom on an NES cart which used a common game for the donor to upset the least number of collectors.