Gaskets, Can They Be 3D Printed?

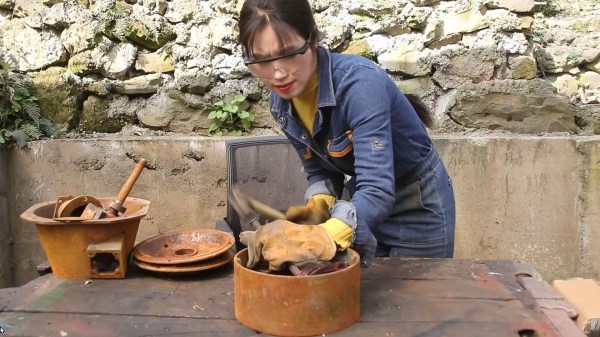
Anyone who’s owned an older engine, whether it be in a car, motorcycle, or garden machine, will at some time have been faced with the need for a gasket. Even when the gasket is readily available there may be an imperative to fix the engine rather than wait for the part to arrive, so it’s common to make your own replacements. Simple ones are easy to cut from thin card, but if you’ve ever tried to do this with a really complex one you’ll know the pain of getting it right. This is the problem tackled in a video from [the_eddies], who has explored the manufacture of replacement gaskets by 3D printing.

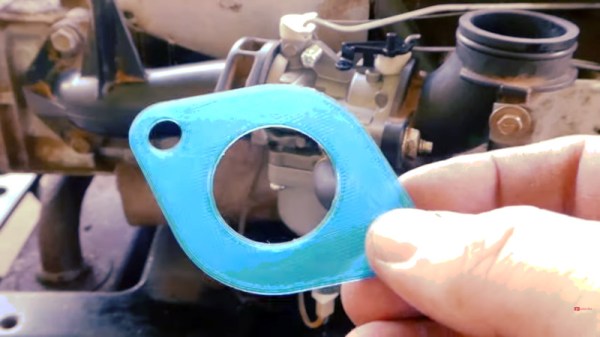
The advantages of CAD and easy manufacture are obvious, but perhaps many common plastics might not perform well in hot or oily environments. For that reason he settles on TPU filament, and gives it a test in a bath of 2-stroke fuel mix to see how well it resists degradation. It passes, as it does also when used with a carburetor, though we’d be curious to see the results of a long-term test. We’ve placed the video below the break, so reach your own conclusions.

Gaskets have featured here before, and if you’re interested then there are other machines which can be used to make them.

Continue reading “Gaskets, Can They Be 3D Printed?”

Taking A Close Look At Parallel Plate Capacitors

Of course, we all know that capacitors are conceptually two conductors separated by a dielectric of some sort. But outside of air-variable capacitors you normally don’t see them looking like that. For example, a film capacitor has its plates rolled up in a coil with an insulating film in between. You can’t really see that unless you take them apart. But [Electronoobs] makes some giant capacitors using large plates and does a few experiments to demonstrate their characteristics. You can see his work in the video below.

The arrangement reminded us of a Leyden jar except there’s no physical motion. He also had some entertaining footage of electrolytic capacitors exploding when connected backwards. The reason, by the way, is that electrolytic capacitors have conductive goo in them. By putting a controlled current through them during manufacturing, a very thin insulating layer forms on one electrode. The thinner the layer, the higher the potential capacitance is. The downside is that putting current in the opposite way of the formation current causes catastrophic results, as you can see.

The value of a capacitor depends on the area, the spacing, and the type of dielectric between the plates. The video covers how each of those alters the capacitor value. Real capacitors also have undesirable characteristics like leakage and parasitic resistance or inductance.

It used to be that capacitance meters were exotic gear, but these days many meters have that capability. This would be a great set of experiments for a classroom or as the basis for a kid’s science project. For example, measuring different dielectric materials to determine which is the best for different purposes.

Granted, capacitors are pretty basic physics, but it is easy to get wrapped up in using them and not think about what’s going on inside. This video is a good introduction or a refresher, if you need one. It is easy enough to make your own variable capacitors or even special capacitors for high voltages.

Continue reading “Taking A Close Look At Parallel Plate Capacitors”

Hall Effect Module Knows Where Your Motor Is

If you have a motor and you’d like to know where the shaft position is, you are likely to turn to an optical encoder scheme. However, as [lingib] points out, you can also use a magnet and a magnetometer. You can see how it works in the video below.

The MLX90393 is a 3-axis hall effect device and, with a magnet on the shaft, the X and Y outputs of the spinning magnet will form a quadrature output that you can easily read.

Continue reading “Hall Effect Module Knows Where Your Motor Is”

Skip The Shipping, Print Your Own Cable Chains

CNC machines and 3D printers tend to have plenty of cabling which must be neatly managed while the machine moves. If not properly taken care of, wires can easily end up tangled in the moving bits leading to a dead machine at best, and some kind of raucous fire at worst. [Nikodem Bartnik] decided to create his own cable chains for his CNC build to keep everything in check.

The benefit of cable chains is that they stop cables splaying everywhere while still allowing them to move as needed with the axes of the machine. [Nikodem] created 20mm and 40mm chains for his build, affixed into the aluminium extrusion with bolts and T-nuts for easy assembly. The chains are assembled by hand, with 3D printed clips that hammer in place to hold the cables inside once inserted.

Of course, there’s nothing stopping you from buying cable chains off the shelf. But if you don’t want to wait for shipping in this era of cursed supply chains, or you want a cable chain you can customize to perfectly suit your machine, making your own could be the way to go. 

Continue reading “Skip The Shipping, Print Your Own Cable Chains”

A Gaggle Of Boards Makes For An I2C Playground

It’s not much of a stretch to assume that the majority of Hackaday readers are at least familiar with I2C. In fact, there’s an excellent chance that anyone who’s ever done more with an Arduino than blink the onboard LED has at one time or another used the serial communication protocol to talk to a sensor, display, or other external gadget. Of course, just because most of us have used it in a few projects doesn’t mean we truly understand it.

If you’re looking to brush up on your I2C knowledge, you could do worse than to follow the guide [András Tevesz] recently wrote up. With a title like Hardware Hacking 101: E01 I2C Sniffing, How to Listen to Your Arduino’s I2C Bus, you know you’re in for a good time. While the document is arguably geared more towards security researchers than electronic hobbyists, the concepts presented can be useful even if you’re just trying to debug your own projects. Continue reading “A Gaggle Of Boards Makes For An I2C Playground”

A Simple Linear Power Supply, Done Well

When reaching for a power supply design it’s normal here in 2022 to reach for a switching design. They’re lightweight, very efficient, and often available off-the-shelf at reasonable prices. Their benefits are such that it’s become surprisingly rare to see a traditional linear power supply with a mains-frequency transformer and rectifier circuit, so [ElectroBoy]’s dual voltage PSU board for audio amplifiers is worth a second look.

This type of linear power supply has an extremely simple circuit consisting of a transformer, bridge rectifier, and capacitors. The transformer isolates and steps down the AC voltage, the rectifier turns it into a rough DC, and the capacitors filter the DC to remove as much AC ripple as possible. In an audio power supply the capacitors have the dual role of filtering and providing an impulse reservoir for the supply in the event of a peak in demand imposed by the music being played. Careful selection is vital, with in this case a toroidal mains transformer and good quality capacitors being chosen.

The choice between a linear power supply such as this one and a switching design for high quality audio is by no means clear-cut, and may be something we’ll consider in our Know Audio series. The desirable properties are low noise and that impulse reservoir we mentioned, and it’s probably fair to say that while both types of power supply can satisfy them. With the extra expense of a toroidal transformer a linear supply is unlikely to be the cheaper of the two, but we suspect the balance tips in its favour due to a good linear supply being the easier to design.

Rural Hacker De-Crufts And Rebuilds Hydroelectric Generator

YouTuber [Linguoer] has a knack, and it’s one that we don’t often see on the pages of Hackaday: rewinding and rebuilding dilapidated motors and generators. In the video below, you’ll see [Lin] take a hydroelectric turbine and generator that looks like it’s been sitting at the bottom of a lake, and turn it into a working unit, all while wearing her trademark blue and yellow denim jumpsuit.

Where as most makers would have used a MIG or TIG welder, [Linguoer] uses a simple (probably A/C) stick welder. Generator windings are calculated and wound by hand, and the carcass of what used to be the generator is sandblasted out in the open. Missing parts are fabricated from scratch using nothing more than an angle grinder. “Simple” is the order of the day.

[Linguoer] often refers to herself as “Village Girl”. Whatever specialty tools she uses, they are elementary. And whatever methods she uses, they are manual. You will get the idea very quickly that [Linguoer] isn’t just a person with a skill, but a person with a passion for getting things done no matter the circumstances. [Linguoer] is a hacker if there ever was one!

If hydroelectric hacks spin your pelton wheel, give this Impressive Off-Grid Hydroelectric Plant a whirl.

Continue reading “Rural Hacker De-Crufts And Rebuilds Hydroelectric Generator”