Single-Button Keyboard Has Multiple Uses

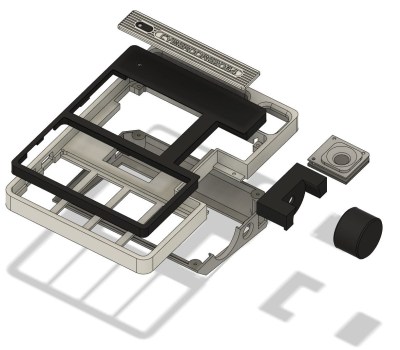
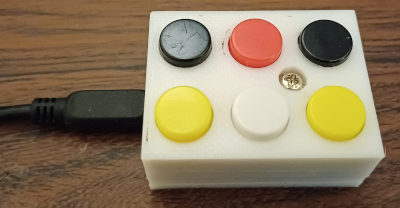
Well now why would I want a single-button keyboard, you might be asking yourself. We say it all depends on how you build the thing, and how you program it. Would you believe that the MagiClick by [Modular] is capable of showing live weather information or the date and time, acting as animated dice, or being a stopwatch and Pomodoro timer? Now you’re beginning to understand.

Before we get much further, yes, this bad boy has two additional buttons on the sides. But the spirit of the thing is in the single large switch in the middle. It’s hiding beneath the 0.85″ 128×128 display, which is protected from pressure and fingerprints by that Pop-o-Matic bubble over the top. While the big button is the main operator used to access the function options, the side buttons are used as auxiliaries to exit and return to the home screen.

MagiClick is based on the ESP32-S3 and is designed to run on CircuitPython. In addition to everything else packed into this thing, there are blinkenlights and a small speaker inside, plus a GPIO expansion header around back. Everything is available on GitHub if you want to build your own.

Not enough keys for you? Well, here’s one with two.

Illustrated Kristina with an IBM Model M keyboard floating between her hands.

Keebin’ With Kristina: The One With The Busy Box Macro Pad

Well, I must admit that Google Translate completely failed me here, and thus I have no real idea what the trick is to this beautiful, stunning transparent split keyboard by [illness072]. Allegedly, the older tweets (exes?) hold the key to this magic, but again, Google Translate.

Based on top picture, I assume that the answer lies in something like thin white PCB fingers bent to accommodate the row stagger and hiding cleverly behind the keys.

Anyone who can read what I assume is Japanese, please advise what is going on in the comments below.

Continue reading “Keebin’ With Kristina: The One With The Busy Box Macro Pad”

Building A Charging Holder For The Apple Pencil

The Apple Pencil is a neat tool for digital creativity, but the user experience is a bit blah when it comes to charging. You either have to plug it into an iPhone or iPad directly, or an iPhone charger using a special adapter. It’s a bit below Apple’s usual seamless best. [Handy Bear] got around this fuss by building their own Apple Pencil dock.

The concept is simple. At its heart, it’s not dissimilar from a regular pen holder. It consists of a 3D printed round base filled with quick cement for heft. The base weighs almost a pound, and has a cork base so it sits nicely on a desk. A Lightning charge cable is fed into the base of the device, with the Apple Pencil adapter permanently fitted. All one has to do is remove the cap from the Apple Pencil, slot it into the adapter, and place the cap in the storage hole provided. The base then keeps the device charged, upright, and ready for use.

It’s not a complicated build, but it solves a fundamental problem with the Apple Pencil. It’s hard to imagine fancy-schmancy creatives are leaving these things just floating around on their desks with cables going everywhere; you’d think Apple would be selling a $99 dock for these by now. Instead, it’s up to the DIYers and the aftermarket.

You might also consider some high-end mods to your Apple Pencil for greater finesse.

Continue reading “Building A Charging Holder For The Apple Pencil”

Salad Spinner Busts Some New Moves

Can you believe that [Tom Tilley]’s wife was just going to pawn off this perfectly good salad spinner on the thrift store when it’s so ripe for hacking? We couldn’t, either. Fortunately, he caught it just in time, right before dinner.

One of the coolest things a person can do that also tends to aid gameplay is to make a custom controller. [Tom] decided to make one for Bust-A-Move, a simple game where one shoots balls at bubbles in order to pop them. It looks like quite the fun little stress reducer. Anyway, a simple game deserves a simple controller, no? Yes.

As you’ll see in the build/demo video below, [Tom] started with a standard wireless mouse and hot-glued a cardboard origami creation to it. This goes upside-down inside the salad spinner and gets connected to the spinner part so that the entire origami moves in a circle. [Tom] then extended the left mouse button to a switch, which he affixed to the outside.

This controller re-uses a slightly modified mouse that [Tom] used in a previous Bust-A-Move controller. He is using a FreePIE script and vJoy in order to map mouse movements to the joystick inputs expected by the game. Watch [Tom] bust some moves after the break.

Continue reading “Salad Spinner Busts Some New Moves”

Illustrated Kristina with an IBM Model M keyboard floating between her hands.

Keebin’ With Kristina: The One With The Death Metal Macro Pad

At “the size of three 60% keyboards (put together)” or approximately one Cannibal Corpse record on vinyl, this beautifully-executed death metal font-inspired macro pad by [zyumbik] may be better off hanging on the wall than hanging out on the desktop.

But let’s say you did have room for the 9-key Deathpad on your desktop. Wouldn’t you just play with the tentacles (?) all the time like I would? Yeah, that’s what I thought. They’re pretty inviting.

So why does this look so fantastic? It’s an SLA print, for one thing. For another, [zyumbik] spent over 1,000 hours designing the thing. Unfortunately it’s not open-source, but you can buy the only other one in existence for a cool $1,000.

Rubik’s Cube Keyboard

Although it doesn’t rotate (yet), creator [_Rudeism] is calling this the Rubik’s Cube Keyboard. Fine with me, though any type of actual rotation would be insanely difficult to pull off. The plan is to do it with RGB LEDs.

The layout is QWERTY-adjacent — the white side is the num pad, yellow has the modifiers, and the other four sides house all the letters. As you might imagine, this uses a custom frame and PCBs. The switches are Glorious Gateron Clears, which definitely supports the blinkenlights planned for V2.

This thing reminds me a bit of of the SafeType™ vertical keyboard, or even [Aaron Rasmussen]’s spherical keyboard. Be sure to check it out in Monkeytype action, where [_Rudeism] manages to pull off about 20WPM. Continue reading “Keebin’ With Kristina: The One With The Death Metal Macro Pad”

Flip The Switch On This I2C Controlled USB Hub

You’ve probably seen USB hubs with physical switches for each port, they provide a handy way to cut the power to individual devices, but only if you’re close enough to flip them. They won’t do you much good if you want to pull the plug on a USB gadget remotely.

That’s why [Jim Heaney] created the I2C-USB-Hub. The device takes your standard USB 2.0 hub circuit, and adds in a MT9700 P-MOSFET load switch for each port. The enable pin on each of these switches is in turn connected to one of the output pins of a PCA9557PW I2C I/O chip. That means controlling each port is as easy as sending the proper sequence of bits over the wire, though [Jim] says he does plan on writing up an Arduino library to make flipping the digital switches a little more user friendly.

Since the 8-bit chip had a few extra pins left over, [Jim] wired one up to serve as a master control for the LED indicator lights on the PCB. Another is used to adjust the current limit on the MT9700 between 500 mA and 1 A.

While naturally we’re big fans of spinning up your own hardware here at Hackaday, we’ve also seen similar results achieved by modifying an off-the-shelf USB hub.

Building Up Unicode Characters One Bit At A Time

The range of characters that can be represented by Unicode is truly bewildering. If there’s a symbol that was ever used to represent a sound or a concept anywhere in the world, chances are pretty good that you can find it somewhere in Unicode. But can many of us recall the proper keyboard calisthenics needed to call forth a particular character at will? Probably not, which is where this Unicode binary input terminal may offer some relief.

“Surely they can’t be suggesting that entering Unicode characters as a sequence of bytes using toggle switches is somehow easier than looking up the numpad shortcut?” we hear you cry. No, but we suspect that’s hardly [Stephen Holdaway]’s intention with this build. Rather, it seems geared specifically at making the process of keying in Unicode harder, but cooler; after all, it was originally his intention to enter this in last year’s Odd Inputs and Peculiar Peripherals contest. [Stephen] didn’t feel it was quite ready at the time, but now we’ve got a chance to give this project a once-over.

The idea is simple: a bank of eight toggle switches (with LEDs, of course) is used to compose the desired UTF-8 character, which is made up of one to four bytes. Each byte is added to a buffer with a separate “shift/clear” momentary toggle, and eventually sent out over USB with a flick of the “send” toggle. [Stephen] thoughtfully included a tiny LCD screen to keep track of the character being composed, so you know what you’re sending down the line. Behind the handsome brushed aluminum panel, a Pi Pico runs the show, drawing glyphs from an SD card containing 200 MB of True Type Font files.

At the end of the day, it’s tempting to look at this as an attractive but essentially useless project. We beg to differ, though — there’s a lot to learn about Unicode, and [Stephen] certainly knocked that off his bucket list with this build. There’s also something wonderfully tactile about this interface, and we’d imagine that composing each codepoint is pretty illustrative of how UTF-8 is organized. Sounds like an all-around win to us.