This Clapperboard Prints Movie Posters

The clapperboard is a device used in video to synchronize audio and video. Its role in movies is well known and its use goes back in one form or another to the 1920s. [Gocivici] is a big movie fan and created a clapperboard that is able to print out posters of recently announced movies when the clapper is clapped.

The poster is not a big, full color job, but rather a black and white one, roughly the size of a movie ticket. [Gocivici] keeps his movie tickets in a journal and wanted to be able to keep small posters in there along with them. A thermal printer is used to print the poster along with the title, the release date, and some information about the movie. In addition to the printer, the hardware involved is a Raspberry Pi, a switch, and an LED. The clapperboard itself is 3d printed and then painted. A bit of metal is used to keep the clappers apart and give a bit of resistance when pressing them together. A nice touch is a metal front, so you can use magnets to keep your posters on the board.

[Gocivici] has detailed build instructions up along with a video (available after the break) showing the printer in action. The 3d models are available as well as the code used to create the posters after grabbing data from TMDb. If you need your clapperboard to be as accurate as possible, take a look at this atomic clock clapperboard.

Continue reading “This Clapperboard Prints Movie Posters”

Doom On The NES

“But can it run Doom?” is perhaps the final test of hacking a platform. From calculators to thermostats, we’ve seen Doom shoehorned into a lot of different pieces of hardware. Many times we’re left scratching our heads at the mashup, and this is no exception.

[TheRasteri] wasn’t satisfied with the existing ports of Doom, so he decided to bring the classic game to a classic console, the NES. In the video embedded after the break, he helpfully points out the system requirements for running Doom, and compares them with the specifications of the NES. Spoilers: not nearly enough.

How did he manage the feat? Taking inspiration from Nintendo’s own SuperFX chip, he embedded a co-processor in the cartridge, and fed the video stream from the cartridge back into the NES. It might not be fair to call it a co-processor, since it’s a Raspberry Pi with thousands of times the processing power of the 6502 that powers the NES. The idea might seem familiar, and in fact it was partially inspired by [Tom7]’s similar hack last year.

Using a Cypress USB controller to feed the graphics bus, [TheRasteri] is able to run Doom on the Raspberry Pi, take the visuals from the game, and convert them into blocks of graphics the NES expects to load from the cartridge. The best trick is that he apparently managed to squeeze everything into a normal NES cartridge. He plans to release a build video on his channel, so keep an eye out.

Meanwhile, don’t forget to take a look at those calculators and thermostats we mentioned.

Continue reading “Doom On The NES”

Mobile SIGINT Hacking On A Civilian’s Budget

Signals Intelligence (SIGINT) refers to performing electronic reconnaissance by eavesdropping on communications, and used to be the kind of thing that was only within the purview of the military or various three letter government agencies. But today, for better or for worse, the individual hacker is able to pull an incredible amount of information out of thin air with low-cost hardware and open source software. Now, thanks to [Josh Conway], all that capability can be harnessed with a slick all-in-one device: the RadioInstigator.

In his talk at the recent 2019 CircleCityCon, [Josh] (who also goes by the handle [CrankyLinuxUser]) presented the RadioInstigator as an affordable way to get into the world of wireless security research beyond the traditional WiFi and Bluetooth. None of the hardware inside the device is new exactly, it’s all stuff the hacking community has had access to for a while now, but this project brings them all together under one 3D printed “roof” as it were. The end result is a surprisingly practical looking device that can be used on the go to explore huge swaths of the RF spectrum at a cost of only around $150 USD.

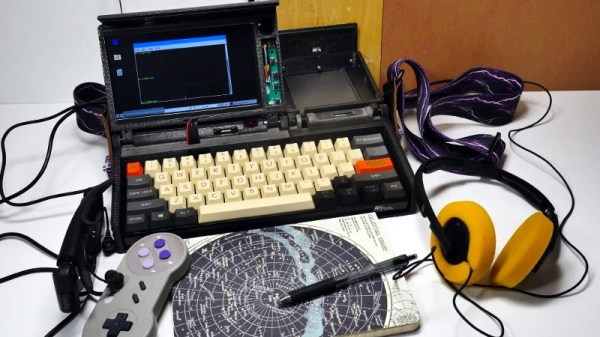
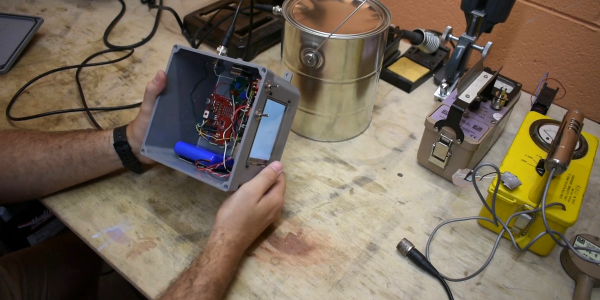
So what has [Josh] packed into this wireless toybox? It will probably come as little surprise to find out that the star of the show is a Raspberry Pi 3 B+, combined with a touch screen display and portable keyboard so the user can interface with the various security tools installed.

To help the RadioInstigator surf the airwaves there’s an RTL-SDR and a 2.4 Ghz nRF24LU1+ “Crazyradio”, both broken out to external antenna connectors on the outside of the device. There’s even an external SMA connector hooked up to the Pi’s GPIO pin, which can be used for low-power transmissions from 5 KHz up to 1500 MHz with rpitx. Everything is powered by a beefy 10,000 mAh battery pack which should give you plenty of loiter time to perform your investigations.

[Josh] has also written several Bash scripts which will get a trove of radio hacking tools installed on the Pi automatically, either by pulling them in through the official repositories or downloading the source and compiling them. Getting the software environment into a known-good state can be a huge time sink, so even if you don’t build your own version of the RadioInstigator, his scripts are still worth checking out.

You can do some pretty incredible things with nothing more than a Pi and an RTL-SDR, but we can’t help but notice there’s still plenty of room inside the RadioInstigator for more gear. It could be the perfect home for a Mult-RTL setup, or maybe even a VGA adapter for spoofing cell networks.

Continue reading “Mobile SIGINT Hacking On A Civilian’s Budget”

A Briefcase Computer For Your Hacking Needs

Decent laptop computers have been available for decades now. Despite this, there’s still something charming and enigmatic about a computer hidden within a briefcase. [MakeFailRepeat] wanted just such a rig, so did the maker thing and built one.

The project began when [MakeFailRepeat] was donated a 15″ monitor that ran on 12V. Naturally, it needed to be used in an awesome project, and the build began. MDF panels were cut to mount the screen inside an aluminium briefcase, and covered in black felt for a pleasing look and feel. A Logitech wireless keyboard and touchpad combo is used for input. The brains of the operation is a Raspberry Pi, equipped with a UPS HAT to handle battery and mains power, and an Adafruit Speaker Bonnet for sound.

The project was inspired by the classic video game Captive, released on Amiga, Atari, and MS-DOS platforms way back in 1990. While we’re pretty sure [MakeFailRepeat] isn’t trapped on a space station, his briefcase computer should nonetheless prove useful. A computer isn’t the only thing you can build into a briefcase, though. Video after the break.

Continue reading “A Briefcase Computer For Your Hacking Needs”

The Automated Solution To Your Unpopularity

You feel that you’re unpopular and no one likes you. The bad news is that if that’s the case in the real world there’s no easy way to fix it. The good news is there’s a great substitute — your popularity on Instagram. With this vending machine you can replace your personality with followers on Instagram. It’s just a shame we have to wait a year until Coachella.

This project is an interactive installation from [Dries Depoorter] that makes it possible to buy followers and likes in just a few seconds. It’s not limited to Instagram — you can get followers on FaceBook, YouTube, and Twitter, too. The hardware consists of a Raspberry Pi 3B+, an Arduino, coin acceptor, a few character LCDs running over I2C, and somewhat surprising for a one-off ‘art installation’, a lot of DIN rails mounted to a real industrial enclosure. Someone here knows what they’re doing;  there’s something resembling cable management inside this box and this vending machine is built to last.

Using this vending machine is as easy as sticking a few Euro coins in the slot and selecting the number of followers or likes you’d like. In a few minutes afterward, hundreds of notifications pop up on your phone. There’s no mention of the software in this vending machine aside from it being written in Python, which makes us wonder where these Instagram bots are based. Check out the video below.

Continue reading “The Automated Solution To Your Unpopularity”

Tiny Wooden Laptop Packs Raspberry Pi

Building a handheld Raspberry Pi rig is practically a hacker rite of passage these days. Off-the-shelf parts keep getting better, and we’re now starting to see affordable compact LCD screens with decent resolution become common. [MakeFailRepeat] got his hands on a HyperPixel screen, and decided to whip up a neat project with it.

The result is a charming little laptop, packing a 4″ screen with 800×480 resolution. Input is via multi-touch, as well as an integrated keyboard. The frame of the laptop is wooden, with a 3D printer supplying parts for the hinge mechanism. To round out the aesthetics, the top of the device was given a decorative copper inlay. Power management is via a UPS hat, which allows the device to switch seamlessly between battery and mains power.

A project like this is a great way to learn a wide range of valuable skills. It involves woodworking and 3D design, as well as the basic configuration of a single board computer. They come in all shapes and sizes, like this tiny RetroPie handheld, or this slick laptop build. Video after the break.

Continue reading “Tiny Wooden Laptop Packs Raspberry Pi”

Keep The Kids Entertained With A Time Machine

We often hear it said that today’s kids don’t go out and play as much as they did in the past, but honestly, it’s hard to really blame them. Have you seen some of the games they have now? It’s going to take something a little more exciting than a game of stickball to get them off the couch when they’ve got 4K and VR game systems to play with.

Circuit to control ATX PSU

Which is exactly why [Bobek] is building his kids a time machine. Not a literal one, of course. The Flux Capacitor technology required has yet to be mastered. But it does allow the player to “travel” through time through videos which are played by punching in specific codes they have to unlock by solving puzzles in the real world. Then again, keeping keeping kids active and mentally engaged might as well be “going back in time” in some people’s eyes.

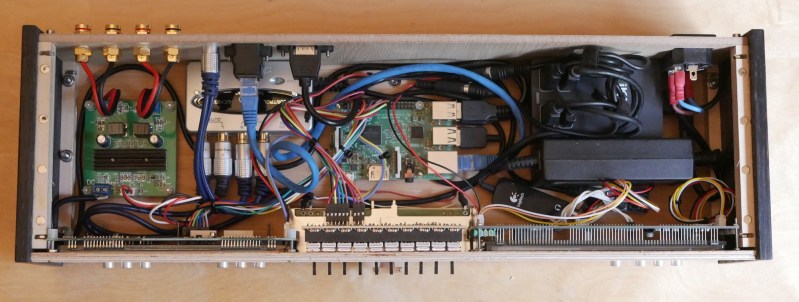
By the looks of things, [Bobek] still has a little work to do on the project, but it’s far enough along that we can get an idea. Inside the bottom of the heavy duty plastic case he’s installed an ATX power supply and a Raspberry Pi 3, and an top of that, there’s a metal plate that holds the power button, an RGB backlit keyboard, and a Vacuum Florescent Display.

After powering on the system, the kids punch in the codes they’ve earned on the keyboard. If accepted, it starts the corresponding presentation which goes over the sights and sounds of the time period they’ve unlocked. In the video after the break you can see [Bobek] test the device with a small display hanging off the end of an HDMI cable, but presumably the system will eventually get an integrated display. The kids could also plug it into the TV, but at that point you might be going full circle.

We’ve seen several examples of hackers creating their own electronic gadgets to keep their children entertained. The line might be a little blurry, but we’d rather see kids use their imagination to “fly” a spaceship in their bedroom than play Roblox on their phone.

Continue reading “Keep The Kids Entertained With A Time Machine”