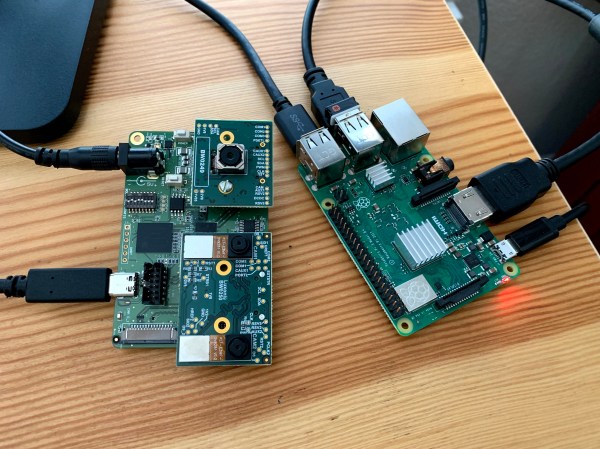
Up until now, running any kind of computer vision system on the Raspberry Pi has been rather underwhelming, even with the addition of products such as the Movidius Neural Compute Stick. Looking to improve on the performance situation while still enjoying the benefits of the Raspberry Pi community, [Brandon] and his team have been working on Luxonis DepthAI. The project uses a carrier board to mate a Myriad X VPU and a suite of cameras to the Raspberry Pi Compute Module, and the performance gains so far have been very promising.
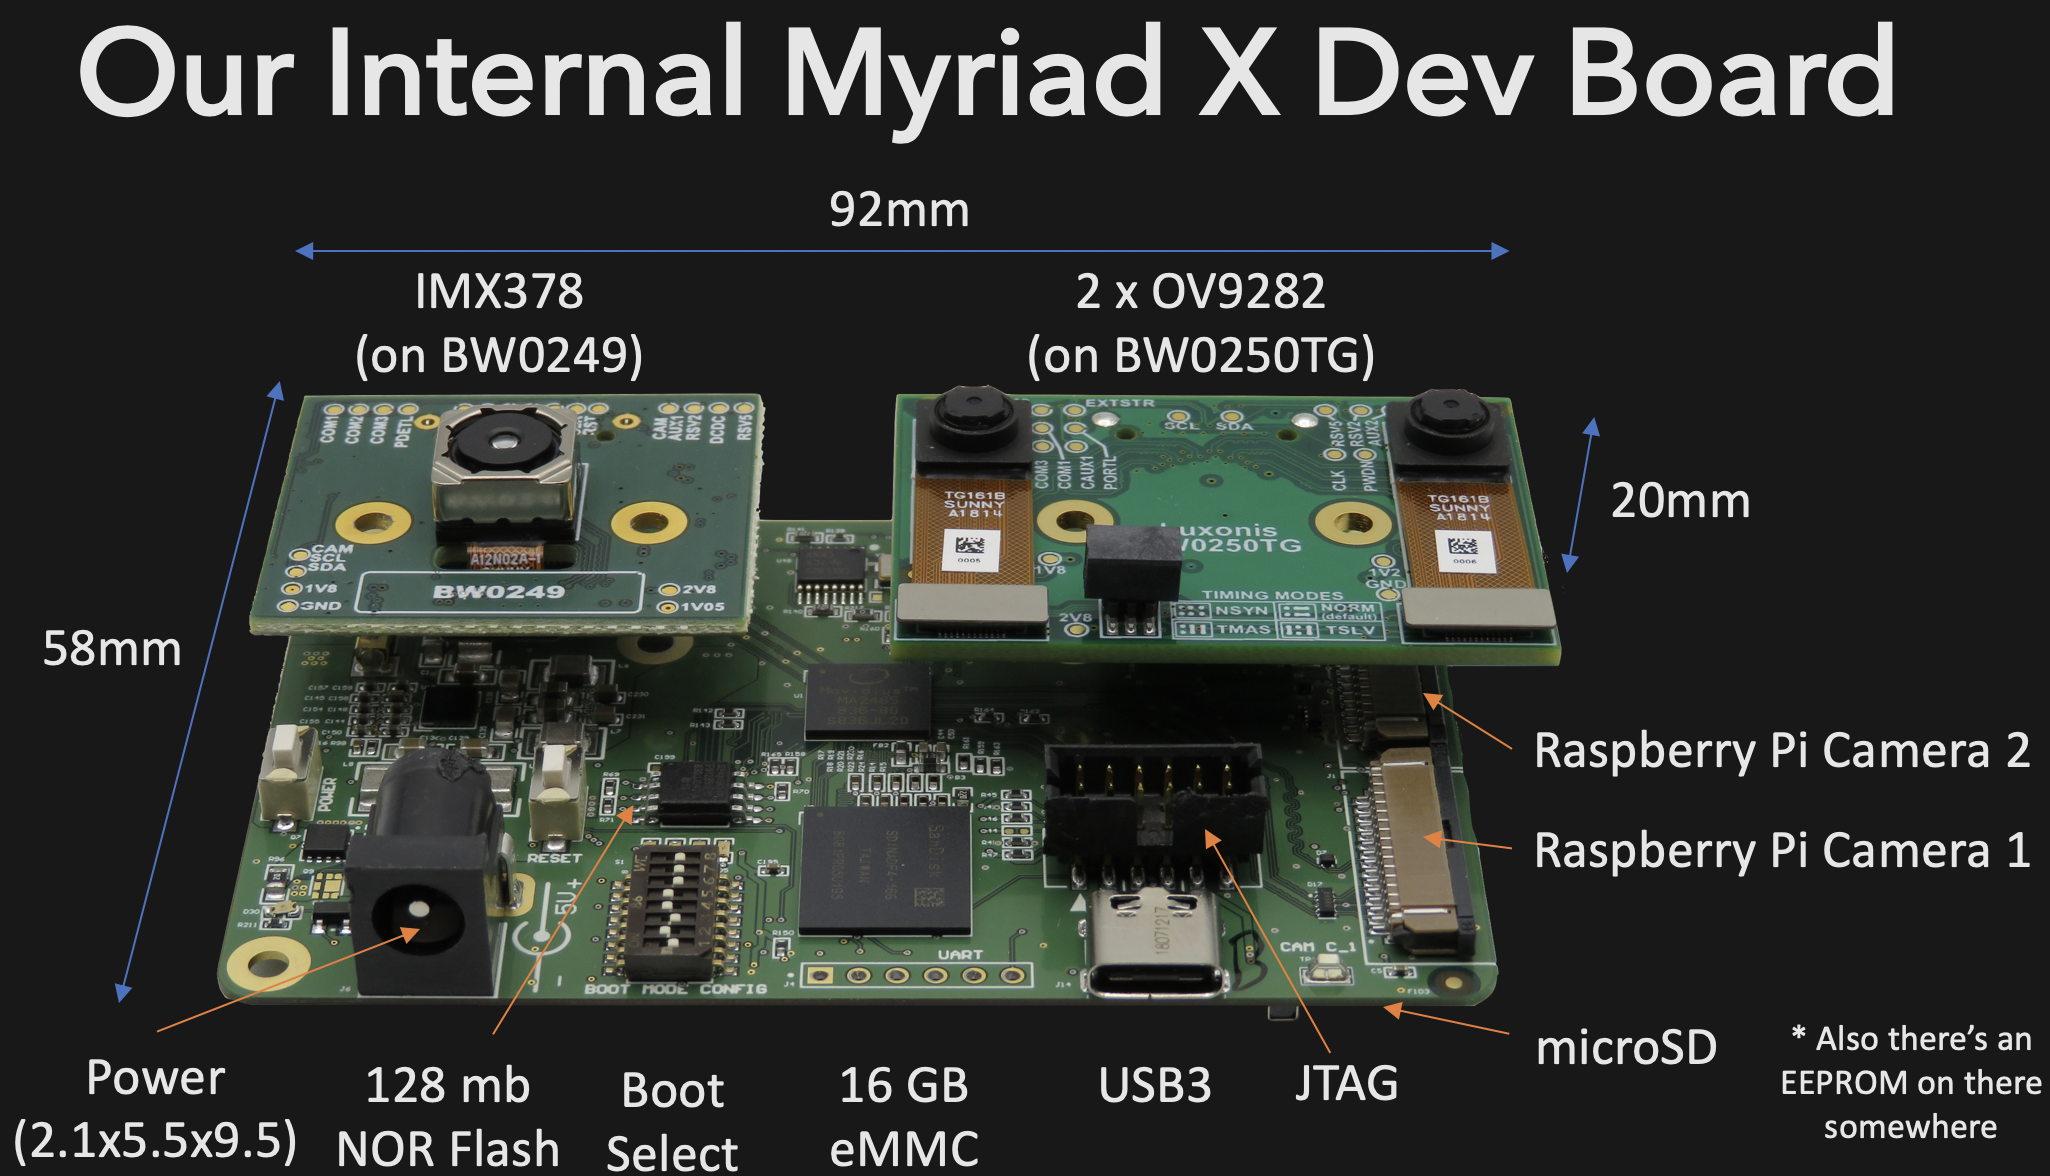 So how does it work? Twin grayscale cameras allow the system to perceive depth, or distance, which is used to produce a “heat map”; ideal for tasks such as obstacle avoidance. At the same time, the high-resolution color camera can be used for object detection and tracking. According to [Brandon], bypassing the Pi’s CPU and sending all processed data via USB gives a roughly 5x performance boost, enabling the full potential of the main Intel Myriad X chip to be unleashed.
For detecting standard objects like people or faces, it will be fairly easy to get up and running with software such as OpenVino, which is already quite mature on the Raspberry Pi. We’re curious about how the system will handle custom models, but no doubt [Brandon’s] team will help improve this situation for the future.
The project is very much in an active state of development, which is exactly what we’d expect for an entry into the 2019 Hackaday Prize. Right now the cameras aren’t necessarily ideal, for example the depth sensors are a bit too close together to be very effective, but the team is still fine tuning their hardware selection. Ultimately the goal is to make a device that helps bikers avoid dangerous collisions, and we’ve very interested to watch the project evolve.
The video after the break shows the stereoscopic heat map in action. The hand is displayed as a warm yellow as it’s relatively close compared to the blue background. We’ve covered the combination Raspberry Pi and the Movidius USB stick in the past, but the stereo vision performance improvements Luxonis DepthAI really takes it to another level.
Continue reading “High Performance Stereo Computer Vision For The Raspberry Pi”