Your local hardware store or garden supply center probably has everything you need to install landscape lighting all around your property. What’s a little less likely is coming out of that situation with fewer holes in your wallet than in your yard. And even then, it’s pretty much guaranteed that any off-the-shelf equipment won’t send you a text message when your landscape lighting isn’t working properly. [Mark]’s landscape lighting system does, though!
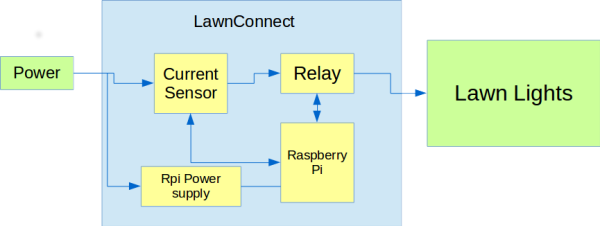
Powered by a Raspberry Pi, this landscape lighting system has every feature imaginable. It can turn the lighting on at sunset and turn it off at a set or random time later in the evening. There’s a web interface served from the Pi that allows further user control. The Raspberry Pi also monitors the lighting and can sense when one of the lights burns out. When one does, the Pi uses Twillo to send a text message notification.
There’s not many more features we can imagine packing into a setup like this. Of course, if you don’t have a spare Pi around you can probably manage to get the job done with an ESP8266, or even an old-fashioned Arduino.


 Enter the