C64 Keyboard Helps Keep The Memory Alive

To say that the Commodore 64 was an important milestone in the history of personal computing is probably a bit of an understatement. For a decent chunk of the 1980s, it was the home computer, with some estimates putting the total number of them sold as high as 17 million. For hackers of a certain age, there’s a fairly good chance that the C64 holds a special spot in their childhood; perhaps even setting them on a trajectory they followed for the rest of their lives.

At the risk of showing his age, [Clicky Steve] writes in to tell us about the important role the C64 played in his childhood. He received it as a gift on his fifth birthday from his parents, and fondly remembers the hours he and his grandfather spent with a mail order book learning how to program it. He credits these memories with getting him interested in technology and electronic music. In an effort to keep himself connected to those early memories, he decided to build a modern keyboard with C64 keycaps.

As you might expect, the process started with [Steve] harvesting the caps from a real Commodore, in fact, the very same computer he received as a child. While the purists might shed a tear that the original machine was sacrificed to build this new keyboard, he does note that his C64 had seen better days.

Of course, you can’t just pull the caps off of C64 and stick them on a modern keyboard. [Steve] found the STLs for a 3D printable C64 to Cherry MX adapter on GitHub, and had 80 of them professionally printed as he doesn’t have access to an SLS printer. He reports the design works well, but that non-destructively removing the adapters from the caps once they are pressed into place probably isn’t going to happen; something to keep in mind for others who might be considering sacrificing their personal C64 for the project.

[Steve] installed the caps on a Preonic mechanical keyboard, which worked out fairly well, though he had to get creative with the layout as the C64 caps didn’t really lend themselves to the keyboard’s ortholinear layout. He does mention that switches a bit heavier than the Cherry MX Whites he selected would probably be ideal, but overall he’s extremely happy with his functional tribute to his grandfather.

If you’re more of a purist, you can always adapt the C64 keyboard directly to USB. Or go in the complete opposite direction and put a Raspberry Pi into a C64 carcass.

It’s The Web, Basically

If you are of a certain age, you probably learned to program in Basic. Even if you aren’t, a lot of microcontroller hobbyists got started on the Basic Stamp, and there are plenty of other places where to venerable language still hides out. But if you want to write cool browser applications, you have to write JavaScript, right? Google will now let you code your web pages in Basic. Known as WWWBasic, this is — of course — a Javascript hack that you can load remotely into a web page and then have your page use Basic for customization. You can even import the thing into Node.js and use Basic inside your JavaScript, although it is hard to think of why you’d want to.

According to the project’s documentation — which is pretty sparse so far, we’re afraid — the Basic program is compiled into JavaScript on page load. There are a few examples, so you can generally pick up what’s available to use. There are graphics, the ability to read a keyboard key, and a way to handle the mouse.

Continue reading “It’s The Web, Basically”

Electromagnetic Field: Speczilla!

It is a golden rule of the journalist’s art, that we report the news, we don’t make it. But just occasionally we find ourselves in the odd position of being in the right place such that one of our throwaway comments or actions has the unintended consequence of seeding a story. This is one of those moments, so it’s a rare case of use of the first person in a daily piece as your scribe instead of Hackaday’s usual second person.

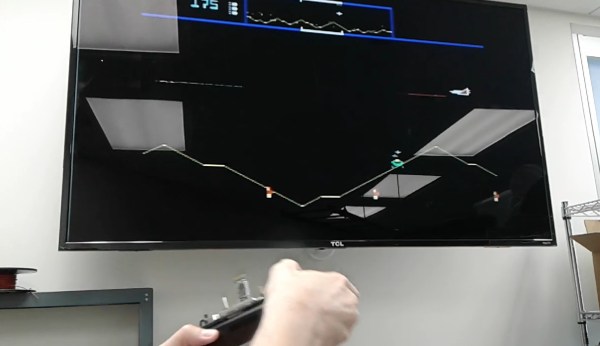
At the SHA2017 hacker camp in the Netherlands, [Matt “Gasman” Westcott] gave his presentation on composing a chiptune from an audience suggestion. Afterwards my Tweet about never having seen a Sinclair Spectrum as large as the one on the presentation screen grew a life of its own and became the idea for a project, which in turn at Electromagnetic Field 2018 was exhibited as a giant-sized fully working Sinclair ZX Spectrum.

Since much of the work was performed in Oxford Hackspace I saw Matt’s progression, his first experiments with foam rubber keys, then as he refined his two-wire switch mechanism. Early experiments hooking a row of them up to a real Spectrum motherboard weren’t the success he’d hoped for, so he moved to the FUSE emulator on a Raspberry Pi. A huge effort and needlework learning curve plus a lot of help from OxHack’s textile specialists and buying his local furniture store’s entire stock of foam allowed him to perfect a facsimile of the classic Spectrum’s case and blue rubber keys, while its lettering and iconic BASIC keywords were vinyl-cut at rLab in Reading. A Milton Keynes Makerspace member provided transport to the camp where it was united with a huge TV in a gazebo, completing the trio of local spaces.

At the camp, though it suffered a few technical hitches along the way it was rather a success. There were two techniques, kneeling down and pressing keys with the palm of your hand, or dancing on them in socked feet for complex manoeuvres. The trademark single-key-press BASIC keywords took a little while to re-learn though, there was a time when those were instinctive.

We’d normally wrap a piece like this one up with a link or two. To other projects perhaps, or other hacks from the same person. But in this case we have neither another home computer on this scale, nor any hacks from [Matt], as he’s well known in the European arm of our community for something completely different. As [Gasman] he’s a chiptune artist par excellence, as you can see if you watch his set from the 2014 Electromagnetic Field.

Packing 10 Into 1: A Square Inch Dekatron Replacement

One of the things that always attracts our eye in old movies is how many kinds of displays you see on old gear both real and imaginary. Really old stuff usually had meters or circular recorders. But slightly newer movies often had some kind of exotic digital display with Nixes or Numitron tubes. One of the really exotic display devices was a Dekatron. While these are pretty rare, you can make a stand-in using modern LEDs and [Dave] did just that in an entry into our square inch competition.

These were gas-filled tubes with ten positions. You had to reset the tube and then the tube would visibly count pulses providing a visual indicator from zero to nine. Depending on the tube configuration, you could use them to count or to act as a divider. Those with neon fill looked sort of orange, although there were argon-based ones that had a purple glow. You can see what an older version of the board looks like in the video below or skip to the second video if you want to see the real ones in action.

Continue reading “Packing 10 Into 1: A Square Inch Dekatron Replacement”

TI(ny) Is A New Take On The TI-99/4A

Way back in the 1980s, in the heyday of the personal computer revolution, Texas Instruments were one of the major players. The TI-99/4A was one of their more popular machines, selling 2.8 million units after an epic price war with the Commodore VIC-20. However once it had been discontinued, fans were left wanting more from the platform. Years later, that led [Fabrice] to produce the TI(ny), his take on an upgraded, more integrated TI-99/4A (Google Translate link).

Having spent many years working on these machines, [Fabrice] was very familiar with the official TI schematics – regarding both their proper use and their errors, omissions and inaccuracies. With a strong underlying knowledge of what makes a TI-99/4A tick, he set out to pen his own take on an extended model. [Fabrice] rolls in such features as Atari-compatible joystick ports, slot connectors for PeBOX expansion cards, and an RGB video output. It’s then all wrapped up in a very tidy looking case of somewhat unclear construction; it appears to be modified from an existing small computer case, and then refinished to look almost stock.

The best detail, though? It’s all made with components available in 1983! We see a lot of retro builds that are the equivalent of throwing a modern fuel-injected V8 into a vintage muscle car, and they are fantastic – but this is a project that shows us what was possible way back when.

Overall it’s a tidy build that shows what the TI-99/4A could have been if it was given a special edition model at the end of its life. If you’re looking to relive the glory days of the machine yourself, what better way then firing up the best demo on the platform? As the saying goes – Don’t Mess With Texas.

[Thanks to g_alen_e for the tip!]

ATX Adapter For The IBM PCJr Now Available

We’ve mentioned previously the challenges that come with maintaining vintage computers which in some cases are pushing 40 years old. Components, even high quality ones, eventually fail and need to be replaced. Now if it’s a fairly popular vintage machine, replacement parts usually aren’t too hard to come by. But what if you’re dealing with a machine that’s not just vintage, but was also such a commercial flop that parts are scarce?

Such is the life for anyone who owns one of the 500,000 IBM PCJrs that Big Blue managed to get out of the door during the year or so the product was on the market. As [AkBKukU] found, a replacement AC adapter for the odd-ball computer was going to cost more than what he paid for the thing, so he set to work on creating an adapter so he could use a modern ATX PSU on the machine. After a couple of months of ironing out the kinks, the design is finally ready for consumption.

In the end, the PCB design itself is quite simple. It’s really just a matter of switching around some pins from the standard ATX plug to the edge connector on the PCJr. There’s also a connector for powering a floppy drive, as well as headers for a fan and power switch.

[AkBKukU] has come up with two ways to use the adapter. You can either go with a standard ATX PSU, in which case it will need to sit outside the machine due to its size, or use a PicoPSU which allows you to keep the whole thing internal. If you don’t mind spending the cash, the PicoPSU method is a much cleaner installation that still provides plenty of power. Depending on which route you take, there are different 3D printed plates to adapt the computer’s rear panel to fit the new hardware.

All the files to build your own version are in the GitHub repository, and [AkBKukU] is doing some low volume runs of both kits and assembled adapter. If this project looks familiar, it’s because we reported on it back when it was still a hand-scratched PCB that didn’t always work as expected.

[Thanks to Gregg for the tip.]

Continue reading “ATX Adapter For The IBM PCJr Now Available”

A Switching Power Supply, 1940s-Style

“They don’t build ’em like they used to.” There’s plenty of truth to that old saw, especially when a switch-mode power supply from the 1940s still works with its original parts. But when said power supply is about the size of a smallish toddler and twice as heavy, building them like the old days isn’t everything it’s cracked up to be.

The power supply that [Ken Shirriff] dives into comes from an ongoing restoration of a vintage teletype we covered recently. In that post we noted the “mysterious blue glow” of the tubes in the power supply, which [Ken] decided to look into further. The tubes are Thyratrons, which can’t really be classified as vacuum tubes since they’re filled with various gasses. Thyratrons are tubes that use ionized gas – mercury vapor in this case – to conduct large currents. In this circuit, the Thyratrons are used as half-wave rectifiers that can be rapidly switched on and off by a feedback circuit. That keeps the output voltage fixed at the nominal 140V DC required by the teletype, with a surprisingly small amount of ripple. The video below is from a series on the entire restoration; this one is cued to where the power supply is powered up for the first time. It’s interesting to see the Thyratrons being switched at about 120 Hz when the supply is under load.

Cheers to [Ken] and his retrocomputing colleagues for keeping the old iron running. Whether the target of his ministrations is a 1974 scientific calculator or core memory from an IBM 1401, we always enjoy watching him work.

Continue reading “A Switching Power Supply, 1940s-Style”