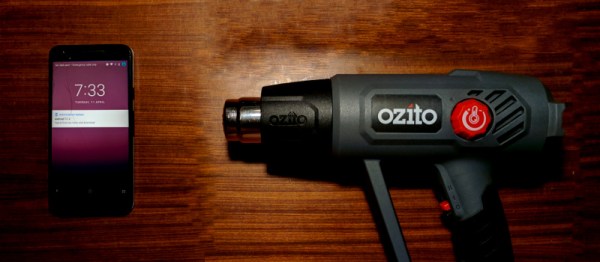
[RoyTecTips] shows us an ingenious hack which turns a single-SIM-slot phone into a fully functioning dual-SIM phone. All that’s needed for this hack is a heat-gun, solvent, micro SD card, nano SIM and some glue. The trick is that the phone has a SIM reader on the backside of an SD-card slot. Through some detailed dissection and reconstruction work, you can piggy-back the SIM on the SD card and have them both work at the same time.
Making the SD/SIM Franken-card is no picnic. First you start by filing away the raised bottom edge of the micro SD card and file down the side until the writing is no longer visible. Next get a heat gun and blast your nano SIM card until the plastic melts away. Then mark where the SIM card’s brains go and glue it on. Turn the phone on then, hey presto, you now have a dual SIM phone while keeping your SD storage.
This hack is reported to work on many Samsung phones that end in “7” and some that end in “5”, along with some 8-series phones from Huawei and Oppo clones of the Samsungs. Since you’re only modifying the SIM card, it’s a fairly low-risk hack for a phone. Combining two cards into one is certainly a neat trick, almost as neat as shoe-horning a microcontroller into an SD card. We wonder how long it will be before we see commercial dual SIM/SD cards on the market.
[Update] I got a little confused on this one as we only have the single sim variants of these phones where I live. this hack is for dual sim phones that either accept 2 sim cards or 1 sim + 1 SD card. This hack solves this problem and allows 2 sims plus 1 SD card in these phones. Sorry for the confusion and thanks to all who pointed this out in the comments.
Python is the Arduino of software projects. It has a critical mass of libraries for anything from facial recognition and neural networks to robotics and remote sensing. And just like Arduino, I have yet to find the killer IDE for Python. Perhaps I just haven’t tried the right one yet, but it could be that I’m just doing Python wrong.
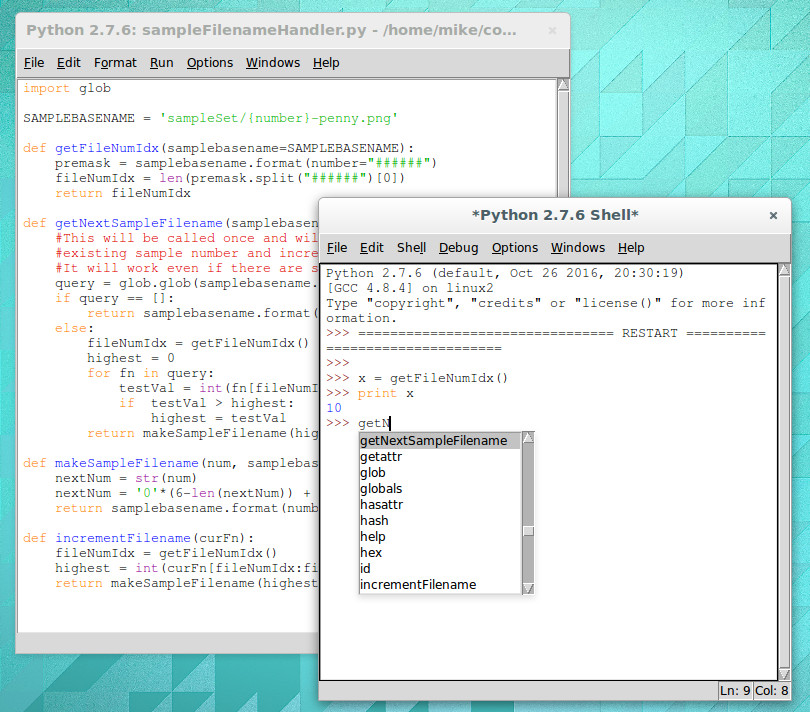
For Years I’ve Been IDLE
IDLE with interactive shell that has highlighting and code completion
I’m a Linux-only type of a guy so using IDLE for Python is a natural fit. It’s in the repositories for super quick and easy install and there’s basically zero configuration to be done. Generally speaking my preferred development environment is text editor and command line compiler. IDLE is just one step above that. You get a separate window for the shell and each Python file you’re working on. Have IDLE run your code and it saves the file, then launches it in the shell window.
For me, there are two important features of IDLE’s shell. The first is that it keeps an interactive session open after you run your Python code. This means that any globals that your script uses are still available, and that you can experiment with your code by calling functions (and classes, etc) in real time. The second desirable feature is that while using this interactive shell, IDLE supports code completion and docstring support (it gives you hints for what parameters a function accepts/requires).
But simplicity has a tough time scaling. I’m working on larger and larger projects spread over many files and the individual nature of IDLE editor windows and lack of robust navigation has me looking to move forward.
The Contenders
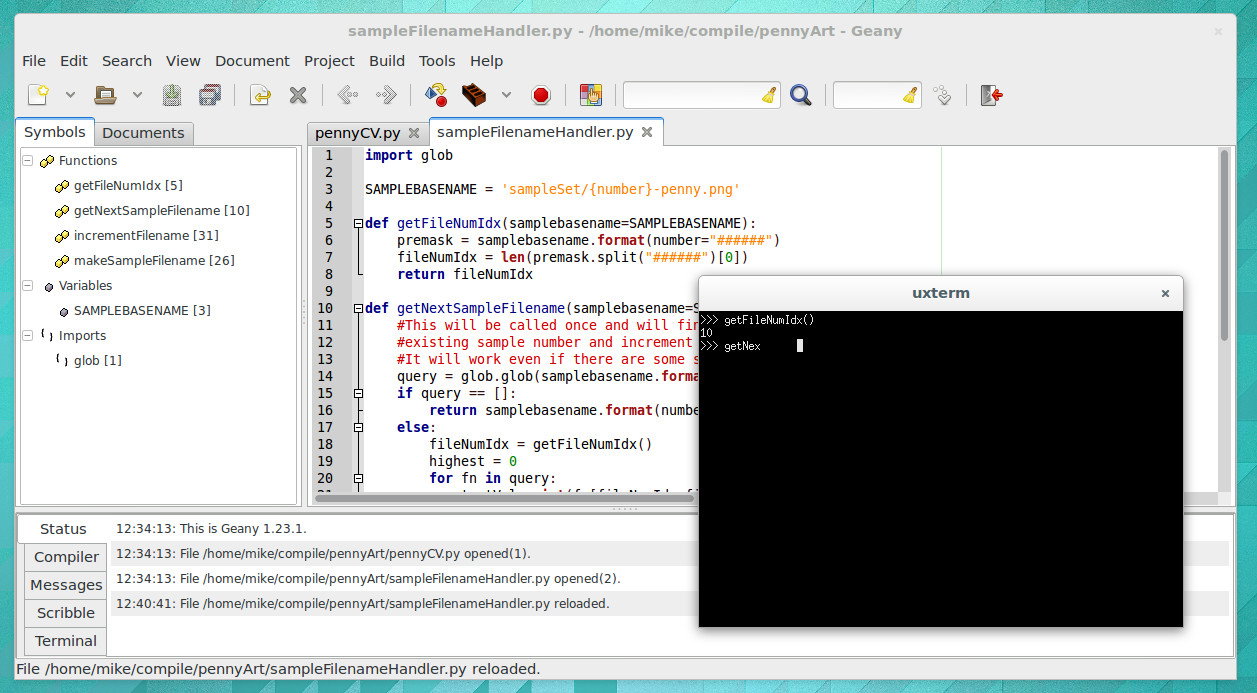
I’ve tried perhaps a half-dozen different Python IDEs now, spending the most time on two of them: Geany and Atom. Both are easy to install on Linux and provide the more advanced features I want for larger projects: better navigation, cross-file code completion (and warnings), variable type and scope indication.
The look of Geany brings to mind an “IDE 1.0” layout style and theme. It’s the familiar three-pane layout that places symbols to the left, code to the right, and status along the bottom. When you run your program it launches in an interactive terminal, which I like, but you lose all IDE features at this point, which I despise. There is no code completion, and no syntax highlighting.
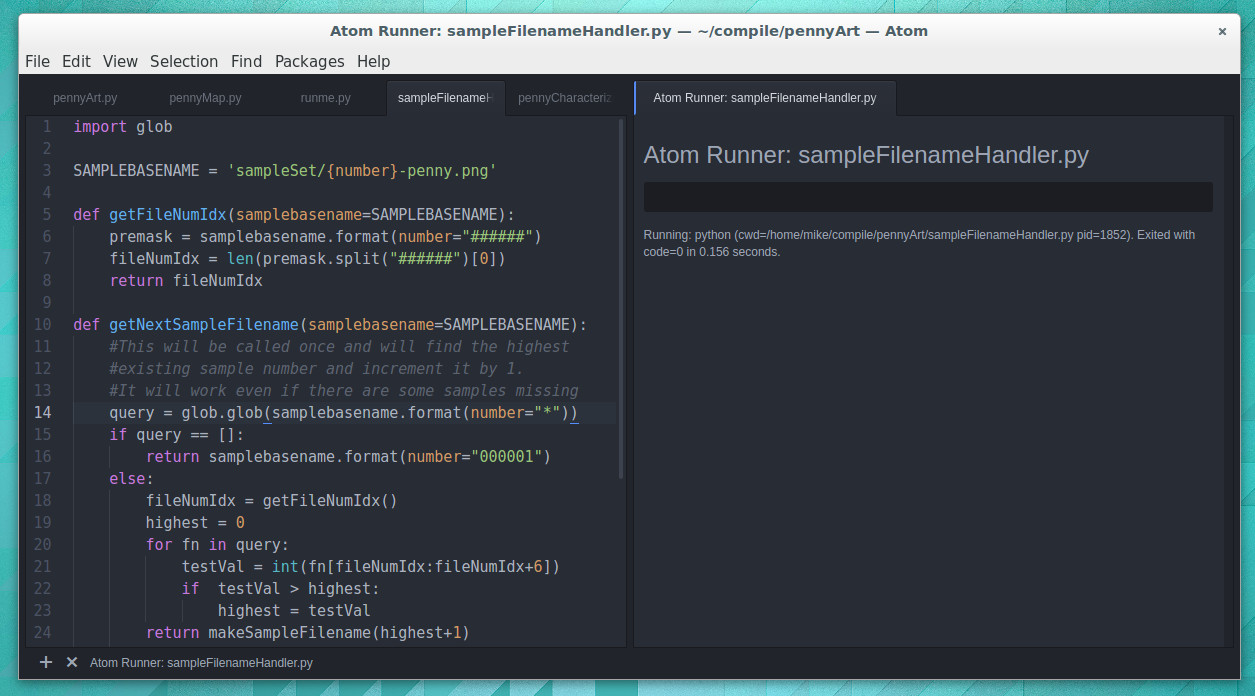
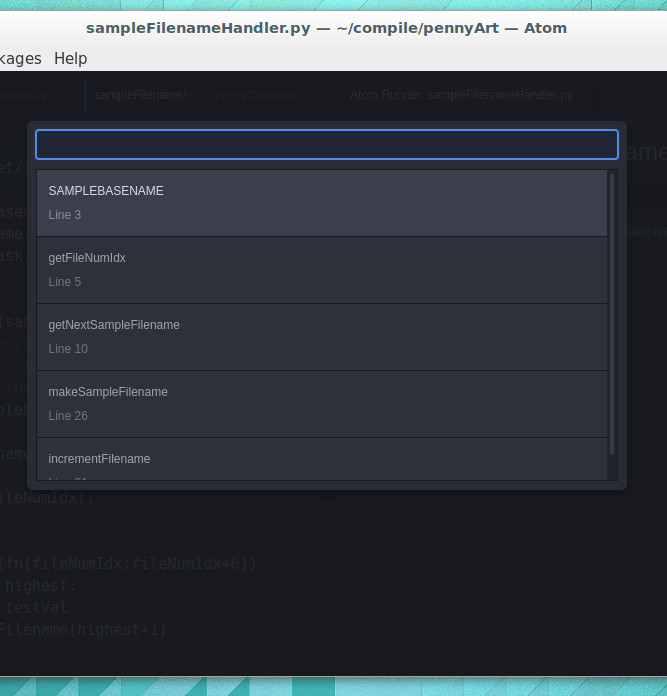
I have been using Atom much more than Geany and have grown to like it enough to stick with it for now. I’d call Atom the “IDE 2.0” layout. It launches with a dark theme and everything is a tab.
Atom has symbol view that isn’t shown all the time. CTRL-R brings it up and it uses a search style but you can also scroll through all symbols
Atom depends heavily on packages (plugins that anyone may write). The package management is good, and the packages I’ve tried have been superb. I’m using autocomplete-python and tabs-to-spaces, but again I come up short when it comes to running Python files. I’ve tried platformio-ide-terminal, script, and runner plugins. The first brings up a terminal as a bottom pane but doesn’t automatically run the file in that terminal. Script also uses a bottom pane but I can’t get it to run interactively. I’m currently using runner which has an okay display but is not interactive. I’ve resorted to using a “fake” python file in my projects as a workaround for commands and tests I would normally run in the interactive shell.
Tell Us How You Python
It’s entirely possible I’ve just been using Python wrong all these years and that tinkering with your code in an interactive shell is a poor choose of development processes.
What do you prefer for your Python development? Does an interactive shell matter to you? Did you start with IDLE and move to a more mature IDE. Which IDE did you end up with and what kind of compromises did you make during that change. Let us know in the comments below.
There’s a lot to be said in favor of getting kids involved in hacking as young as possible, but there is one thing about working in electronics that I believe is best left as a mystery until at least the teenage years — hide the shrink tube. Teach them to breadboard, have them learn resistor color codes and Ohm’s Law, and even teach them to solder. But don’t you dare let them near the heat shrink tubing. Foolishly reveal that magical stuff to kids, and if there’s a heat source anywhere nearby I guarantee they’ll blow through your entire stock of the expensive stuff the minute you turn your back. Ask me how I know.
I jest, but only partly. There really is something fun about applying heat shrink tubing, and there’s no denying how satisfying a termination can be when it’s hermetically sealed inside that little piece of inexplicably expensive tubing. But how does the stuff even work in the first place?
If you measure a DC voltage, and want to get some idea of how “big” it is over time, it’s pretty easy: just take a number of measurements and take the average. If you’re interested in the average power over the same timeframe, it’s likely to be pretty close (though not identical) to the same answer you’d get if you calculated the power using the average voltage instead of calculating instantaneous power and averaging. DC voltages don’t move around that much.
Try the same trick with an AC voltage, and you get zero, or something nearby. Why? With an AC waveform, the positive voltage excursions cancel out the negative ones. You’d get the same result if the flip were switched off. Clearly, a simple average isn’t capturing what we think of as “size” in an AC waveform; we need a new concept of “size”. Enter root-mean-square (RMS) voltage.
To calculate the RMS voltage, you take a number of voltage readings, square them, add them all together, and then divide by the number of entries in the average before taking the square root: . The rationale behind this strange averaging procedure is that the resulting number can be used in calculating average power for AC waveforms through simple multiplication as you would for DC voltages. If that answer isn’t entirely satisfying to you, read on. Hopefully we’ll help it make a little more sense.
[Scotty Allen] from Strange Parts, has just concluded a three month journey of what clearly is one of the most interesting Shenzhen market projects we have seen in a while. We have all heard amazing tales, pertaining the versatility of these Chinese markets and the multitude of parts, tools and expertise available at your disposal. But how far can you really go and what’s the most outrageous project can you complete if you so wished? To answer this question, [Scotty] decided to source and assemble his own Iphone 6S, right down to the component level!
The journey began by acquiring the vehemently advertised, uni-body aluminium back, that clearly does not command the same level of regard on these Chinese markets when compared to Apple’s advertisements. [Scotty’s] vlog shows a vast amount of such backings tossed as piles in the streets of Shenzhen. After buying the right one, he needed to get it laser etched with all the relevant US variant markings. This is obviously not a problem when the etching shop is conveniently situated a stones throw away, rather simplistically beneath a deck of stairs.
Next came the screen assembly, which to stay true to the original cause was purchased individually in the form of a digitizer, the LCD, back-light and later casually assembled in another shop, quicker than it would take you to put on that clean room Coverall, you thought was needed to complete such a job.
[Scotty] reports that sourcing and assembling the Logic board proved to be the hardest part of this challenge. Even though, he successfully purchased an unpopulated PCB and all the Silicon; soldering them successfully proved to be a dead end and instead for now, he purchased a used Logic board. We feel this should be absolutely conquerable if you possessed the right tools and experience.
All the other bolts and whistles were acquired as separate components and the final result is largely indistinguishable from the genuine article, but costs only $300. This is not surprising as Apple’s notorious markup has been previously uncovered in various teardowns.
Check out [Scotty’s] full video that includes a lot of insight into these enigmatic Shenzhen Markets. We sure loved every bit of it. Now that’s one way get a bargain!
Someone had some fun with the Dallas early warning tornado siren system on Friday, April 8th. All 156 tornado sirens were hacked to go off just before midnight until they were manually turned off individually, reports The Washington Post. Thousands of residents flooded 911 call centers asking if they were under attack, if there was a tornado or if the zombie apocalypse had begun. The sirens were blaring for at least an hour and was originally put down as a malfunction, however it was later revealed that it was a hack and the “hacker” must have had physical access to the siren control center.
This isn’t the first time Dallas has had problems with “hackers” breaking into their infrastructure, Only last year some unknown person/persons hacked electronic road signs (a prank we’ve seen before) in and around Dallas claiming “Work is Canceled — Go Back Home” and “Donald Trump Is A Shape-shifting Lizard!!”. Mayor Mike Rawlings claims the perpetrators will be found and prosecuted although we don’t share his confidence since last year’s attackers are still at large.
The video below is one of many on YouTube filmed by bemused Dallas residents.
UPDATE: This hack seems to have been accomplished via DTMF signals broadcast on radio frequency in the clear. Recognizing the vulnerability after the fact, the system is now using some form of encryption for the control messages. Thanks [Dan J.] for posting this in the comments below.
It was but two weeks ago when I told my story of woe — the tale of an LG Nexus 5X that fell ill, seemingly due to a manufacturing fault at birth. I managed to disassemble it and made my way through a semi-successful attempt at repair, relying on a freezer and hairdryer to coax it back to life long enough to backup my data. Try as I might, however, I simply couldn’t get the phone running for more than ten minutes at a time.
All was not in vain, however! I was rewarded for documenting my struggles with the vast experience and knowledge of the wider Internet: “Hairdryers don’t get as hot as heatguns!”
It turned out I had just assumed that two similar devices, both relying on a hot bit of metal and a fan as their primary components, must be virtually identical if rated at a similar power draw. I was wrong! Apparently the average hairdryer stays well cooler than 150 degrees Celsius to avoid melting one’s silky locks or burning the skin. I even learned that apparently, wet hair melts at a lower temperature than dry hair. Who knew?
Armed with this knowledge, I rushed out and bought the cheapest heat gun I could find — around $50. Rated up to 600 degrees C, this was definitely going to be hotter than the hairdryer. With the prevailing opinion being that I had not applied enough heat in general, I decided to also increase the heating period to 90 seconds, up from a quick 30 second pass originally.


 . The rationale behind this strange averaging procedure is that the resulting number can be used in calculating average power for AC waveforms through simple multiplication as you would for DC voltages. If that answer isn’t entirely satisfying to you, read on. Hopefully we’ll help it make a little more sense.