Retro Gadgets: The 1974 Breadboard Project

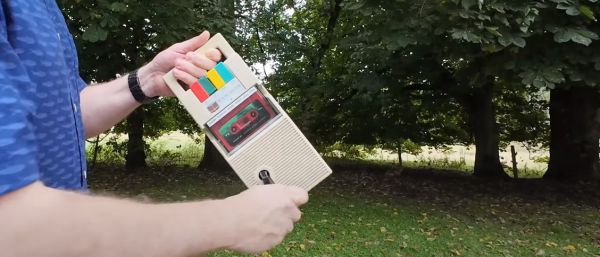
It is hard to imagine experimenting with electronics without the ubiquitous solderless breadboard. We are sure you have a few within arm’s reach. The little plastic wonders make it easy to throw together a circuit, try it, and then tear it down again. But, surprisingly, breadboards of that type haven’t always been around, and — for a while — they were also an expensive item. Maybe that’s what motivated [R. G. Cooper] to build Slip-n-Clip — his system for quickly building circuits that he published in a 1974 edition of the magazine Elementary Electronics.

The system isn’t really what you would think of as a breadboard today, but it was effective and certainly cheap to build. The biggest problem? It wasn’t something you’d use with DIP ICs. But in the early 1970s, you might not be building very much with ICs, and the ones you used might be in oddball transistor-like packages. Things were strange in the 70s!

A Brief History of Breadboards

In the very old days, people built radios and such on wooden substrates that were actually bread-cutting boards. That’s where the name came from. It was common to draw a diagram with the physical layout you had in mind, glue it to the board, and use it as a guide for building and troubleshooting. Wood was easy to drill and cut. A nail or a thumbtack would make dandy terminals. Probably the last time we saw that done was about a dozen years ago in Make Magazine. Even then, it was only a novelty — few people still build circuits like this, but you can see how [Colin] did it in the video below.

Continue reading “Retro Gadgets: The 1974 Breadboard Project”

Turning Soviet Electronics Into A Nixie Tube Clock

Sometimes you find something that looks really cool but doesn’t work, but that’s an opportunity to give it a new life. That was the case when [Davis DeWitt] got his hands on a weird Soviet-era box with four original Nixie tubes inside. He tears the unit down, shows off the engineering that went into it and explains what it took to give the unit a new life as a clock.

Each digit is housed inside a pluggable unit. If a digit failed, a technician could simply swap it out.

A lot can happen over decades of neglect. That was clear when [Davis] discovered every single bolt had seized in place and had to be carefully drilled out. But Nixie tubes don’t really go bad, so he was hopeful that the process would pay off.

The unit is a modular display of some kind, clearly meant to plug into a larger assembly. Inside the unit, each digit is housed in its own modular plug with a single Nixie tube at the front, a small neon bulb for a decimal point, and a bunch of internal electronics. Bringing up the rear is a card edge connector.

Continues after the break…

Continue reading “Turning Soviet Electronics Into A Nixie Tube Clock”

A Guide To Field Stripping Your Voyager Tricorder

For the last few years, [Mangy_Dog] has been working on what is easily the most technically and aesthetically impressive Star Trek tricorder prop the world has ever seen. With each new version of the hardware we’ve gotten the occasional peek under the hood or source code walk-through, but these limited presentations have made it somewhat difficult to really appreciate the scale of this undertaking.

But now thanks to this epic hour-long tour of the hardware and software that makes up version 2.5 of hisĀ Voyager tricorder, we can finally see just how incredible the engineering that’s gone into this project really is. Every detail has been meticulously considered to deliver a final product that’s not only as visually accurate as possible, but reliable enough to actually carry around. Continue reading “A Guide To Field Stripping Your Voyager Tricorder”

Portable 1990s POS Will Strain Your Back

[JR] over at [Tech Throwback] got ahold of an unusual piece of gear recently — a portable Point of Sale (POS) credit card machine from the late 1990s (video, embedded below the break ). Today these machines can be just a small accessory that works in conjunction with your smart phone, but only the most dedicated merchants would lug this behemoth around. The unit is basically a Motorola bag phone, a credit card scanner, a receipt printer, a lead-acid battery, and a couple of PCBs crammed into a custom carrying case

Handset Detail

Despite having a lot of documentation, [JR] struggles to find any information on this U.S. Wireless POS-50. He finds that the credit card scanner is an Omron CAT-95 authorization terminal, and the Motorola SCN-2397B phone appears to come from the Soft-PAK series.

He is able to power it up, but can’t do much with is because he is missing the authorization password. But regardless, with the demise of the Advanced Mobile Phone System for over a decade, this 850 MHz band analog phone can’t connect to the network anymore.

If you happen to know anything about this old POS, or used a similar luggable system for accepting credit cards in the 1990s, let us know in the comments below.

Continue reading “Portable 1990s POS Will Strain Your Back”

Opening A Curta — With Great Care

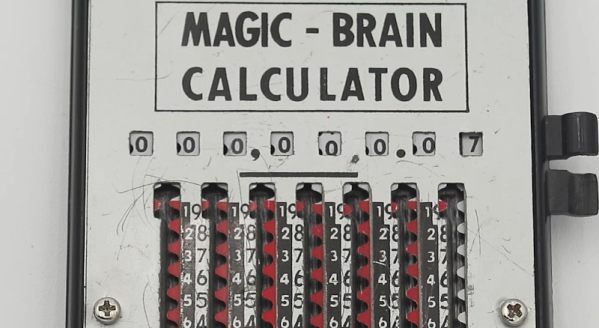
We’ve always admired Curta mechanical calculators, and would be very hesitant to dismantle one. But [Janus Cycle] did just that — and succeeded. A friend sent him a Curta Model 2 calculator that was frozen up. Just opening the case involved percussive force to remove a retaining pin, and once inside he discovered the main shaft had been slightly bent. No doubt this calculator had suffered a drop at some point in the past.

I’m sticking to the rule of doing no harm — I’d rather not be able to fix this than do something that causes more problems.

Inside the Curta

But surprisingly, he was able to get it substantially back in working order without completely taking apart all 600+ parts. Most of the issues were shafts whose lubrication had become gummy, and one carry lever was slightly bent. There is still a little more work, but soon this calculator will once again be cranking out results.

Has anyone dismantled a mechanical contraption this complicated before, for example a teletype machine? Let us know in the comments. If you want to brush up on your Curta knowledge, check out the Curta Calculator Page. We also wrote a Retrotechtacular about the Curta before. Thanks to [mister35mm] for sending in this tip.

Continue reading “Opening A Curta — With Great Care”

Inside A Cordless Soldering Station

There was a time when soldering stations were unusual in hobby labs. These days, inexpensive stations are everywhere. [Kerry Wong] looks at the TS1C station, which is tiny and cordless. As he points out, cordless irons are not new, but modern battery technology has made them much more practical. However, this iron doesn’t actually have a battery.

The iron has a large 750 Farad supercapacitor. This has advantages and disadvantages. On the plus side, a supercapacitor charges quickly and doesn’t get weaker with each charging cycle like a conventional battery. On the minus side, the large capacitor makes the unit bulky compared to normal irons. [Kerry] notes that it is ergonomic, though, and he felt comfortable holding it. Also, the supercapacitor limits the amount of charge available while soldering.

It is somewhat of a balance, though. If you want to take the iron and climb a tower, you might be very interested in a longer running time. But if you return the unit to the base every few minutes, the fast charging of the cap will compensate for the lower capacity, and you’ll probably never notice it go flat.

The iron itself doesn’t display any data. The display is on the base, meaning the devices must be paired via Bluetooth. It also requires a PD-enabled USB-C connection, so you can’t just wire it to a battery. You can plug a power supply right into the iron if you prefer, but you still can’t use a simple power connection.

Of course, you assume it does an adequate job of soldering. We wanted to see inside! And [Kerry] didn’t disappoint. If you want to see soldering, skip to about the 10-minute marker. The teardown starts at around 16 minutes.

Honestly, for the bench, we’d probably stick with a wired iron. You don’t always want a base and a PD power supply for a portable iron. But if you absolutely hate cords, this could be a reasonable answer. We’ve seen another review of this iron that didn’t like the plastic casings. Maybe it is like Jedi and lightsabers: you should just build your own.

Continue reading “Inside A Cordless Soldering Station”

Let’s Listen To A Tape — Paper Tape

These days, data is as likely as not to be “in the cloud.” Otherwise, it’s probably on a USB flash drive or SD card. But in the old days, paper tape was a widespread way to store and retrieve data. A common way to start the day at the office was to toggle in a few dozen bytes of bootloader code, thread a bigger bootloader tape into your TeleType paper tape reader, and then get your coffee while the more capable bootloader clunked its way into memory. Then you could finish your brew while loading the tape with your compiler or whatever you wanted. [Scott Baker] has a Heathkit H8 and decided using a paper tape machine with it and some of his other gear would be fun.

Instead of a TeleType, [Scott] picked up a used paper tape machine from FANUC intended for the CNC industry. They are widely available on the surplus market, although a working machine might run you $500. [Scott] paid $200, so he had some work to do to make the unit operational.

Paper tape had a few varieties. For computer work, you usually had a tape that could hold eight holes across, one for each bit in a byte. However, there are also 6-bit and 5-bit tapes for special purposes or different encodings (old TeleTypes used 5-bit characters in Baudot). The paper choice varied too. You could get plain paper, oiled paper, which maybe didn’t jam as often, and Mylar, which is less likely to shred up when it does jam.

To make things even more difficult, the machines all worked a little differently as well. Sure, punches almost all use solenoids. But the tape transport was sometimes a pinch roller and sometimes a sprocket-style drive. Reading the holes could be done with mechanical contacts or optically. Some punches left little “hanging chads” on the tape, so you didn’t have to empty a confetti box to throw away the chad.

The repair job was interesting. Inside the machine is an 8051 microcontroller. There was no clock, and the circuit used two custom modules. One was simply a crystal, and the other was an oscillator. Removing both allowed a modern can oscillator to replace both modules. The next problem was a fried serial output driver. Replacing that got things working except for random resets due to a faulty brown-out reset circuit. That was easy to fix, too.

Of course, if you are really cheap, it is easy to make a paper tape reader from 8 phototransistors, and pulling tape through by hand isn’t unheard of. It can even talk USB. We’ve even seen a conference badge that can read tapes.

Continue reading “Let’s Listen To A Tape — Paper Tape”