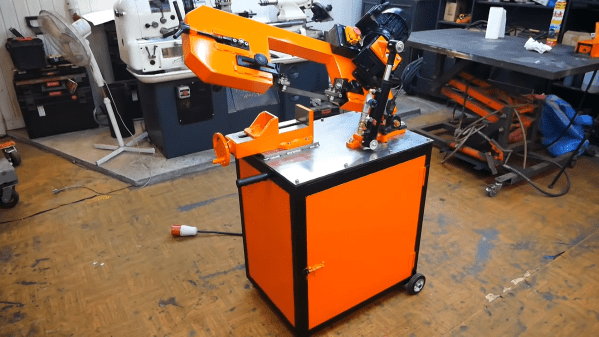
As the channel name implies, [Workshop From Scratch] is building a growing list of tools and machines from scratch. His latest edition is a heavy-duty metal band saw.
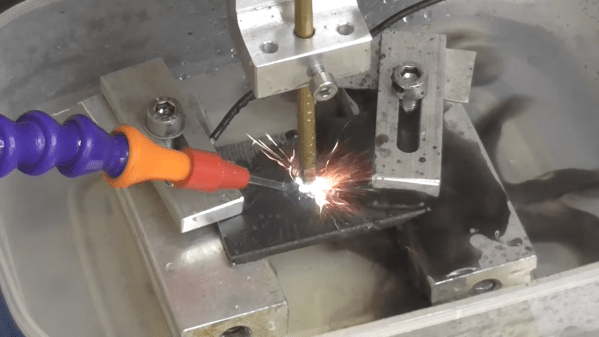
As with all his tools, the frame consists of thick welded steel components. The blade runs on a pair of modified belt pulleys and is driven by a motor with a worm gearbox. The blade tension is adjustable, and so are the pair of blade guides. To slowly lower the blade while cutting, [Workshop From Scratch] added a hydraulic piston with an adjustable valve to limit the lowering speed. When it reaches the bottom, a limit switch turns off the motor. The saw is mounted on a heavy steel table and can rotate at the base to cut at different angles. A heavy-duty vise, also built from scratch holds the workpieces securely in place.
Judging by the amount of steel he cuts for his projects, we imagine this saw will be a welcome addition to the shop. It’s impressive what he is able to build with just a drill, angle grinder, and welder. Many of the other tools used in the video, like the magnetic drill press and hydraulic vise are also his handiwork. Continue reading “Homemade Metal Band Saw”