Old Chainsaw Repurposed For Kitchen Use

There are many ways to keep critical appliances running during a power outage. Maybe a UPS for a computer, a set of solar panels to charge your phone, or even a generator to keep your refrigerator or air conditioning working. This modification to a standard blender will also let you ride through a power outage while still being able to make delicious beverages. It runs on gasoline.

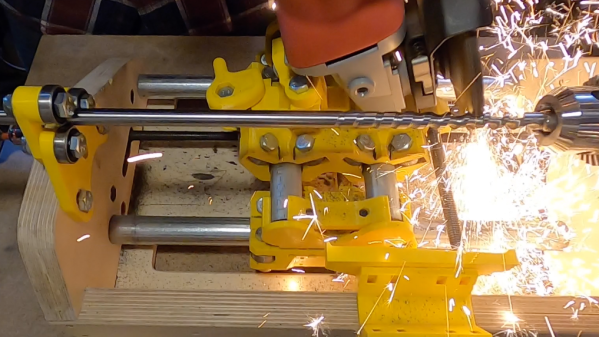
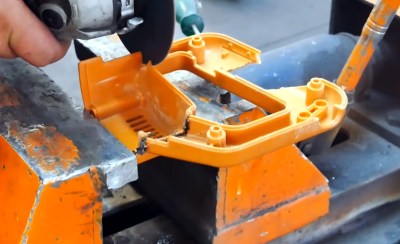
The build uses an old chainsaw to power the blades of the blender. [Bob] was able to design and build an entirely new drivetrain to get this device to work, starting by removing the chainsaw chain and bar and attaching a sprocket to the main shaft of the motor. A chain connects it to a custom-made bracket holding part of an angle grinder, which supports the blender jar. Add in a chain guard for safety and you’ll have a blender with slightly more power than the average kitchen appliance.

The video of the build is worth watching, even if your boring, electric-powered blender suits your needs already. The shop that [Bob] works in has about every tool we could dream of, including welders, 3D printers, band saws, and even a CNC plasma cutter. It reminds us of [This Old Tony]’s shop.

Continue reading “Old Chainsaw Repurposed For Kitchen Use”

A Custom Milled Jig For Smart Bulb Programming

Who would have thought that some day we’d need programming jigs for our light bulbs? But progress marches on, and as there’s currently a number of affordable Internet-controlled bulbs powered by the ESP8266 on the market, we’re at the point where a tool to help update the firmware on the light over your kitchen sink might be something nice to have. Which is why [cperiod] created this programming jig for AiLight smart bulbs.

Flashing the AiLight bulbs is easy enough, there’s a series of test points right on the face of the PCB that you can hook up to. But if you’re updating more than one of them, you don’t want to have to solder your programmer up to each bulb individually. That’s where the jig comes in. [cperiod] says there are already some 3D printed designs out there, but they proved to be a bit finicky.

The design that [cperiod] came up with and eventually milled out on a 1610 CNC router is quite simple. It’s effectively just a holder to keep the five pogo pins where they need to be, and a jumper that lets you toggle the chip’s programming mode (useful for debugging).

The neat trick here are the “alignment pins”, which are actually two pieces of 14 gauge copper wire that have had their ends rounded off. It turns out these will slip perfectly into holes on the AliLight PCB, ensuring that the pogo pins end up on target. It works well enough that you can hold the bulb and jig in one hand while programming, it just needs a little downwards pressure to make good contact.

We’ve previously seen how easily you can replace the firmware on some of these ESP8266 bulbs. While there’s certainly a downside to these bulbs being so simple to modify, it’s hard to deny their hackability makes them very appealing for anyone looking to roll their own network-controlled lighting system.

Fail Of The Week: Supercapacitor Spot Welder

[Julian] needed to weld a bit of nickel to some steel and decided to use a spot welding technique. Of course he didn’t have a spot welder sitting around. Since these are fairly simple machines so [Julian] set out to build a spot welder using a charged supercapacitor. The fundamentals all seem to be there — the supercap is a 100 Farad unit and with a charge of 2.6V, that works out to over 300 joules — yet it simply doesn’t work.

The problem is in how the discharge energy is being directed. Just using the capacitor would cause the charge to flow out as a spark when you got near the point to discharge. To combat this, [Julian] put a microswitch between the capacitor and the copper point he expected to use as the welding tip. The microswitch, of course, is probably not the best for carrying a large surge of current, so we suspect that may be part of why he didn’t get great results.

The other thing we noticed is that he used a single point and used the workpiece as a ground return. Most spot welders use two points near each other or on each side of the workpiece. The current from the capacitor is probably just absorbed by the relatively large piece of metal.

The second video below from [American Tech] shows a 500F capacitor doing spot welding with little more than two wires and it seems to work. Hackaday’s own [Sean Boyce] even made one out of some whopping 3000F caps. It did work, although he’s been pursuing improvements.

Continue reading “Fail Of The Week: Supercapacitor Spot Welder”

DIY PC Test Bench Puts Hardware Troubleshooting Out In The Open

If you’ve built a few PCs, you know how frustrating troubleshooting can be. Finding a faulty component inside the cramped confines of a case can be painful — whether its literal when sharp edges draw blood, or just figurative when you have to open that cramped case multiple times to make adjustments.

[Colonel Camp] decided to make life a bit easier by building this PC test bench which makes component troubleshooting much easier and can be built with old parts you probably have lying around. [Camp] was inspired by an old Linus PC Tech Tips video on the same topic. The key to the build is an old PC case. These cases are often riveted together, s a drill makes quick work of disassembling the chassis to easily get to all of the components. The motherboard pan and rear panel/card cage become the top shelf of the test bench, while the outer shell of the case becomes the base and a storage area. Two pieces of lumber support the upper shelf. The build was primed and painted with several coats of grey.

[Camp] built up his testbench with a modest motherboard, cooler and a 970 video card. He loaded up Manjaro Linux to verify everything worked. The basic hardware has already been replaced with a new system including a ridiculously huge cooler. But that’s all in a day’s work for a test bench PC.

We’ve seen some wild workbenches over the years, and this one fits right in for all your PC projects. Check out the video after the break!

Continue reading “DIY PC Test Bench Puts Hardware Troubleshooting Out In The Open”

Control The Suck With This Manual Vacuum Pick-And-Place Tool

The tapes that surface-mount devices come in may be optimized for automated pick and place, but woe betide those who try to dig components out manually. No matter what size package, the well on the tape seems to be just a wee bit too small to allow tweezers to grip it, so you end up picking the thing up edgewise or worse, pinching too tight and launching the tiny thing into The Void. We hope you ordered extra.

Such circumstances are why vacuum handlers were invented, but useful as they are for picking and placing SMDs, they aren’t perfect. [Steve Gardener]’s sub-optimal experience with such tools led him to build this custom vacuum pick-and-place tool. It’s based on an off-the-shelf Weller unit, of which only the handpiece remains. A bigger, more powerful vacuum pump is joined in a custom enclosure by a PCB with a PIC18F13K22 microcontroller, a power supply, a solenoid to control the vacuum, and a relay to switch the pump. A footswitch starts the pump and closes the vacuum vent; letting off the pedal opens the vent to drop the part, while the pump keeps running for a variable time. This lets him rapidly work through a series of parts without having to build vacuum back up between picks. The video below shows the build and the tool in action.

We love the idea of this tool, and the polished look is pretty slick too. If manual pick-and-place isn’t for you, though, maybe converting a 3D-printer into an automated PnP is something to check out.

Continue reading “Control The Suck With This Manual Vacuum Pick-And-Place Tool”

Print Your Own Heat Shrink Labels For Factory-Chic Wire Naming

Heat shrink tubing is great for insulating wires. Labeling wires in a bundle is always useful, too. [Voltlog] has a cheap Brother label printer and discovered he can buy knock off label cassettes for a lot less from China. However, he also found something else: cassettes with heat shrink tubing in them made for the same kind of printer. Could he use the heat shrink cassettes to make neat wire labels? In his first video the answer was sort of, but not really. However, he later had a breakthrough and made a second video explaining how to do it. You can see both videos, below.

At first, the printer didn’t even want to recognize the cassette. It seems like Brother doesn’t want you using exotic tapes with cheap printers. No worry, this isn’t sophisticated DRM, just a sense hole that you need to cover with tape. This discovery was made using the extremely scientific trick of covering all the holes that were not on a regular cassette.

Continue reading “Print Your Own Heat Shrink Labels For Factory-Chic Wire Naming”

Shop-Made Tools Turn Cheap Steel Into Telescoping Tubes

Beginning metalworkers are often surprised at just how cheap steel can be. It’s a commodity made by the gigaton, and there are always plenty of extra pieces and scraps left over from big projects that are available for pennies a pound. But what you’ve got is often not what you need, especially when it’s steel tubing with welded seams that prevents one tube from fitting inside another.

[Jason Marburger] from Fireball Tool has some great tips for cleaning interior welds in steel tubing. The first part of the video below details manual methods for cleaning off seam welds, including chiseling, sanding with a narrow belt sander, and grinding them down with a die grinder. Those all work well, but only for short lengths of tubing. Longer tubes need special treatment, which is where the clever tools [Jason] designed come in handy.

By attaching a chunk of high-speed steel to a slug made from the next size tube down and driving it through the tube to be cleaned with a hefty piece of threaded rod, he basically created ain internal shaper to shave the weld down. It works like a charm, as does the tool he made for round tubing by laying a bead of hard facing welding rod around the edge of a mild steel slug. Driving this tool into the seamed round tubing with a shop press cleaned up the weld nicely too.

Hats off to [Jason] for coming up with a couple of great shop tips to keep in mind. We’ve seen similar expedient tools for metalworking lately, like this homemade die-punching tool and a linear track to keep your plasma cutter in line.

Continue reading “Shop-Made Tools Turn Cheap Steel Into Telescoping Tubes”