We’re not sure if [Stefan Gotteswinter] ever makes anything but tools to make more tools in his shop. This nice set of toolmaker’s magnets are no exception to the trend.
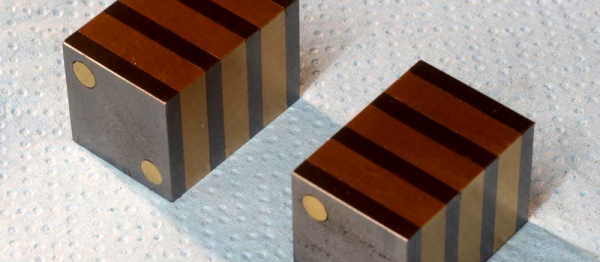
We can gather that [Stefan] is a professional machinist by trade. Like all professionals who do the same thing for work and play, he was spoiled by the nicer tools at work. One tool in particular, a toolmaker’s magnet, always came in handy. These are strong magnets that have been ground flat, square, and parallel.
He really only needed one magnet, so he started to build a 20 x 20 x 100 mm one. It would be made out of alternating mild steel and brass plates. The steel plates would have a hole drilled through them and he’d place a correctly oriented magnet in the middle. It would all be clamped and glued together.
The build was going pretty well when he decided that he couldn’t really trust the glue alone. He had just begun grinding, but decided to switch to a quick drilling operation. Two brass rods through the whole assembly would be enough to hold it together. He started drilling, and then, suddenly, he had two magnets.
The assembly had broken in half. He decided that, all things considered, two 20 x 20 x 50 mm magnets were also handy. So he completed the drilling, and ground the new set of magnets to be a perfect match to each other. In the end he had a tool that looks just as expensive as the commercial option. There is also a video series on the magnets, part 1 and part 2, viewable after the break.

![This could probably be any of our grandmothers at work. George Grantham Bain Collection [PD], via Wikimedia Commons](https://hackaday.com/wp-content/uploads/2016/10/woman-with-sewing-machine.jpg)
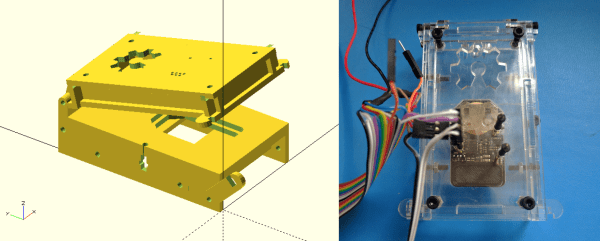
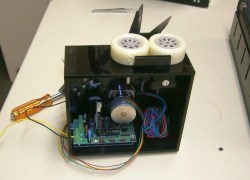 The first thing the team had to do was to mount the scissors so they would cut reliably. One of the stepper motors was attached to a drive wheel that had a bolt mounted on it. This went through one of the scissors’ handles, the other handle was held in place on the machine using screws. The second stepper motor was used to rotate the wheels that drives the cable through to the correct length. [2PrintBeta] used a