Most of us have some form of an on-the-go toolkit, but how much thought have we put into its contents? There’s a community of people who put a lot of thought into this subject, and EMF Camp have put up one of their talks from earlier in the summer in which [Drew Batchelor] sets out their manifesto and introduces tinytoolk.it, a fascinating resource.
The talk is well worth a watch, as rather than setting the tools you should be carrying, it instead examines the motivations for your kit in the first place, and how to cull those which don’t make the grade. If an item seems to see little use, put a piece of tape with the date on it every time it comes out, to put a number on it. As an example he ended up culling a multi-tool from his kit, not because it’s not an extremely useful tool, but because he found everything it did was better done by other items in the kit.
It’s probable we’ll all look at our carry-around kit with new eyes after watching this, it’s certain that ours could use a few tweaks. What’s in your kit, and how could you improve it? Let us know in the comments.
Although less popular these days, wire-wrap is still a very relevant, easily reversible solder-free way to assemble (prototype) systems using wire-wrap wire and a wire-wrap tool. This latter tool can be either a hand or powered tool, but all it has to do is retain the stripped wire, fit around the wire-wrapping post and create a snug, oxidation-proof metal-metal contact fit. For the very common 30 AWG (0.25 mm) wire-wrap wire, the Jonard Tools (OK Industries) WSU-30M wire-strip-unwrap tool is pretty much the popular standard. It allows you to strip off insulation, wrap and unwrap connections all with one tool, but the question is whether you can just 3D print a wrap-unwrap tool that’s about as good?
First a note about cost, as although the genuine WSU-30M has risen in cost over the years, it can still be obtained for around $50 from retails like Mouser, while clones of varying quality can be obtained for around $15 from your favorite e-tailer website. From experience, these clones have quite sloppy tolerance, and provide a baseline of where a wrapping tool becomes unusable, as they require some modding to be reliable.
Wire-wrap tool model by [KidSwidden] on Thingiverse.Taking a quick look at the wire-wrap tools available on Thingiverrse, we can see basically two categories: one which goes for minimally viable, with just a cylinder that has a hole poked on the side for the stripped wire to fit through, as these versions by [JLSA_Portfolio], [paulgeneres], [orionids] and [cmellano]. The WSU-30M and similar tools have a channel on the side that the stripped wire is fed into, to prevent it from getting tangled up and snagging. On the clone units this channel often has to be taped off to prevent the wire from escaping and demonstrating why retaining the wire prior to wrapping is a good idea.
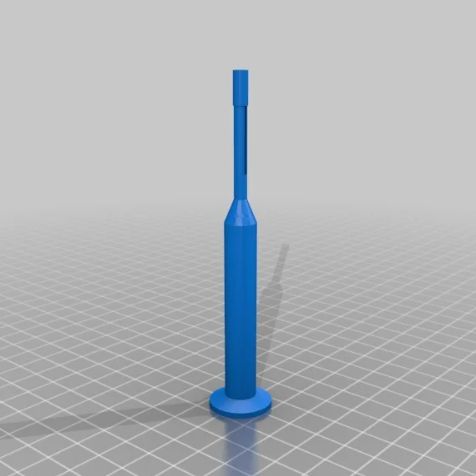
This leads us to three examples of a 3D printed wire-wrap tool with such a wire channel: by [KidSwidden] (based on a Radio Shack unit, apparently), another by [DieKatzchen] and an interesting variation by [4sStylZ]. Naturally, the problem with such fine features is that tolerance matter a lot, with an 0.2 mm nozzle (for FDM printers) recommended, and the use of an SLA printer probably a good idea. It’s also hard to say what kind of wire-wrap connection you are going to get, as there are actually two variants: regular and modified.
The starting guide to wire-wrapping by Sparkfun uses the WSU-30M, which as the name suggests uses modified wire-wrap, which means that part of the wire insulation is wrapped around the bottom of the post, for extra mechanical stability, effectively like strain-relief. A lot of such essential details are covered in this [Nuts and Volts] article which provides an invaluable starting guide to wire-wrapping, including detecting bad wraps.
Naturally, the 3D printed tools will not include a stripper for the wire insulation, so you will have to provide this yourself (PSA: using your teeth is not recommended), and none of these 3D models include an unwrap tool, which may or may not be an issue for you, as careful unwrapping allows you to reuse the wire, which can be useful while debugging or reworking a board.
Top image: completed wire-wrap on a post. (Credit: Sparkfun)
When are jumper wires on a breadboard entirely optional? When it’s the latest version of [Kevin Santo Cappuccio]’s Jumperless, which uses a bunch of analog crosspoint switches (typically used for handling things like video signals) to create connections instead of physical wires. There’s even an RGB LED under each hole capable of real-time visualization of signals between components.
If this looks a bit familiar, that’s because an earlier version took second place in the 2023 Hackaday Prize. But things have evolved considerably since then. There are multiple programmable power rails, ADC channels, a rotary encoder, and much more. The PCB design itself is fantastic, including the probe which acts like a multi-function tool for interacting with the whole thing. The newest version will make its debut on Crowd Supply in just a few days.
It’s open source and made to be hackable, so give the GitHub repository a look if you want a closer peek. You can watch it in action in a brief video posted to social media, embedded below.
Running a metal lathe is not for the faint of heart. Without proper knowledge and preparation, these machines can quickly cause injury or destroy expensive stock, tools, or parts. The other major problem even for those with knowledge and preparedness is that some of their more niche capabilities, like cutting threads with a lead screw, can be tedious and complicated thanks to the change gear system found on some lathes. While these are useful tools for getting things done, [Not An Engineer] decided that there was a better way and got to work building an electronic gearbox to automate the task of the traditional mechanical change gear setup in this video.
What makes change gears so tricky is that they usually come as a set of many gears of different ratios, forcing the lathe operator to figure out the exact combination of gears needed to couple the spindle of the lathe to the feed screw at the precise ratio needed for cutting a specific thread pattern. It is possible to do this task but can be quite a headache. [Not An Engineer] first turned to an Arduino Nano to receive input from a rotary encoder connected to the shaft of the lathe and then instruct a motor to turn the feed screw at a set ratio.
The first major problem was that the Arduino was not nearly fast enough to catch every signal from the encoder, leading to a considerable amount of drift in the output of the motor. That was solved by upgrading to a Teensy 4.1 with a 600 MHz clock speed. There was still one other major hurdle to cross; the problem of controlling the motor smoothly when an odd ratio is selected. [Not An Engineer] used this algorithm to inspire some code, and with that and some custom hardware to attach everything to the lathe he has a working set of electronic change gears that never need to be changed again. And, if you don’t have a lathe at all but are looking to get started with one, you can always build your own from easily-sourced parts.
While many of us now have laser cutters — either a K40-style machine or one of the newer high-output diodes — you probably don’t have one that cuts metal. True, some hobby lasers now offer IR laser heads with modest power to engrave metal. The xTool S1, for example, accepts a 2 W IR laser as an option, but we doubt it would cut through anything thicker than foil. However, there are a growing number of fiber and carbon dioxide lasers that can cut metal at semi-reasonable prices, and [All3DP] has a primer on the technology that is worth a read.
According to the post, CO2 lasers are less expensive but require gas assist, can’t work with shiny metals well, and are finicky because of the mirrors and glass tube inside. Fiber lasers cost more, but don’t need gas, work on more materials, and have fewer parts that need maintenance or may be prone to damage. There are other kinds of lasers, but the post focuses on these, the most common ones.
Machines that can cut metal aren’t cheap. They start at about $10,000. However, prices are dropping and we remember when $10,000 would buy you what would today be a terrible oscilloscope, so maybe there’s hope for an impulse-buy metal-cutting laser one day.
It isn’t that diode lasers can’t cut metal at all, but the results are not terribly useful. What would you rather have? A metal cutter or a metal 3D printer?
These days, PCB fab houses are just about everywhere, and you can’t go buy a taco without walking past eight of them. Still, some out there still like to etch their PCBs at home. If that sounds like you, you might see some value in [Chris Borge]’s PCB agitator.
The design mostly relies on 3D printed parts, including the main body. It has a heavy base which is filled with concrete to keep it nicely weighed down on the table. A table for holding a PCB and fluid tank is then installed on top, via a bearing which allows it to pivot in one axis. An Arduino Nano commands the agitation of the table top, and hence the PCB etching tank, with a servo used to actually shift the table back and forth.
It’s a simple design — far simpler than some of the advanced coffee-making hardware we’ve seen recently. Regardless, it gets the job done, and done well! In testing, it accelerated [Chris]’s etching jobs significantly, we’re talking hours here. Meanwhile, if you don’t have a 3D printer on hand, you could always try building one out of junk instead!
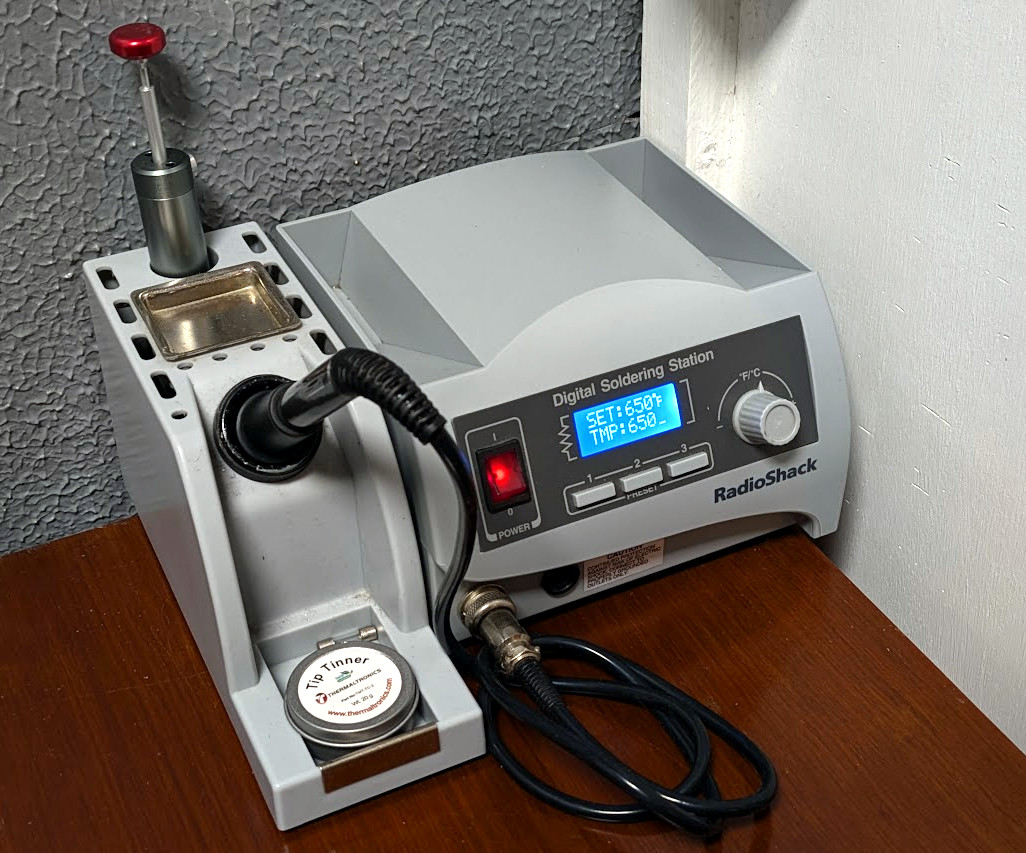
Like many people who solder regularly, I decided years ago to upgrade from a basic iron and invest in a soldering station. My RadioShack digital station has served me well for the better part of 20 years. It heats up fast, tips are readily available, and it’s a breeze to dial in whatever temperature I need. It’s older than both of my children, has moved with me to three different homes, and has outlived two cars and one marriage (so far, anyway).
When I got this, Hackaday still used B&W pictures.
As such, when the new breed of “smart” USB-C soldering irons started hitting the scene, I didn’t find them terribly compelling. Oh sure, I bought a Pinecil. But that’s because I’m an unrepentant open source zealot and love the idea that there’s a soldering iron running a community developed firmware. In practice though, I only used the thing a few times, and even then it was because I needed something portable. Using it at home on the workbench? It just never felt up to the task of daily use.
So when iFixit got in contact a couple weeks back and said they had a prototype USB-C soldering iron they wanted me to take a look at, I was skeptical to say the least. But then I started reading over the documentation they sent over, and couldn’t deny that they had some interesting ideas. For one, it was something of a hybrid iron. It was portable when you needed it to be, yet offered the flexibility and power of a station when you were at the bench.
Even better, they were planning on putting their money where their mouth is. The hardware was designed with repairability in mind at every step. Not only was it modular and easy to open up, but the company would be providing full schematics, teardown guides, and spare parts.