Magnet placement tools are great because they remove finger fumbling while ensuring correct polarity every time. [EmGi] has made a further improvement by making a version that auto-feeds from an internal stack of magnets.
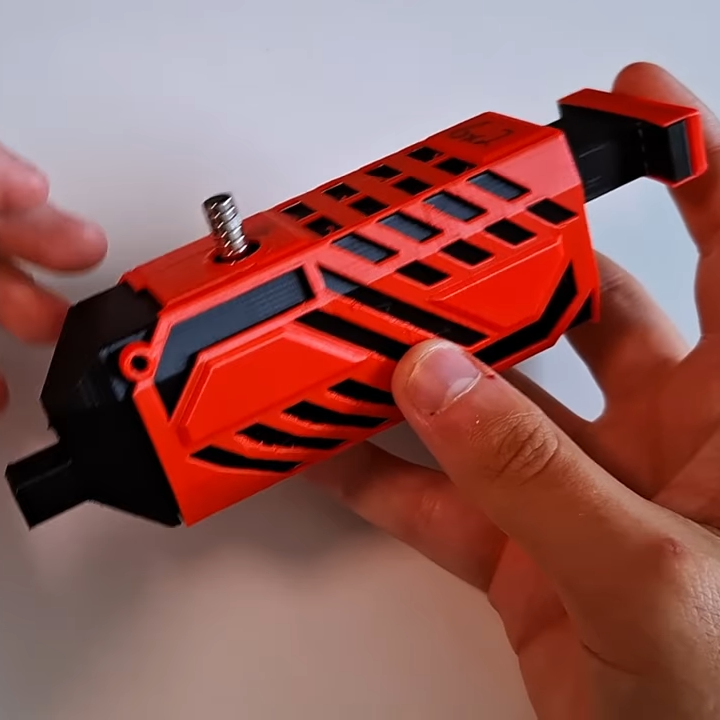
That is a trickier task than one might imagine, because magnets can have a pesky habit of being attracted in inconvenient ways, or flipping around and sticking where they should not. [EmGi] solves this with a clever rack and pinion mechanism to turn a single plunger press into a motion that shears one magnet from a stack and keeps it constrained while the same magnet responsible for holding it to the tip takes care of dragging it down a feed path. It’s easier to see it work in action, so check out the video (embedded below) in which [EmGi] explains exactly what is going on.
This design is actually an evolution of an earlier, non-reloading version. This new one is mechanically more complex, but if it looks useful you can get the design files from Printables or Makerworld and make your own.
The only catch is that this reloading design is limited in what sizes of magnet it can handle, because magnet behavior during feeding is highly dependent on the physical layout and movements. For a different non-reloading placement tool that works with any magnet size and is about as simple as one can get, you can make your own with little more than a bolt and a spring.
Continue reading “Auto-Reloading Magnet Dispenser Can Feed Itself”