Schematic-o-matic

Tricked-Out Breadboard Automatically Draws Schematics Of Whatever You Build

When it comes to electronic design, breadboarding a circuit is the fun part — the creative juices flow, parts come and go, jumpers build into a tangled mess, but it’s all worth it when the circuit finally comes to life. Then comes the “What have I done?” phase, where you’ve got to backtrack through the circuit to document exactly how you built it. If only there was a better way.

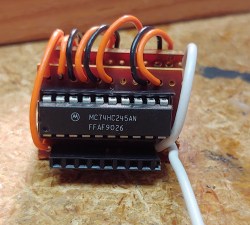
Thanks to [Nick Bild], there is, in the form of the “Schematic-o-matic”, which aims to automate the breadboard documentation process. The trick is using a breadboard where each bus bar is connected to an IO pin on an Arduino Due. A program runs through each point on the breadboard, running a continuity test to see if there’s a jumper connecting them. A Python program then uses the connection list, along with some basic information about where components are plugged into the board, to generate a KiCad schematic.

[Nick] admits the schematics are crude at this point, and that it’s a bit inconvenient to remove some components, like ICs, from the breadboard first to prevent false readings. But this seems like one of those things where getting 80% of the work done automatically and worrying about the rest later is a big win. Plus, we can see a path forward to automatic IC probing, and even measurement of passive components too. But even as it is, it’s a great tool.

Continue reading “Tricked-Out Breadboard Automatically Draws Schematics Of Whatever You Build”

Keep The Sparks Away With A Plasma Cutting Table

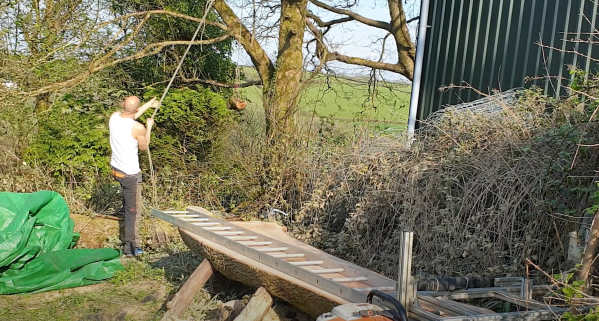
For one-off projects or prototypes it’s not uncommon for us to make do with whatever workspace we have on hand. Using a deck railing as an impromptu sawhorse, for example, is one that might be familiar to anyone who owns a circular saw, but [Daniel] has a slightly different situation. He had been setting up metal workpieces on random chunks of brick in order to use his plasma cutter, but just like the home handyman who gets tired of nicking their deck with a saw, he decided to come up with a more permanent solution and built a custom plasma cutting table.

Plasma cutting has a tendency to throw up a lot of sparks, so most commercial offerings for plasma cutting tables include a water bath to catch all of the debris from the cutting process. [Daniel] builds his table over a metal tub to hold some water for this purpose. The table itself is built out of aluminum and designed to be built without welding even though most people with plasma cutters probably have welders as well. The frame is designed to be exceptionally strong and includes curved slats which add to the strength of the table. The table is also designed to be portable, so the curved slats stay in place when the table is moved.

While this might seem like an average metal table at first glance, the table is actually being designed with a homemade CNC machine in mind which [Daniel] is working on. The CNC plasma cutter needs a sturdy, flat surface and can’t be set up on bricks in the driveway, so this table suits both [Daniel]’s immediate needs to not shower himself in sparks every time he cuts something and also his future CNC machine’s need for a sturdy, flat workspace. We look forward to seeing that build being completed but in the meantime take a look at this motorized plasma cutter which has the beginnings of a CNC machine if in one direction only.

Continue reading “Keep The Sparks Away With A Plasma Cutting Table”

Shady Air Umbrella Given New Lease On Life

Many infamous Kickstarter projects have ultimately flopped or failed, leaving backers frustrated and angry. Often pitched with a splashy convincing video that happens to have critical components conveniently offscreen. [Allen Pan] was reminiscing about one such project, the air umbrella, and decide to redeem the project by making his own.

The basic idea of the air umbrella was a device that could create a cone of fast-moving air over your head to deflect air. Going off of the specs listed on the original Kickstarter page, [Allen] made a simple prototype that did nothing. Suspicions confirmed, he decided to keep going by buying a powerful electric leaf blower. A nozzle was 3d printed that could direct the air into the needed disc. Early testing with the mist function on a garden hose seemed promising, and they worked their way up to progressively larger raindrops.

Finally, the clouds of California smiled upon them, and it rained. [Allen] was ecstatic that his umbrella worked. He couldn’t hear much out of one ear as he was holding a leaf blower next to it for a few minutes, but it’s a small price to pay to stay dry with the Air Umbrella.

If you’re curious about more false Kickstarter claims, why not read up on this tiny Arduino compatible board making some dubious claims.

[Header image courtesy of Air Umbrella Kickstarter page]

Continue reading “Shady Air Umbrella Given New Lease On Life”

An array of 3D-printed parts for old sewing machines.

Printed Sewing Machine Parts Extend Singer’s Range

[Grow Your Own Clothes] had finally found their ideal sewing machine for doing zig-zag stitches (/\/\/\) and converting to a treadle drive (mechanically foot-fed) — a Singer 411G. This is a well-respected workhorse of a machine, and if you see one in a secondhand store, you might want to grab it. The only problem is that its multi-step zig-zag stitch is a 4-stepper and not a 3-step, which is what [GYOC] prefers. Having heard it was possible to hack them into doing a 3-step, [GYOC] set out to learn Tinkercad and grow their own sewing machine parts.

A 3D-printed cam lets this machine do the zig-zag in three steps instead of four.
The new zig-zag top hat cam in place.

So once upon a time, sewing machines didn’t just do a bunch of things out of the box. They needed an array of plastic cams to do different stitches, kind of like trading out the element or disk in a typewriter to print in italics. While most machines still have exchangeable feet for different needs and special parts for sewing things like buttonholes, most domestics now have decorative stitches and their cams built in.

The 3-step zig-zag cam was just the beginning. [GYOC] decided to make a few more parts before their Tinkercad knowledge faded: a needle adapter with an improved design, some tension stud sprockets for a different machine, and a couple of buttonhole templates for making different sizes with a buttonholer. Although they aren’t giving away the files for free, all of these parts are available quite cheaply in their Shapeways store.

Got an old machine you don’t know what to do with? Try converting it to a computerized embroidery machine.

Thanks for the tip, [Raphael]!

Master craftsperson turns a huge bolt into a pneumatic engraving tool.

Impressive Hack Turns Bolt Into Pneumatic Engraver

Did you ever see one of those videos that causes you to look at an everyday object in a new light? This is one of those videos (embedded below). And fortunately for us, there’s a write-up to go along with it in case you don’t always understand what’s going on.

In this case, what’s going on is that [AMbros Custom] is masterfully turning a stainless steel M20 bolt into a pneumatic engraving tool. Yeah, you read that correctly. But the most amazing thing about this hack is the minimum of tools used to do it. For one thing, there’s not a lathe in sight — [AMbros Custom] just chucked it into the drill or added a few nuts and clamped it in a vise.

So, how does it work? [AMbros Custom] hooks it up to a compressor, which causes the piston inside to go up and down, agitating the engraving bit. If you don’t want to watch the video, there are a ton of build pictures in the write-up.

What else can you do with a bolt? If you have the tools, you can do plenty. You could even turn one into a secret cash stash for buying more large bolts.

Continue reading “Impressive Hack Turns Bolt Into Pneumatic Engraver”

Two-Stage Dust Collector Recycles Blasting Media

A critical element of a good blasting cabinet setup is a vacuum system that can suck out the dust, blasting media, and bits of removed material faster than it collects inside the chamber. A cyclone separator can get the job done, but since it dumps all the waste from the cabinet into one bucket, it can make reusing the blasting material a dirty job. But as [Daniel Bauen] explains in the latest Engineerable video, his two-stage dust collector is able to keep the cabinet clear while separating the used blasting material into its own container.

The cheap dust separator only works on large particles.

Basically, the idea here is to to use two different cyclone separators: one that’s very effective, and a cheap model that’s only able to remove large particulates. By running the air from the cabinet through the cheap separator first, the used blasting media is captured in a dedicated bucket. From there, the air runs through the high-efficiency separator to extract the finer dust. Finally, the shop vacuum [Daniel] is using has its own washable HEPA filter to catch anything that makes it through the two extractors; though he notes that it only rarely needs to be cleaned out.

Normally this system is attached directly to the blasting cabinet, and it does a good job of capturing the bulk of the used blasting media in real-time. But to make sure the media is really cleaned up being using it again, [Daniel] will actually run the contents of the first bucket through the system a few more times to separate out any of the more stubborn dust that might be mixed in.

Of course not everyone has the space, or even the need, for such an elaborate blasting setup. If you’re just trying to quickly clean up some parts on the cheap, you can make a basic blaster for around $6. Good luck capturing the media though.

Continue reading “Two-Stage Dust Collector Recycles Blasting Media”

Solder Paste Dispenser Without Giant Compressor

We have certainly all had our moments with solder paste. Some of us hate it; it’s sticky and gooey, and it gets everywhere. That is, unless you have a solder paste dispenser. The trouble with these is that they typically require the use of an air compressor, which can be cumbersome to haul around in certain situations. If you need a solder paste dispenser that fits conveniently where air compressors won’t, take a look at this small one from [Nuri Engineer] called the solderocket.

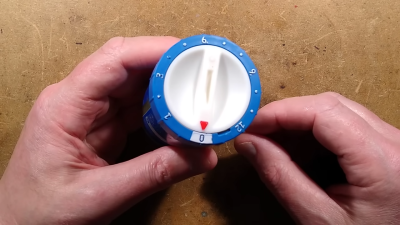
This design foregoes the traditional compressor in favor of pressurized carbon dioxide canisters. These are common enough and used for things like rapidly inflating bicycle tires, but for this more delicate procedure the pressurized gas needs to be handled more daintily. A rotary knob is attached to the canister to regulate pressure, and a second knob attached to a microcontroller adjusts the amount of time the air pressure is applied to the solder paste. With this small compact setup, any type of paste can be delivered to a PCB without needing to use messy stencils or needing larger hardware like a compressor.

This could be just the tool that you need if you regularly work with surface-mount components. Of course there are other methods of dispensing solder paste that don’t require any compressed gas of any kind, but as long as something is around that gets the job done, we can’t really argue with either method.