Codename Colossus: The HMC Boudicca

[Michael Sng], founder of [Machination Studio], wanted to create a toy line unlike anything the world has seen.  He has recently completed the first production prototype in the Codename Colossus toy line: the HMC Boudicca. The egg-shaped HMC Boudicca is tank-like with a definite Metal Slug vibe, but it’s almost a disservice calling it a toy.

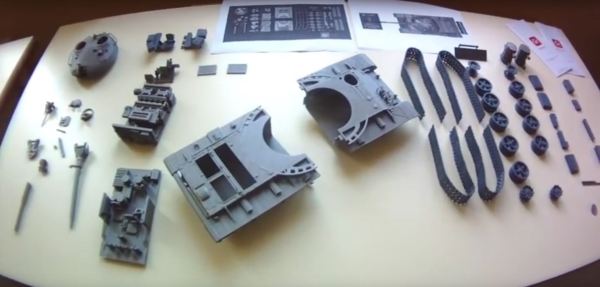
The HMC Boudicca is over 20″ tall. It is composed of over 400 parts, a majority of which are 3D-printed or laser-cut. Internal parts are FDM while the external pieces are SLS printed. It is a kinetic piece that walks in a hexapodal fashion, so there are lots of servos, motors, sensors, and LEDs, that are controlled by an Arduino. A lot of work and attention to detail was put into this prototype. The HMC Boudicca was designed to be easily disassembled with a Phillips screwdriver. The electronic components are all plug-in devices, so no soldering is required when it comes time to replace a sensor or servo.

Codename Colossus is a toy line that is made to order and intended to be artisanal in nature. Each piece will be individually hand-painted and assembled like the HMC Boudicca. While no official prices are posted yet on the site, we assume these are not going to be cheap. In fact, the site states that each piece will have a 2% markup from the previously sold price to help maintain the value of the pieces and control cost inflation. This could be a source of contention for potential buyers. It underscores [Michael’s] philosophy that Codename Colossus is meant to be a collectible work of art, an antithesis to mass production.

Regardless of the business strategy, we are interested in seeing any additional designs for this series. It would be fun to see a whole bunch of these marching as one robot army!

Continue reading “Codename Colossus: The HMC Boudicca”

Galactic Dimension – A Supersized DIY Pinball Machine

If you are from the 1960’s or 1970’s we know you would have enjoyed furiously punching the buttons of a pin ball machine back in the day. Installation artist [Niklas Roy] recently revisited this old classic game and built Galactic Dimension – a supersized pinball machine for Phæno – an amazing science center in the German city of Wolfsburg. The science centre was planning a big exhibition featuring thirty beautiful, classic pinball machines loaned from the Pacific Pinball Museum in Alameda, California.

The game machine was built on a steep ramp and has a gigantic play field measuring 3m x 6m (10’x20′). It features Sci-Fi game elements in the play field which blend perfectly with the futuristic building where it is housed. The game elements are built from repurposed everyday items like hair dryers and fans, giving visitors the motivation to build some of their own such contraptions.

The players operate the machine via a control desk, and a giant calculator is used to display the game score. The steep ramp had an incline of almost 30° which meant that he had to use a light ball to be able to propel it around the play field. The main user controls are the two flippers, and building giant ones was a big challenge. Solenoids or coils would not cut the ice, and he settled for pneumatic cylinders – easy to control, powerful, not too loud, and the museum already had a compressed air supply readily available. But it still took him three iterations before he could get it right. The plunger, which initially propels the ball, was built from PVC pipes and a hair dryer. Each play field element was built as a separate module to make assembly and maintenance easier. All featured a 220V AC supply, a sensor (either an IR distance sensor or a light barrier) to detect the ball, and an Arduino. Actuators were built from hair dryers and portable fans. Each of them have their own sound effects too – either a hacked toy or a speaker controlled by the Arduino. After everything was built, taken apart, transported, and reassembled at the site, the Galactic Dimension worked without a glitch, and without releasing any magic smoke. To top it off, Andreas Harre, who’s been the German pinball champion for several years in a row, also played the machine when he visited Phæno – and was totally excited about it!

So if you are in that part of Germany anytime until September, do drop in and try to ring up a big score. For photos of his build log, check out the photo album. There’s also a fairly big block diagram (German) and the Arduino sketches (.zip file), if you’d like to take a stab at building an even bigger pinball machine. Check the video to see the machine in action. And if the name [Niklas] sounds familiar, it is because he loves building installations such as the Forbidden Fruit Machine, the Ball Sucking Machine, and another Ball Sucking Machine.

Continue reading “Galactic Dimension – A Supersized DIY Pinball Machine”

tweet pinata

Tweet-Powered Bat Removes Effort Required To Obtain Pinata Contents

A child filled game-launch event was happening in London and [Roo] was asked to use his serious making skills to construct a machine that would hit a pinata with a baseball bat. This is a great idea, well, because giving bats to a bunch of kids at a populated event probably wouldn’t end well. One of the characters from the game Skylanders is named ‘Painyatta‘ and that is whom the pinata is modeled after. Tweeting #HitPainyatta initiates a bat swing. The swing tweeter gets to keep any treats that happen to fall out.

The physical machine is pretty simple. Most of it is made of MDF and wood. A large base supports a tall, skinny box. Mounted on top is a large stepper motor with a long wooden arm holding an aluminum bat. Once a tweet came in, a moderator would check for offensive content (hey, there are kids around) using a custom Twitter API app, and if acceptable, the tweet would be displayed on an LED matrix while an Arduino controlled a stepper driver to spin the motor and swing the bat.

…no children were harmed in the making of this project…

Continue reading “Tweet-Powered Bat Removes Effort Required To Obtain Pinata Contents”

IoT Enabled Thomas The Tank Engine

This month the popular “Thomas the Tank Engine” toy celebrated its 70 anniversary. As a fun project, [tinkermax] wanted to bring this traditional toy into the age of IoT, while preserving its physical appearance and simple charm.

He used a model called the “Diesel” which seemed big enough to house the electronics, but proved otherwise once he inspected the innards. He needed to fit in an ESP8266 module, an accelerometer breakout, some discrete parts, a nifty analog multiplexer, and a 14500 3.7V LiPo. Once done, he was able to control its speed remotely over WiFi, with an auto “throttle-boost” that kicks in when the accelerometer senses that the train is going uphill, and has remote monitoring of battery state, engine load, inclination and track vibration – all in real-time using MQTT over WiFi. It’s quite a demonstration of the power of these super-cheap WiFi modules that are powering the current wave of IoT innovation.

The train motor works off a single 1.5V battery, so [tinkermax] tried a couple of boost converters to get the ESP-12 to work. But the modules were a tad bigger, and couldn’t provide the high peak current needed by the ESP-12. So he used a 14500 3.7V LiPo battery instead. A series diode drops the LiPo voltage to a circuit friendly 2.9V ~ 3.6V range. The ADXL345 accelerometer is used to measure “pitch” to detect going up and down a hill, “roll” to check for tilt or tip over and vibration to identify track defects. It communicates with the ESP-12 using a special Lite-SPI library that he wrote.

Two analog measurements are performed. One uses a resistor in series with the PWM driven motor to measure its current, with a low pass filter to smooth out PWM noise. The other is a resistor divider network used to monitor battery voltage. But the ESP-12 has just one ADC channel. Instead of adding another ADC module, [tinkermax] used a neat device – the FSA3157 – which allows two analog inputs to be channeled to a single output much like a SPDT switch. One PWM output is used to control motor speed and a second one to pulse a LED.

The sensor data is streamed 5 times a second over the MQTT protocol to a Raspberry Pi based MQTT broker. Finally, a JavaScript webpage receives the MQTT messages and plots the data graphically. One upgrade he would like to implement is speed measurement, to allow constant speed drive. If you have any ideas on how to extract that information from an accelerometer, chip in with your comments below. Check out his build log in the short video below. And if you’d like to see how all of this can be used in the real world, check this other video where [tinkermax]’s colleague gives a run down about a commercial enterprise IoT cloud platform hooked up to Thomas the Tank Engine.

Continue reading “IoT Enabled Thomas The Tank Engine”

Craft Bead NES Controller

NES Controller Made Out Of Fused Craft Beads

Close your eyes and think back, far back when you were a wee kid. Remember those colored beads that a child would populate on a small plastic peg board, arranged in some sort of artsy pattern, then ironed to fuse the beads together into a crafty trinket? They were fun for kids but what good are they to us adults nowadays? Well, [Lalya] has shown that they can be used to make a unique and interesting NES Controller.

First, the controller’s front panel was laid out on the pegboard, remembering to lay it out in reverse so the melted side of the beads was facing into the controller. Holes were left in the top panel for the D-pad and B/A buttons. The sides, back and bottom panels of the controller were made the same way. Hot glue holds the case panels together.

Craft Bead NES Controller

Inside the case is an Arduino and breadboard with three through-hole momentary buttons. These are wired up to the Arduino inputs and a sketch emulates keystrokes when connected to a computer. Unfortunately, the D-pad’s functionality is just a button right now. [Lalya] uses the project to control iTunes.  Maybe the next revision will be more video game friendly.

Having your own NES controller recreation might not be high on your list. But you have to admit that this s a pretty simple and inexpensive way to make custom enclosures.

LEGO NES Controller

Large NES Controller Made From LEGOs

If LEGO are cool, and abnormally large NES controllers are cool, then what [Baron von Brunk] has created is pretty dang cool. It’s a super large functional NES game controller…. made out of LEGO! Yes, your favorite building blocks from the past (or present) can now be use to make an unnecessarily large game controller.

lego-nes-internalsThe four main sides of the controller case are standard stacked grey LEGO bricks. The inside of the case is mostly hollow, only with some supporting structures for the walls and buttons. The top is made from 4 individual LEGO panels that can be quickly and easily removed to access the interior components. The large LEGO buttons slide up and down inside a frame and are supported in the ‘up’ position care of some shock absorbers from a Technic Lego set. The shocks create a spring-loaded button that, when pressed down, makes contact with a momentary switch from Radio Shack. Each momentary switch is wired to a stock NES controller buried inside the large replica. The stock controller cord is then connected to an NES-to-USB adapter so the final product works with an NES Emulator on a PC.

[Baron von Brunk] is no stranger to Hackaday or other LEGO projects, check out this lamp shade and traffic light.

Continue reading “Large NES Controller Made From LEGOs”

“Bricking” Microcontrollers In LEGO Motivates Young Programmers

Back when he was about seven years old, [Ytai] learned to program on an Atari 800XL. Now he has a seven-year-old of his own and wants to spark his interest in programming, so he created these programmable LEGO bricks with tiny embedded microcontrollers. This is probably one of the few times that “bricking” a microcontroller is a good thing!

IMG_20150519_144818The core of the project is the Espruino Pico microcontroller which has the interesting feature of running a Java stack in a very tiny package. The Blocky IDE is very simple as well, and doesn’t bog users down in syntax (which can be discouraging to new programmers, especially when they’re not even a decade old). The bricks that [Ytai] made include a servo motor with bricks on the body and the arm, some LEDs integrated into Technic bricks, and a few pushbutton bricks.

We always like seeing projects that are geared at getting kids interested in creating, programming, and hacking, and this certainly does that! [Ytai] has plans for a few more LEGO-based projects to help keep his kid interested in programming as well, and we look forward to seeing those! If you’re looking for other ways to spark the curiosity of the youths, be sure to check out the Microbot, or if you know some teens that need some direction, perhaps these battlebots are more your style.