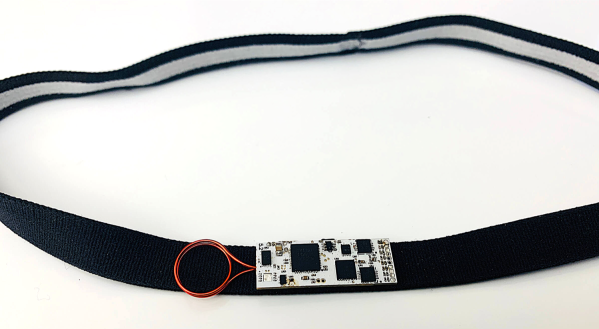
Stress monitoring has always been a tricky business. As it turns out, there is a somewhat reliable way of monitoring stress by measuring how much cortisol, the so-called “stress hormone,” the human body produces. With that in mind, bioengineering researchers at the University of Texas at Dallas decided to make CortiWatch, a wearable device for continuously monitoring cortisol excreted in sweat, as a sort of DIY stress meter.
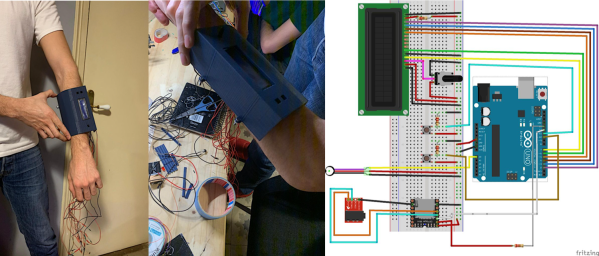
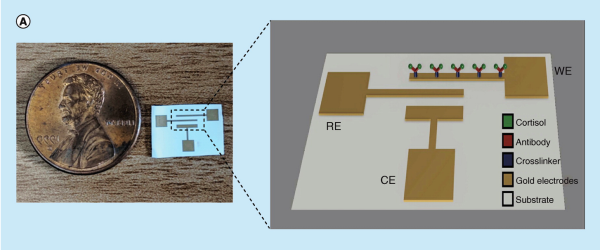
They made their own potentiostat, a device for measure small amounts of current produced by electrochemical reactions, similar to the glucometer. We’ve talked about these types of measurements before. Simply put, the potentiostat contains a voltage reference generator which biases the sensing electrodes at a preset potential. The voltage bias causes local electrochemical reactions at the sensing electrodes (WE in the image above), stimulating electron flow which is then measured by a transimpedance amplifier or “current-to-voltage” converter. The signal is then analyzed by an onboard analog-to-digital converter. Simply put, the more cortisol in the system, the higher the transimpedance amplifier voltage.
To validate their system a bit more thoroughly than simple benchtop studies, the researchers did some “real-life” testing. A volunteer wore the CortiWatch for 9 hours. The researchers found a consistent decrease in cortisol levels throughout the day and were able to verify these measurements with another independent test. Seems reasonable, however, it’s not quite clear to us what cortisol levels they were expecting to measure during the testing period. We do admit that it takes quite a bit of calibration to get these systems working in real-life settings, so maybe this is a start. We’ll see where they go from here.
Maybe the CortiWatch can finally give us a proper lie detector. We’ll let you be the judge.