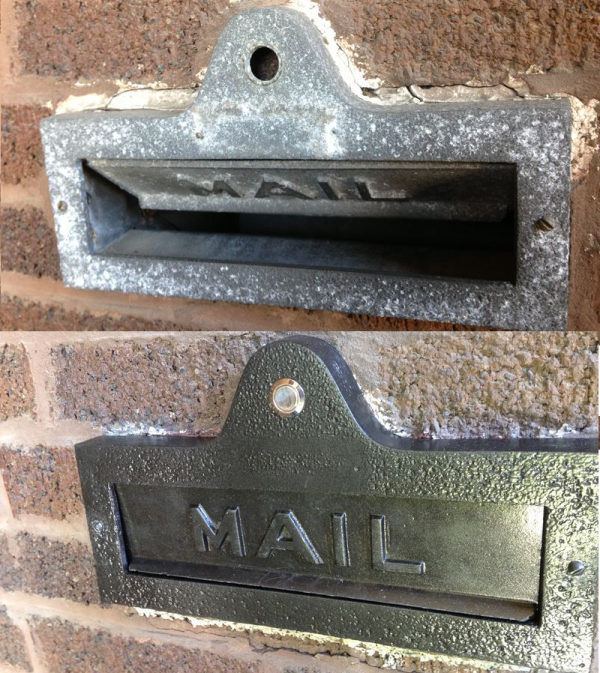
When you move into an old house, you are bound to have some home repairs in your future. [Ben] discovered this after moving into his home, built in 1929. The house had a mail slot that was in pretty bad shape. The slot was rusted and stuck open, it was covered in old nasty caulk, and it had a built-in doorbell that was no longer functional. [Ben] took it upon himself to fix it up.
The first thing on the agenda was to fix the doorbell. After removing the old one, [Ben] was able to expose the original cloth-insulated wiring. He managed to trace the wires back to his basement and, to his surprise, they seemed to be functional. He replaced the old doorbell button with a new momentary button and then hooked up a DIY doorbell using an XBee radio. [Ben] already had an XBee base station for his Raspberry Pi, so he was wrote a script that could send a notification to his phone whenever the doorbell was pushed.
Unfortunately, the old wiring just didn’t hold up. The push button only worked sporadically. [Ben] ended up purchasing an off the shelf wireless doorbell. He didn’t want to have to stick the included ugly plastic button onto the front of his house though, so [Ben] had to figure out how to trigger the new doorbell using the nice metallic button. He used the macro lens on his iPhone to follow the traces on the PCB until he was able to locate the correct points to trigger the doorbell. Then it was just a matter of a quick soldering job and he had a functional doorbell.
Once the electronics upgrades were complete, he moved on to fixing up the look of the mail slot. He had to remove the rust using a wire brush and sandpaper. Then he gave it a few coats of paint. He replaced the original natural insulation with some spray foam, and removed all the old nasty caulk. The final product looks as good as new and now includes a functional wireless doorbell.
We’re big fans of salvaging old-school home hardware. Another example that comes to mind is this set of door chimes with modernized driver.

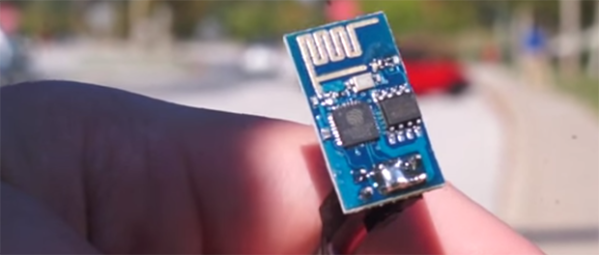
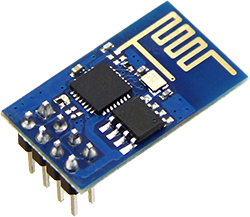 When we first heard about it a few weeks ago, we knew the ESP8266 UART to WiFi module was a special beast. It was cheap, gave every microcontroller the ability to connect to a WiFi network, and could – possibly – be programmed itself, turning this little module into a complete Internet of Things solution. The only thing preventing the last feature from being realized was the lack of compiler support. This has now changed. The officially unofficial ESP8266 community forums