They say you should never cheap out on anything that comes between you and the ground, like tires, shoes, and mattresses. We would take that a little further into the 21st century and extend it to anything between you and work. In our case, ‘buy nice or buy twice’ includes keyboards and mice.
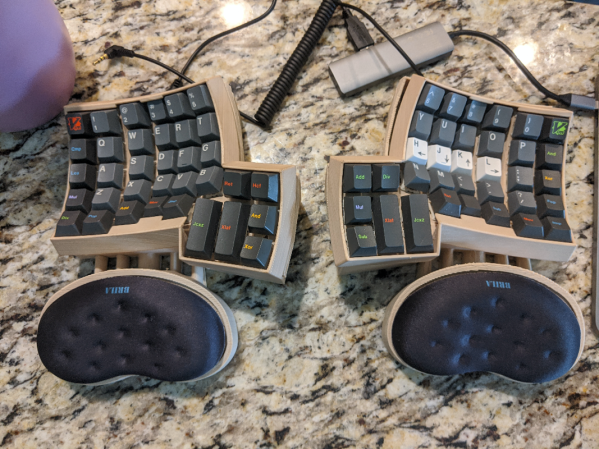
 [Marcus Young] is a fan of ortholinear ergonomic comfort, but not of cables. He gave [adereth]’s dactyl keyboard some wings by using a Bluetooth micro, and the Pterodactyl was born. Of course, the two halves still use a TRRS cable to communicate, and wires are required to charge batteries, but it’s the principle of the thing.
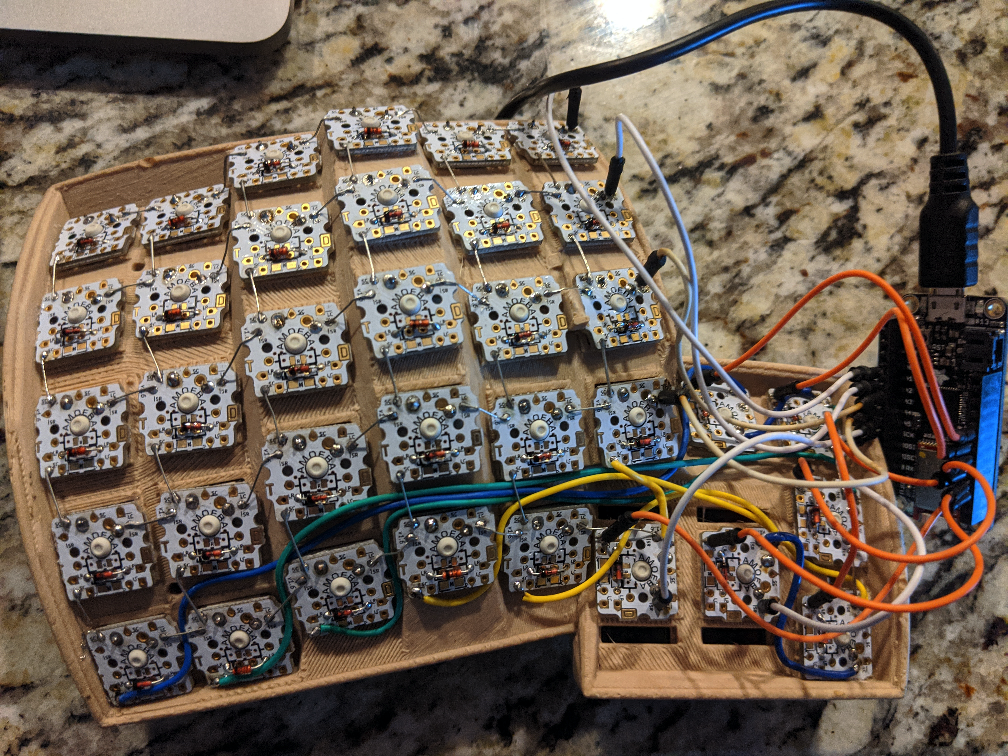
That’s not all [Marcus] did to make the dactyl his own — it also has a modified full-fat base that gives him all the room in the world to wire up the keyswitch matrix compared to the original streamlined design.
Instead of the usual Teensy, Pro Micro, or Proton-C, the pterodactyl has a Feather 32u4 in its belly. [Marcus] is clacking on Holy Panda switches which we’ve been meaning to try, and individual PCBs for each switch, which seems like it might negate gluing the switches in place so they survive through keycap changes. Check out [Marcus]’ write-up to see what he learned during this build.
This isn’t the first modified dactyl we’ve seen flying around here, and it won’t be the last. Here’s one with a dual personality — both halves can work together or alone.
Via r/mk