Commercially available radio control tanks are fun and all, but sometimes you’ve just got to build your own. [Let’s Print] did just that, whipping up a tank on his 3D printer before taking it out in the snow.
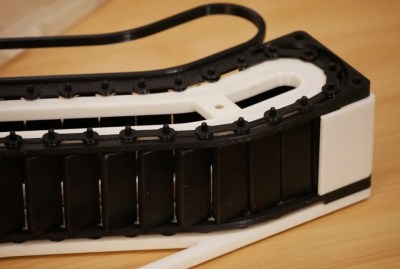
The tank is a fairly straightforward build, relying on a pair of brushed motors for propulsion, controlled by twin speed controllers hooked up to standard radio control hardware. Everything else is bespoke, however, from the 3D printed gearboxes, to the chassis and the rather aggressive-looking tracks. The pointed teeth of the latter leave deep indentations when the tank cruises around on mud, though weren’t quite enough to stop the little tank from getting high-centered in deep snow.
The build isn’t for the impatient, however. [Let’s Print] notes that the tracks alone took over 80 hours to run off in PETG, let alone the rest of the frame and gearboxes. However, we’re sure it was a great learning experience, and great fun to drive outside. Now the next step is surely to go bigger. Video after the break.
Virtually any hobby has an endless series of rabbit holes to fall into, with new details to learn around every corner. This is true for beekeeping, microcontrollers, bicycles, and gardening (just to name a few), but those involved in the intricate world of coffee roasting and brewing turn this detail dial up to the max. There are countless methods of making coffee, all with devout followers and detractors alike, and each with its unique set of equipment. To explore one of those methods and brew a perfect espresso, [Eric] turned to his trusted 3D printer and some compressed gas cylinders.
An espresso machine uses high pressure to force hot water through finely ground coffee. This pressure is often developed with an electric pump, but there are manual espresso machines as well. These require expensive parts which can withstand high forces, so rather than build a heavy-duty machine with levers, [Eric] turned to compressed CO2 to deliver the high pressure needed.
To build the pressure/brew chamber, he 3D printed most of the parts with the exception of the metal basked which holds the coffee. The 3D printed cap needs to withstand around nine atmospheres of pressure so it’s reasonably thick, held down with four large bolts, and holds a small CO2 canister, relief valve, and pressure gauge.
To [Eric]’s fine tastes, the contraption makes an excellent cup of coffee at minimal cost compared to a traditional espresso machine. The expendable CO2 cartridges only add $0.15 to the total cost of the cup and for it’s simplicity and small size this is an excellent trade-off. He plans to improve on the design over time, and we can’t wait to see what he discovers. In the meantime, we’ll focus on making sure that our beans are of the highest quality so they’re ready for that next espresso.
The first issue that needed sorting out was the broken case. This Amiga must have had one wild ride, as there were several nasty cracks in the front panel and whole chunks had been broken off. We’ve seen [Drygol] repair broken computer cases before, but it seems like each time he comes up with some new tricks to bring these massacred pieces of plastic back to like-new condition. In this case plastic welding is used to hold the parts together and fill in the gaps, and then brass mesh is added to the backside for strength. The joints are then sanded, filled in with polyester putty, and finally sprayed with custom color matched paint. While he was in the area, he also filled in a hole the previous owner had made for a toggle switch.
Before
After
Then [Drygol] moved onto the internals. Some of the traces on the PCB had been corroded by a popped battery, a socket needed to be replaced, and as you might expect for a machine of this vintage, all of the electrolytic capacitors were suspect and needed to go. Finally, as the system didn’t have a power supply, he wired in a picoPSU. That got the 34 year old computer back up and running, and at this point, the machine was almost like new again. So naturally, it was time to start with the upgrades and modifications.
[Drygol] added an IDE interface and connected a CompactFlash adapter as the computer’s primary drive. For the secondary, he installed a GoTek floppy drive emulator that lets you replace a mountain of physical disks with a USB flash drive full of images. Between the two, all of the computer’s storage needs are met with nary a moving part.
The emulator was given its own 3D printed front panel to fit with the Amiga’s visual style, and he also printed out a holder for the RGB4ALL S-Video/Composite adapter installed on the rear of the machine. To help keep all this new gear cool, he finished things off with a new case fan.
The Stirling external combustion engine has fascinated gear heads since its inception, and while the technology has never enjoyed widespread commercialization, there’s a vibrant community of tinkerers who build and test their own takes on the idea. [Leo Fernekes] has been working on a small Stirling engine made from 3D printed parts and common hardware components, and in his latest video he walks viewers through the design and testing process.
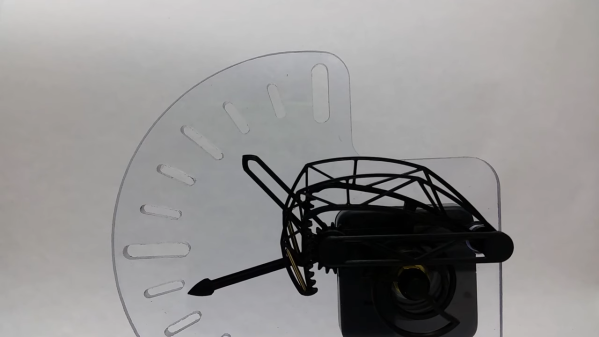
We’ve seen Stirling engines with 3D printed parts before, but in most cases, they are just structural components. This time, [Leo] really wanted to push what could be done with plastic parts, so everything from the water jacket for the cold side of the cylinder to the gears and connecting rods of the rhombic drive has been printed. Beyond the bearings and rods, the most notable non-printed component is the stainless steel spice shaker that’s being used as the cylinder.
Mating the hot metal cylinder to the 3D printed parts naturally introduced some problems. The solution [Leo] came up with was to design a toothed collar to hold the cylinder, which reduces the surface area that’s in direct contact. He then used a piece of empty SMD component feed tape as a insulator between the two components, and covered the whole joint in high-temperature silicone.
Like many homebrew Stirling engines, this one isn’t perfect. It vibrates too much, some of the internal components have a tendency to melt during extended runs, and in general, it needs some fine tuning. But it runs, and in the end, that’s really the most important thing with a project like this. Improvements will come with time, especially once [Leo] finishes building the dynamometer he hopes will give him some solid data on how the engine’s overall performance is impacted as he makes changes.
A few weeks ago, a video went viral on social media that depicted a rather unsavory individual receiving what could be described as a “percussive reminder” of social norms courtesy of a bystander armed with a can of Twisted Tea. The video served as inspiration for many a meme, but perhaps none more technically intricate than this air cannon that launches 24 ounces of hard iced tea at better than 100 miles per hour built by [Greg Bejtlich].
Technically we’re looking at two different hacks here. The first is the pneumatic launcher put together using a low-cost eBay tire bead seater. These tools are designed to unleash a large volume of air into a tire so it can be properly seated onto the rim, but it doesn’t take much more than a few pieces of PVC pipe from the hardware store to turn it into an impromptu mortar. It’s even got a convenient trigger and a handle to help control the recoil. Though as you can see in the video after the break, it still ends up being a bit too energetic for [Greg] to keep a grip on.
For the projectiles, [Greg] has 3D printed a nose cone and tail fin that snap onto the 24 oz cans in hopes of making them more aerodynamically stable. The slow motion video seems to indicate they aren’t terribly effective, but they certainly look impressive. Spring-loaded control surfaces that deploy after the can leaves the muzzle could be the answer, though at some point you have to ask yourself how far you’re willing to go for an Internet meme.
It wouldn’t be much of an exaggeration to say that anyone reading these words has struggled at one time or another to keep an ever growing collection of electronic bits and bobs from descending into absolute chaos. Tossing them all into plastic bins is at least a start down the road to long-term organization, but they still needed to be sorted and inventoried if you want to avoid the wasted time and money of buying parts you forgot you already had.
For his latest project, [Zack Freedman] decided to finally tackle the personal parts collection that he’s ended up lugging around for the last several years. The first half of the battle was just figuring out what he actually had, what he was likely to need down the line, and getting it all sorted out so he didn’t have to keep rummaging through a big pile to find what he needed. But it’s not enough to get organized, you also need to stay organized.
Which is why he then turned his attention to how all these newly sorted components would actually be stored going forward. He already had a trio of Harbor Freight bin organizers, but as one expects from that fine retailer, they were only marginally suitable for the task at hand. So [Zack] designed a 3D printed faceplate that could snap onto the original plastic bin. The new fronts made them easier to grab and featured an opening to accept a laser-etched plastic label.
To give them a little visual flair, he decided to print the faceplates using rainbow gradient filament. To prevent them from being random colors, he used the relatively obscure sequential slicing option so his Prusa i3 would print each faceplate in its entirety before moving over to the next one on the bed. This took far longer than doing them in parallel (especially since he had access to multiple printers), but makes for a much nicer aesthetic as the color smoothly transitions between each bin on the wall. It also has a practical benefit, as you can tell at a glance if any of the bins have found themselves in the wrong spot.
One of the best applications for desktop 3D printing is the creation of one-off bespoke components. Most of the time a halfway decent pair of calipers and some patience is all it takes to model up whatever part you’re after, but occasionally things get complex enough that you might need a little help. If you ever find yourself in such a situation, salvation might be just a few marker scribbles away.
As [Mangy_Dog] explains in a recent video, he wanted to model a control panel for a laser cutter he’s been working on, but thought the shapes involved were a bit more than he wanted to figure out manually. So he decided to give photogrammetry a try. For the uninitiated, this process involves taking as many high-resolution images as possible of a given object from multiple angles, and letting the computer stitch that into a three dimensional model. He reasoned that if he had a 3D model of the laser’s existing front panel, it would be easy enough to 3D print some replacement parts for it.
That would be a neat enough trick on its own, but what we especially liked about this video was the tip that [Mangy_Dog] passed along about increasing visual complexity to improve the final results. Basically, the software is looking for identifiable surface details to piece together, so you can make things a bit easier for it by taking a few different colored markers and drawing all over the surface like a toddler. It might look crazy, but all those lines give the software some anchor points that help it sort out the nuances of the shape.
Unfortunately the markers ended up being a little more permanent than [Mangy_Dog] had hoped, and he eventually had to use acetone to get the stains off. Certainly something to keep in mind. But in the end, the 3D model generated was accurate enough that (after a bit of scaling) he was able to design a new panel that pops right on as if it was a factory component.
Hackaday readers may recall that when we last heard from [Mangy_Dog] he was putting the finishing touches on his incredible “Playdog Blackbone” handheld gaming system, which itself is a triumph of mating 3D printed components with existing hardware.