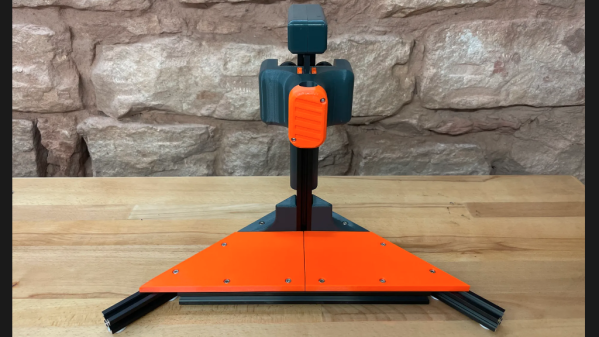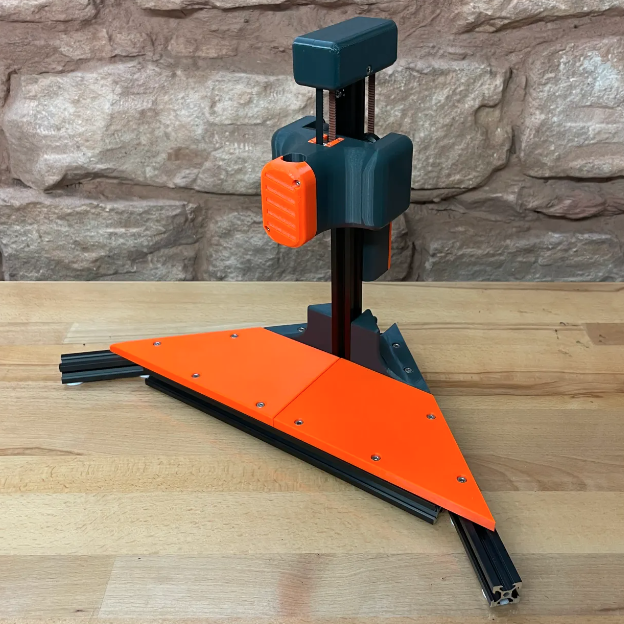
[Pepijn de Vos] wanted a 6DOF HID. You know, a 6 Degrees Of Freedom Hardware Interface Device. Those are the fancy controllers for navigating in 3D space, for uses like Computer Aided Design, or Kerbal Space Program. And while we can’t speak to [Pepijn]’s KSP addiction, we do know that the commercially available controllers are prohibitively expensive. It takes some serious CAD work to justify the expenditure. [Pepijn] falls somewhere in-between, and while he couldn’t justify the expense, he does have the chops to design and 3D print his own.
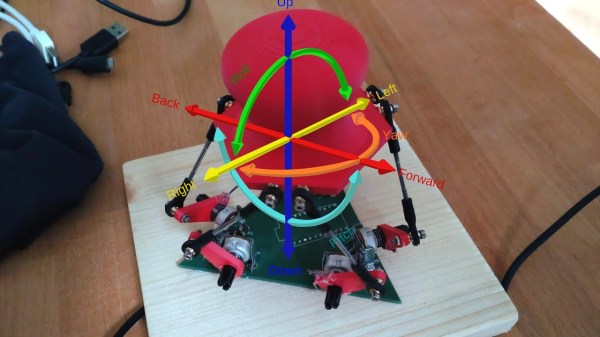
Marvelously, he’s shared the design files for SpaceFox, linked above. It’s 6 spring-loaded potentiometers, supporting a floating printed Big Knob. The pots feed into an Arduino Pro Micro, which calculates the knob’s position on the fly and feeds in into the connected computer. On the computer side, the project uses the spacenavd driver to interface with various applications.
SpaceFox V1 is essentially a proof of concept, just asking for someone to come along and knock off the rough edges. [Pepijn] even includes a wishlist of improvements, but with the caveat that he’s satisfied with his working model. If this project really gets your 6DOF juices flowing, maybe try making an improved version, and share the improvements. And let us know about it!