When Does Car Hacking Become “Tampering”? The British Government Seeks Guidance

When a government decides to take a look at your particular field of experimentation, it’s never necessarily a cause for rejoicing, as British motor vehicle enthusiasts are finding out through a UK Government consultation. Titled “Future of transport regulatory review: modernising vehicle standards“, the document explains that it is part of the process of re-adopting under UK law areas which have previously been governed by the European Union. Of particular interest is the section “Tackling tampering”, which promises a new set of offences for “tampering with a system, part or component of a vehicle intended or adapted to be used on a road“.

They go into detail as to the nature of the offences, which seem to relate to the production of devices designed to negate the safety or environmental features of the car. They’re at pains to say that they have no wish to target the legitimate car modification world, for example in motorsport or restoration, but it’s easy to see how a car hacker might inadvertently fall foul of any new rules. It’s worried the enthusiasts enough that a petition has been launched on the UK parliamentary petition site, making the point that the existing yearly MOT roadworthiness test should fulfill the function of taking any illegal vehicles off the road.

We’re always wary when governments wander into our purview, and given where this is being written it’s fair to say that British governments have had their fair share of ill-considered laws in their time. But before we call doom upon the future of car hacking for Brits, it’s worth remarking that they don’t always make a mess in this arena. The rules for the Individual Vehicle Approval test for putting a home-built car on the road are far from a bureaucratic nightmare for example, instead being a relatively sensible primer in building a safe motor vehicle.

So we’d suggest not to panic just yet, but perhaps any British readers might like to respond appropriately to the consultation and the petition in the interests of nudging them in the right direction.

Thanks [Adam Quantrill] for the tip.

OpenDog Version 3 Is Ready To Go Walkies

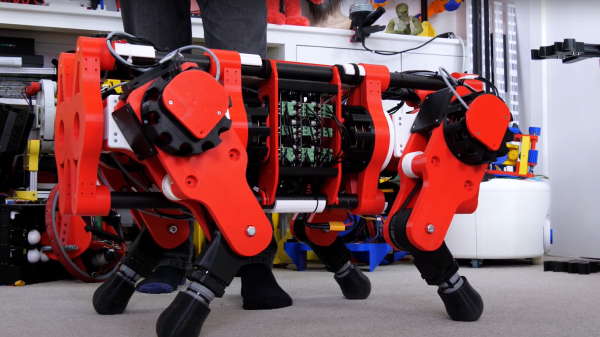
We’ve been following [James Bruton]’s open dog project for a little while now, and with his considerable pace of work – pandemic or no pandemic – development has been incredibly rapid. The latest milestone is the public release of version 3 (Video, embedded below.) This upgrade to the system adds 3D printed cycloidal gearboxes, removing the previous belt drives. [James] had immense fun tuning the motor controller parameters for these and admits they’re not completely dialed in yet. He notes that the wider gearbox body means that the robots geometry needed to change a little, and the previous belt-drive version may have a bit of an edge, but he’s confident he can make it work (and given his incredible previous robotics builds, we totally believe he’ll nail it!)

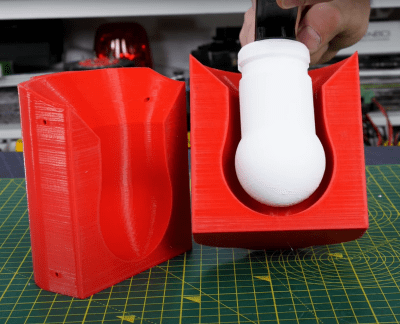
Silicone overmolding around a 3D printed former, using a 3D printed mould

Older versions struggled with slippery plastic feet; the advantage of a predictably smooth contact shape of a rounded foot is somewhat offset by the limited contact patch size, and that means not so much grip on some surfaces. [James] solution was obvious enough – just learn how to make 3D printed silicone moulds and cast a nice rubber foot around a plastic former, and problem solved! Unfortunately he neglected to add some recesses for a lever to get in between the mould halves, so it was a bit of a struggle to separate after curing. A beginner’s mistake that won’t be repeated, we’re sure.

Full source for openDogV3 is now available on the GitHub page. Here’s the playlist for the whole project, as well as direct links for the cycloidal drive development (part1, part2, part3.) But before you all go diving in to start 3D printing your own pooch, [James] tells us that the total cost would be around $2000 all in, with the bulk of that being the motors and ODrive units, so this one for the serious builder only!

We’ve covered robot dogs a fair bit, a particularly nice example is The Dizzy Wolf, and if you’re wondering just why on earth you’d want a robot dog, then Ask Hackaday has you covered as well.

Continue reading “OpenDog Version 3 Is Ready To Go Walkies”

An orange 3D printed four digit clock with rotating segments

Be Mesmerized By The Latest Time Twister

[Hans Andersson] has been creating marvelous twisting timepieces for over a decade, and we’re pleased to be able to share his latest mechanical clock contraption with our readers, the Time Twister 5.

In contrast to his previous LEGO-based clocks, version five of the Time Twister uses 3D printed segments, undoubtedly providing greater flexibility in terms of aesthetics and function. Each digit is a mechanical display, five layers vertical and three segments horizontal, with a total of three unique faces. Each layer of each display can be individually rotated by a servo, and this arrangement allows for displaying any number between zero and nine. The whole show is controlled by an Arduino MEGA and a DS3231 real-time clock.

Watching these upended prisms rotate into legible fifteen-segment digits is enjoyable enough already, but the mechanical sound created by this timepiece in motion is arguably even more satisfying. Check out the video below to see (and hear) for yourself. If you want to build one yourself, all the details are here.

We last covered [Hans Andersson] and his very first Time Twister clock way back in November 2011. Since then we’ve come across many impressive mechanical clocks, like this seven-segment work of art. We’re constantly impressed by the outstanding craftsmanship of these mechanical clocks, and it’s inspiring to see one of our OG horologists back in the saddle once more.

Continue reading “Be Mesmerized By The Latest Time Twister”

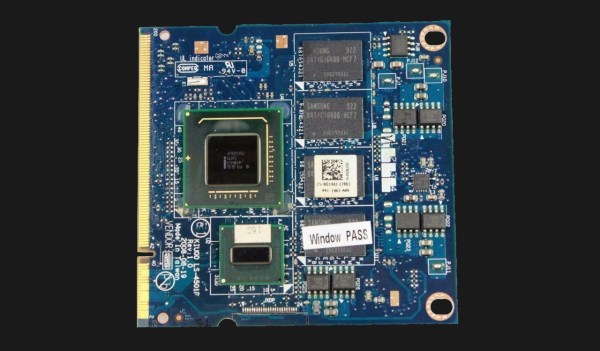
the SoM module used to power a Dell Mini 1210, in an extended SODIMM form-factor

When Dell Built A Netbook With An X86 System-on-Module

Just like with pre-touchscreen cellphones having fancy innovative features that everyone’s forgotten about, there’s areas that laptop manufacturers used to venture in but no longer dare touch. On Twitter, [Kiwa] talks a fascinating attempt by Dell to make laptops with user-replaceable CPU+RAM modules. In 2008, Dell released the Inspiron Mini 1210, with its CPU, chipset and RAM soldered to a separate board in an “extended SODIMM” form-factor – not unlike the Raspberry Pi Compute Modules pre-CM4! Apparently, different versions of such “processor cards” existed for their Inspiron Mini lineup, with varying amounts of RAM and CPU horsepower. With replacement CPU+RAM modules still being sold online, that makes these Dell netbooks to be, to our knowledge, the only x86 netbooks with upgradable CPUs.

You could try and get yourself one of these laptops or replacement CPU modules nowadays, if you like tinkering with old tech – and don’t mind having a subpar experience on even Linux, thanks to the Poulsbo chipset’s notorious lack of openness. Sadly, Dell has thoroughly abandoned the concept of x86 system-on-module cards, and laptops have been getting less modular as we go – we haven’t been getting socketed CPUs since the third generation of mobile Intel boards, and even RAM is soldered to the motherboard more and more often. In theory, the “CPU daughterboard” approach could improve manufacturing yields and costs, making it possible to use a simpler large board for the motherboard and only have the CPU board be high-layer-count. However, we can only guess that this wasn’t profitable enough overall, even with all the theoretical upsides. Or, perhaps, Google-style, someone axed this project internally because of certain metrics unmet.

If you think about it, a laptop motherboard is a single-board computer; however, that’s clearly not enough for our goals of upgradability and repairability. If you’re looking to have your own way and upgrade your laptop regardless of manufacturer’s intentions, here’s an old yet impressive story about replacing the soldered-in CPU on the original Asus EEE, and a more recent story about upgrading soldered-in RAM in a Dell XPS ultrabook. And if you’re looking for retrocomputing goodness, following [Kiwa] on Twitter is a must – last seen liveblogging restoration and renovation of a Kaypro someone threw out on the curb.

ESP8266 Based WiFi Game Boy Cartridge Browses WikiPedia

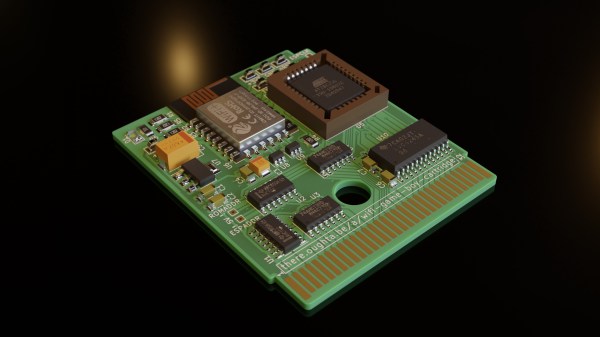
[Sebastian Staacks] came across his old Game Boy and was wondering (as you do) what happened to recent attempts at getting a WiFi interface wedged into a standard cartridge. After a while the conclusion was that people had been scuppered by approaching the problem in a way that made it too hard. Obviously that meant it was necessary to follow through and build something, which is precisely what he did with his WiFi Game Boy Cartridge.

A trend lately has been to hook up a fast microcontroller to a bus, then move the whole interfacing shenanigans into software. This works fine in some circumstances, but for the GB interface, it’s not so easy. The GB is powered by the Sharp LR35902, running at a smidge over 4 MHz, but its machine cycle takes four clocks giving an instruction rate of only 1 MHz. The cartridge interface presents the raw CPU bus directly. This is both good and bad. It’s good, because it enables all kinds of expansion modules, like cameras, printers, and other custom peripherals, but it’s bad because the burden of interfacing with the CPU, at its full speed, lies squarely in the cartridge’s remit.

Rather than trying to hook this bus directly to a fast microcontroller, [Staacks] has taken a different approach; by decoding the address bus with discrete logic, it was easy to derive chip selects for an embedded ESP8266 as well as a socketed EEPROM. The clock for the former was also gated and sent into the ESP8266, generating an interrupt to wake it up. The EEPROM stores a simple application whose job is to present an OSD keyboard and send requests to Wikipedia, via the ESP8266 WiFi stack. The resulting text is then displayed on the 160×144 dot matrix display. The interrupt latency of the ESP8266 was mitigated by the application simply discarding the first data byte sent to it, and retrying the access. This way the ESP8266 could spend the majority of its time dealing with wireless duties, only pausing to swap a byte now-and-then with the application. A simple solution which appears to actually work! If you’re up for building one of these and writing your own applications, you can wander over to GitHub, clone yourself a copy and crack on!

We’ve seen a few attempts at doing this before, [davedarko] tried with this project, and if you search hackaday.io you’ll get loads of GB hacks to browse. Finally a recent twitter thread also points to another effort to do something similar with Wi-Fi, but development is still ongoing. We’ll check back later!

Continue reading “ESP8266 Based WiFi Game Boy Cartridge Browses WikiPedia”

The End Of The Electromechanical Era

When viewed from the far future, the early years of the 21st century will probably be seen as the end of a short era in human technological development. In the beginning of the 20th century, most everything was mechanical. There were certainly some electric devices, but consumer products like gramophone players and “movie” cameras were purely mechanical affairs. You cranked them up, and they ran on springs. Nowadays, almost every bit of consumer gear you buy will be entirely electronic. In between, there was a roughly 50 year period that I’m going to call the Electromechanical Era.

Jenny List’s teardown this week of an old Fuji film movie camera from 1972 captures the middle of this era perfectly. There’s a small PCB and an electric motor, but most of the heavy lifting in the controls was actually put on the shoulders of levers, bearings, and ridiculously clever mechanisms. The electrical and mechanical systems were loosely coupled, with the electrical controlled by the mechanical.

I’m willing to argue the specifics, but I’d preliminarily date the peak of the Electromechanical Era somewhere around 1990. Last year, I had to replace all of the rotted rubber drive belts in a Sony Walkman WM-D6C, a professional portable tape player and recorder produced from 1984-2002.

It’s not a simple tape recorder — the motors are electronically regulated to keep ridiculously constant speed for such a small device, and mine has Dolby B and C noise reduction circuitry packed inside along with some decent mic preamps. But still, when you press the fast-forward button, it physically shoves rubber-coated drive wheels out of the way, and sliding pieces of metal make it change modes of operation by making and breaking electrical contacts. Its precision lies as much in the mechanical assemblies and motors as in the electronics. It’s truly half electronic and half mechanical.

But that era is long over. The coming of the CD player signaled the end, although we didn’t see it at the time. Sure, there is a motor, but all the buttons are electronic, and all the “mechanism” is implemented almost entirely in silicon. The digital camera was possibly the last nail in the Electromechanical Era’s coffin: with no need to handle physical film, the last demand for anything mechanical evaporated. Open up a GoPro if you don’t know what I mean.

While I’ll be happy to never have to replace the drive rubber in a cassette recorder again, it’s with a little sadness that I think on the early iPods with their spinning metal hard drives, and how they gave way to the entirely silicon Zoom H5 recorder that I use now. It has a S/N ratio and quiet pre-amps, no wow or flutter, and a quality that would have been literally unbelievable when I bought the WM-D6C.

Still, if you find yourself in the thrift store, and you’ve never done so before, buy and take apart one of these marvels from a bygone era. A cassette recorder, even a cheap one, hides a wealth of electromechanical design.

A Well Documented BreadBoard Computer Shows Dedication

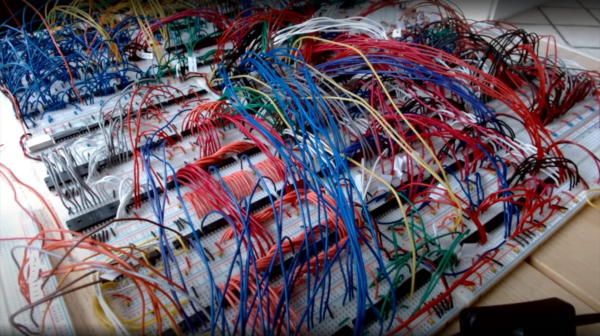
These pages have not been exactly devoid of home-built computers, with those constructed on solderless breadboard less frequent, but still not rarities. But what is more of a rarity is this ground-up 8-bit 74xx logic-based computer (video, embedded below) with full source, an emulator, assembler and test suite. [JDH] spent a solid couple of weeks working late into the night to build this, and the results show for themselves.

The new JDH-8 is now a figment of reality.

The architecture is a traditional 8-bit load/store microcoded processor with the microcode stored in easily programmable AT28C64 EEPROMs for ease of tweaking.  The address bus is 16-bits, which is quite ample for this, and puts it in line with (admittedly more sophisticated) 8-bit micros of old such as the 6502. There is also a hardware stack, and a discrete-logic ALU as well! Finally, since that wasn’t enough work already, he added in his own discrete logic video controller.

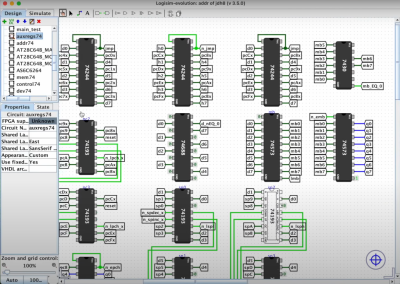
Wise people simulate before prototyping something like this

There are sixteen instructions covering memory access, ALU operations and I/O operations. One of the great things about this project is that [JDH] readily admits the mistakes made along the way, and how the architecture didn’t need to be this complex. One example is that hardware stack wasn’t really necessary as it could just have been implemented in software. Also, due to the implementation, memory accesses were so fast compared with the achievable cycle time, that there really was no point to using load/store architecture at all! Still, [JDH] had fun building and programming it!

It was interesting to see the use of LogiSim-Evolution to debug first a high level model of the architecture and then the translation into TTL chips. This scribe wasn’t aware of that tool (the shame!) but is going to try this out real soon.

All code for the software side of things can be found on the project GitHub. Perhaps the hardware design will appear there as well, be at the time of writing we couldn’t seem to find it.

Can’t get enough breadboard computers? (We can’t) check this out from last year. Stuck for a suitable enclosure for your latest bread breadboard computer? How about a bread bin.

Continue reading “A Well Documented BreadBoard Computer Shows Dedication”