Giant CNC Machine Measures A Full Cubic Meter

There are plenty of designs for table-top 3D printers, engravers, and general CNC machines out there. However, if you wanna build big things and build them fast, sometimes you need a machine that can handle bigger jobs. This gigantic 1x1x1 m 5-axis CNC machine from [Brian Brocken] absolutely fits the bill.

The build relies on 3D-printed components and aluminium tubing to make it accessible for anyone to put together. [Brian] notes that 25×25 mm tubing with a 2 mm wall thickness does an okay job, but those aiming to minimize deflection would do well to upgrade to 5 mm thickness instead. Stepper motors are NEMA 23 size, though the Y-axis uses a pair of NEMA 17s. This is necessary to deal with the immense size of the machine. Control is thanks to an Arduino Mega fitted with a RAMPS board, running the Marlin firmware.

The plan is to use the machine to test out a variety of CNC machining techniques. It could make for a great maxi-sized 3D printer, and should be able to handle some basic 5-axis milling of very soft materials like foams. This might seem silly on the face of it, but it can be of great use for mold making tasks.

We’ve seen giant CNC routers built before, too, and they can readily be put to great use. Video after the break.

Continue reading “Giant CNC Machine Measures A Full Cubic Meter”

RAMPS Rebuild Keeps Robox 3D Printer Out Of Junk Bin

A 3D printer is a wonderful invention, but it needs maintenance like every machine that runs for long hours. [Rob Ward] had a well-used Robox 3D printer that was in need of some repairs, but getting the necessary replacement parts shipped to Australia was cost-prohibitive. Rather than see a beloved printer be scrapped as e-waste, he decided to rebuild it using components that he could more easily source. Unfortunately the proprietary software and design of the Robox made this a bit difficult, so it was decided a brain transplant was the best path forward.

Step one was to deduce how the motors worked. A spare RAMPS 1.4 board and Arduino Mega2560 made short work of the limit switches and XYZ motors. This was largely accomplished by splicing into the PCBs themselves. The Bowden filament driver motor had a filament detector and an optical travel sensor that required a bit of extra tuning, but now the challenging task was next: extruding.

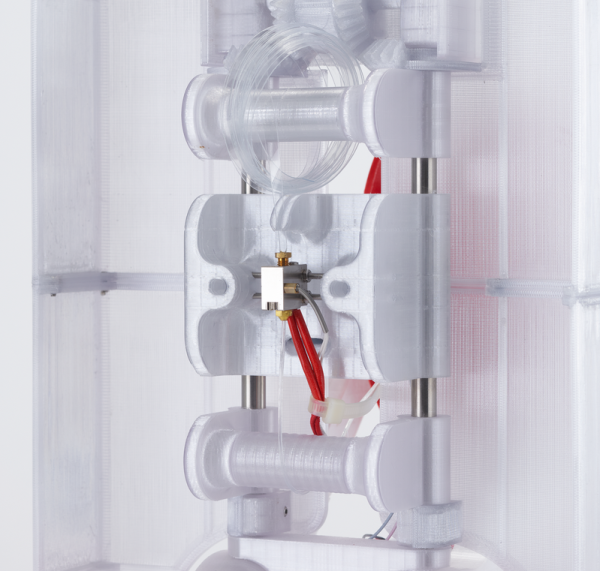
The printer’s new custom hotend.

With a cheap CR10 hot end from an online auction house, [Rob] began modifying the filament feed to feed in a different direction than the Robox was designed for (the filament comes in at a 90-degree angle on the stock Robox). A fan was needed to cool the filament feed line. Initial results were mixed with lots of blockages and clogs in the filament. A better hot end and a machined aluminum bracket for a smoother path made more reliable prints.

The original bed heater was an excellent heater but it was a 240 VAC heater. Reluctant to having high voltages running through his hacked system, he switched them out for 12 VDC adhesive pads. A MOSFET and MOSFET buffer allowed the bed to reach a temperature workable for PLA. [Rob] upgraded to a GT2560 running Marlin 2.x.x.

With a reliable machine, [Rob] stepped back to admire his work. However, the conversion to the feed being perpendicular to the bed surface had reduced his overall build height. With some modeling in OpenSCAD and some clever use of a standard silicone sock, he had a solution that fed the wire into the back of the hot end, allowing to reclaim some of the build height.

It was a long twelves months of work but the write-up is a joy to read. He’s included STL and SCAD files for the replacement parts on the printer. If you’re interested in seeing more machines rebuilt, why not take a look at this knitting machine gifted with a new brain.

Charger Caddy Shows What 3D Printers Were Meant For

As computers became more popular in the late 80s and into the 90s, they vastly changed their environments. Of course the technological changes were obvious, but plenty of other things changed to accommodate this new technology as well. For example, furniture started to include design elements to accommodate the desktop computer, with pass-through ports in the back of the desks to facilitate cable management. While these are less common features now there are plenty of desks still have them, this 3D printed design modernizes them in a simple yet revolutionary way.

While these ports may have originally hosted thick VGA cables, parallel printer cables (if they would fit), and other now-obsolete wiring, modern technology uses simpler, smaller solutions. This doesn’t mean that they aren’t any less in need of management, though. This print was designed to hold these smaller wires such as laptop chargers, phone chargers, and other USB cables inside the port. A cap on the top of the print keeps everything hidden until it is lifted by hand, where a cable can be selected and pulled up to the top of the desk.

While it might seem like a simple project at first, the elegance of this solution demonstrates excellent use of design principles and a knack for integrating slightly older design decisions with modern technology. If you have a 3D printer and a cable management port on your desk, the print is available on Thingiverse. Not every project needs a complicated solution to solve a problem, like this automatic solar tracker we recently saw which uses no complicated electronics or algorithms to reliably point itself at the sun.

Discarded Plastic Laser-Cut And Reassembled

The longevity of plastic is both a blessing and a curse. On the one hand, it’s extremely durable, inexpensive, and easy to work with, but it also doesn’t biodegrade and lasts indefinitely in the environment when not disposed of properly. While this can mean devastating impacts to various ecosystems, it can also be a benefit if you happen to pick this plastic up and also happen to have a laser cutter around.

After cleaning and sorting plastic that they had found from various places, including scraps from a 3D printing facility, the folks at [dinalab] set about turning waste plastic into something that would be usable once more. After sorting it they shredded it and then melted it into sheets. They found that a sandwich press yielded the best results, as it kept the plastic at a low enough temperature to keep it from burning. Once its off of the press and properly cooled, the flat sheets of plastic can be sent to the laser cutter to be made into whatever useful thing they happen to need.

Not only does this process reuse plastic that would otherwise end up in the landfill (or worse, the ocean), it can also reuse plastic from itself since the scraps can be re-melted back into sheets. Plastic does lose some of its favorable material properties with repeated heat cycles, but we’d have to imagine this is negligible for the types of things that [dinalab] is creating. Of course, you can always skip the heat cycles entirely and turn waste plastic directly into 3D printer filament instead.

Continue reading “Discarded Plastic Laser-Cut And Reassembled”

Turning A MIG Welder Into A Metal 3D Printer

Metal 3D printers are, by and large, many times more expensive than their FDM and resin-based brethren. It’s a shame, because there’s plenty of projects that would benefit from being able to produce more heat-resistant metal parts with additive fabrication methods. [Integza]’s rocketry projects are one such example, so he decided to explore turning a MIG welder into a 3D printer for his own nefarious purposes. (Video, embedded below.)

The build is as simple as you could possibly imagine. A plastic adapter was printed to affix a MIG welding nozzle to an existing Elegoo Neptune 2 3D printer. Unfortunately, early attempts failed quickly as the heat from the welding nozzle melted the adapter. However, with a new design that held the nozzle handle far from the hot end, the ersatz metal 3D printer was able to run for much longer.

Useful parts weren’t on the cards, however, with [Integza] facing repeated issues with the steel bed warping from the heat of the welding process. While a thicker steel base plate would help, it’s likely that warping could still happen with enough heat input so more engineering may be needed. It’s not a new concept by any means, and results are typically rough, but it’s one we’d like to see developed further regardless.

Continue reading “Turning A MIG Welder Into A Metal 3D Printer”

Custom 3D Printer Cart Hides Clever Features

Even if you’ve got a decent sized workshop, there’s only so much stuff you can have sitting on the bench at one time. That’s why [Eric Strebel], ever the prolific maker, decided to build this slick cart for his fairly bulky Ultimaker 3 Extended printer. (Video, embedded below.) While the cart is obviously designed to match the aesthetics of the Ultimaker, the video below is sure to have some useful tips and tricks no matter which printer or tool you’re looking to cart around the shop in style.

[Eric] made a second video on sketching out the design.
On the surface this might look like a pretty standard rolling cart, and admittedly, at least half of the video is a bit more New Yankee Workshop than something we’d usually be interested in here on Hackaday. But [Eric] has built a number of neat little details into the cart that we think are worth mentally filing away for future projects.

For example, we really liked his use of magnets to hold the plastic totes in place, especially his method of letting the magnets align themselves first before locking everything down with screws and hot glue. The integrated uninterruptible power supply is also a nice touch, as it not only helps protect your prints in the event of a power outage, but means you could even move the cart around (very carefully…) as the printer does its thing.

But perhaps the most interesting element of the cart is that [Eric] has relocated the Ultimaker’s NFC sensors from the back of the printer and into the cart itself. This allows the printer to still read the NFC chip built into the rolls of Ultimaker filament, even when they’re locked safely away from humidity in a sealed box.

Now all you’ve got to do is apply for the loan it will take to pay for all of the MDF you’ll need to build your own version. At this point, we wouldn’t be surprised if encasing your 3D printer in metal would end up being cheaper than using wood.

Continue reading “Custom 3D Printer Cart Hides Clever Features”

Can The Solenoid Engine Power A Car?

[Emiel] aka [The Practical Engineer] makes all kinds of fun projects in his fully-featured shop, and one of his tangents has been building a series of solenoid engines. These engines mimic the function of an internal combustion engine, with each solenoid acting as a piston. The only problem with [Emiel]’s concept engines, though, was that he never actually put them into a vehicle to prove their effectiveness. This build finally proves that they can work at powering a vehicle.

The project starts with a new engine. [Emiel] chose a V4 design using four solenoids and an Arduino-based controller. After some trouble getting it to operate properly, he scavenged a small circuit board he built in his V8 solenoid engine to help with timing. With that installed, the solenoids click away and spin the crankshaft at a single constant speed. The vehicle itself was mostly 3D printed, with two aluminum tubes as support structures to mount the engine. Even the wheels were 3D printed with a special rubber coating applied to them. With a small drive train assembled, it’s off to the races for this tiny prototype.

While the small car doesn’t have steering and only goes at a constant speed, the proof of concept that these tiny electric engines actually work is a welcomed addition to [Emiel]’s collection of videos on these curious engines. Of course they’re not as efficient as driving the wheels directly with an electric motor, but we all know there’s no fun in that. If you haven’t seen his most intricate build, the V8 is certainly worth checking out, and also shows off the timing circuitry he repurposed for this car.

Continue reading “Can The Solenoid Engine Power A Car?”